![]()
|
|
|
|
|
|
|
|
|
|
|
|
|
|
|
|
|
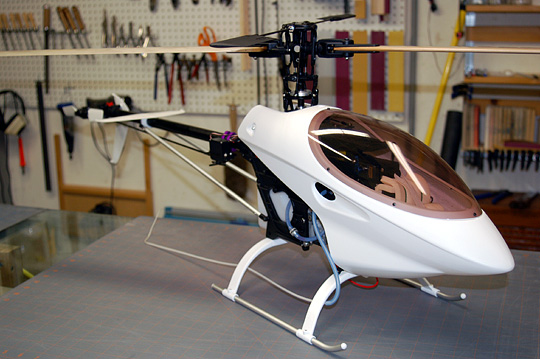
IntroductionI smashed up my first Raptor pretty good a couple years ago. The damage was severe enough that it would have been more economical to buy a new helicopter rather than make the necessary repairs. But then life happened and purchasing a replacement helicopter fell way down on the priority list. I now have the V2 which apparently has many improvements. I don't remember enough detail about the V1 to tell you what most of those improvements are, but I do know a few of them. The clutch has been redesigned and doesn't fail as much as the original. I can testify to this because I bought the V2 clutch for my first Raptor and it lasted longer than the 5 or 6 V1 clutches the heli went through and was still working fine until I crashed the model. The fuel tank has been redesigned. I believe it has more capacity but I'm not sure about that. The canopy is also redesigned. Frankly, it looks pretty much the same to me but a lot of guys say, "Man! It's less butt-ugly than before!" I never thought it was, but whatever... There are clips molded into the both sides of the frame to hold wires from the electronics. This is something I'm happy to see because it took a bit of rigging to keep the gyro wire out of the gearing on my last Raptor. There is also a stand-off for mounting a header tank. I've never used a header tank, but I'm clear on what the advantages are. I will probably add one, but I'm not paying $18.00 for a 2 oz. tank! The tank itself is a couple bucks and the bent aluminum strap must be the other $16.00. I'm pretty sure I can accomplish the same thing in a short time for a fraction of the cost. If you have never flown a heli and are considering various models as your first then I recommend this model to you. It's very simple, well engineered, the molding and overall parts fit is fantastic and you should encounter no frustrations at all during the build. Along those lines, I also recommend that you build this model. First, it's a lot of fun to put together. Second, if somebody brought me an ARF heli to put together for him, I would take it back apart just to make sure everything had been tightened properly and that Loctite was applied in appropriate places. Building it from the beginning would save me a lot of time since I wouldn't have to take it apart first. Lastly, I think it's important that you know what's inside and what it does. Helicopters need a lot of maintenance and you'll be ahead of the game if you already understand how it's put together. This model took me only one day to completely build. That includes installing everything while taking about 1,500 photos for this article (which were culled to about 250). Balancing the rotor blades, aligning the head and setting up the radio took another day.
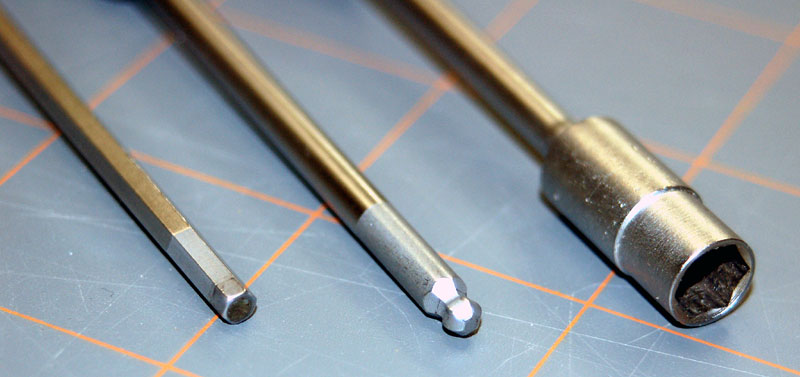
I also strongly recommend that you find a qualified helicopter pilot who is willing to help you in person. Getting your helicopter set up properly is very important and the instructions aren't real helpful in this regard. The Raptor instruction manual shows twenty steps to building the model. Although the manual does cover the entire build, it is overly crowded with too many steps in some illustrations. In some cases it's difficult to see what's going on. If you open the parts bag(s) needed for an assembly and you find you have parts left when you think you've completed the step then scan the instruction closely. Every part is used. I've broken down the assembly and photographed the entire process to help you build yours. In fact, I'm not only going to show you how to do it, I'm also going to tell you when to eat, sleep and bathe — all in logical sequence (you may take breaks when you like as long as you keep them reasonably short and stay out of trouble — remember — it's all fun and games until somebody gets pregnant). Here are the rules: When you bring your new kit home (or receive it in the mail) you may open it, pull everything out of the box, look it over and that's all. You may not open any bags except to remove the instruction manual. Put your radio on charge so it's ready when you need it. Clear off a good size workspace, assemble your tools, some hand-tool-removable Loctite (blue), a couple clean rags, a bottle of sewing machine oil, and some alcohol. Get a couple small plastic containers to put parts in after you've opened the bags. Pick out a day's worth of good tunes to listen to. Widespread Panic, Blue Oyster Cult, Neil Young and Mark Knoplfer (Dire Straits) are acceptable choices.
|
|
|
Parts not included but needed to complete constructionIf you have everything on hand you will be able to proceed without interruption. I very strongly suggest that you purchase a tail-boom servo mount for the tail rotor servo. You'll also need a pushrod.
|
|
|
General Construction Notes
|
|
|
Now read through the pages here and the instruction manual to give you an idea of what's involved. When you're done, finish your day off doing something like letting your family know where you'll be gone to and that if they don't see you in a couple days they should bring you some more food. You may begin on your heli when you have a full day to work on it. In this series
|
|
|
|
|
|
|
|
|
Copyright © 2006 Paul K. Johnson
|
|


 This
article will not discuss setup. I am not qualified to help you with
this as I am only one-half step ahead of being a rank beginner heli pilot.
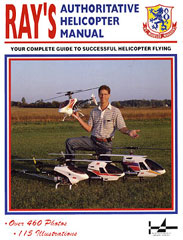
I recommend that you purchase Ray Hostetler's excellent book, Ray's Authoritative Helicopter Manual.
Mr. Hostetler discusses helicopter setup theory and application in detail.
This
article will not discuss setup. I am not qualified to help you with
this as I am only one-half step ahead of being a rank beginner heli pilot.
I recommend that you purchase Ray Hostetler's excellent book, Ray's Authoritative Helicopter Manual.
Mr. Hostetler discusses helicopter setup theory and application in detail.