|
|
|
|
Adhesives
used for Model Building
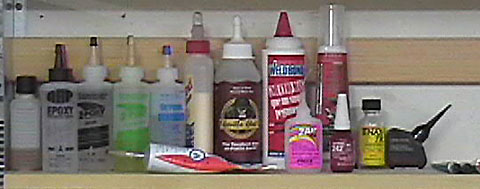
There are a variety of types of adhesives available. Each has a useful
purpose as well as things it definitely should not be used for. This page
is intended to outline the most common adhesives used in model-building and give
guidance on selecting and using the correct adhesive.
If you are a beginning kit builder,
then the short answer is that you will need Carpenter's Glue,
Slow-Cure Epoxy, and a small bottle of Thin Cyanoacrylate (CA).
If you are assembling an ARF,
then you will need Slow-Curing Epoxy and Thin and Medium CA. The other glues listed here can be purchased as needed.
|
|
|
|
Glue Properties
These are things you should understand about any
glue that you use. If you know what each glue's properties are, then
selecting the correct glue for a task is a fairly simple matter. On
the other hand, if you are a beginner, do not get hung up about glues.
A good wood glue or CA and some epoxy will get your trainer built.
Type
Most glues are of one of two types:
Glue is solvent or water-based and dries by
evaporation of the solvent.
These glues cure by chemical process.
They are further broken down to one or two-part glues. Two-part glues must
be mixed in some ratio before the glue can be used. Two-part chemical-cure
glues do not shrink significantly. One-part types may or may not shrink.
Excess glue can be wiped up with solvent while wet or scraped off with a razor
blade after it is cured. Larger quantities can be mixed in a disposable
container such as yogurt cups, tuna cans, etc. Some glues will melt
plastic, but I have not had any problem mixing epoxies in plastic containers.
One-part glues that cure include Cyanoacrylates (AKA Super Glue or CA)
and silicone sealant.
Two-part glues include epoxies.
If you happen to say "dry" when you mean "cure" someone will undoubtedly
correct you. Even though he's right, feel free to ignore him. For all practical purposes, "dry" and
"cure" mean the same thing — the glue
hardened about as much as it's going to and it isn't wet any more.
Note: Multi-Part
adhesives should be mixed on a non-porous surface or container. Cardboard and other porous surfaces will prevent the
glue from being mixed in the proper proportions due to the glue soaking into the
surface. This may result in the glue not curing properly.
Strength
As a rule of thumb, stronger glues tend to be heavier. Therefore, select a glue that is strong enough to do the job
but do not go over-board. For example, there is
no good reason to use epoxy to glue wing sheeting together but a lot of reasons
not to. Slow drying glues tend to be stronger than fast drying glues
because they have more time to soak into the wood — at
least that's the reason most commonly given. It's a true statement
but there is another important problem with fast-drying glues. They tend
to be brittle.
Materials it can bond
Most glues are intended for certain materials.
Using the wrong glue can cause a variety of problems including excess weight,
difficult finishing and glue joints failing.
Fuel-proof
Fuel should not be able to get inside the
airframe and fuel-proofness is not much of a consideration for general
construction.
Fuel tanks can and do split open from improper assembly,
defective molding or design or a crash. The fuel compartment
should definitely be coated with something fuel proof such as epoxy or
polyurethane (paint). Joints around the firewall should also be glued
with a fuel-proof glue.
Sanding ease
Often you will need to sand a glue joint between
two pieces of wood. If the glue is significantly harder than the
surrounding materials, the glue will not sand away at the same rate as the
materials it is bonding. Usually this results in an unsightly ridge that
will be seen under the final finish.
Pot-Life
How long the glue stays useable after it
has been dispensed or mixed in an open container.
Working time
This is not the same as pot-life. Glues
that cure tend to heat up. In the pot, they will cure faster than in a
thin film. Therefore, many of these glues can still be worked after being
applied to a part even though the glue in the pot is too thick to use.
Tip: The time given for
epoxies is the working time, not the curing time. For example, 15 minute epoxy has a 15 minute working
time. Cure time is usually 30-60 minutes depending on the brand and
climate.
Cure time
How long a glue takes to fully harden. Note
that the time given is for practical purposes. Most glues that cure tend
to continue the chemical curing process for months.
Shelf-life
All glues have a shelf life. This is how long it can sit on the shelf
before it goes bad. My advice is to not buy any more glue than you can
reasonably use within a year or so after you purchase it even though some glues
have shelf lives of years. Shelf life is strongly affected by the climate
(heat, humidity, UV light, etc.).
Set (also Tack or Grab)
When the glue "grabs" but not when it is fully dried or cured. For
solvent and water based glues this is when the glue reaches a state where the
parts are firmly held in place, but could be taken apart — possibly without damaging
anything. For adhesives that cure, it is the stage where the glue has
cured to the point where the parts are firmly bonded in place, but has not fully
hardened.
Surface Protection
Sometimes an adhesive is used to protect a surface. This property can
take precedence over bonding characteristics. For example, if you want a
smooth, long lasting surface to
mount a servo using foam tape, then epoxy is a
good choice.
The strength of epoxy is irrelevent in this case. What is important is
that exposed, cured epoxy withstands exposure to the environment better than
many other adhesives while creating a non-porous surface that foam tape adheres
to well.
Carpenter's glue is a bad choice because it shrinks as it dries so the
surface won't be as flat and smooth as desired and it also breaks down if too
exposed.
|
|
|
|
Gluing Techniques
Tip: A round bamboo skewer with the end
cut at a bevel is a great scooper to remove excess glue that squeezes
from a joint without smearing it everywhere.
Double-Gluing
Double-gluing is a technique that should be used whenever gluing end-grain
wood. End grain needs
to soak up a certain amount of glue to make a strong joint. If you apply
glue and immediately put the part in place, most of the glue will be forced out
of the joint and the end grain will soak up the glue that is left leaving
very little glue in the joint.
What you should do is put glue on the end grain and let it soak in for a minute
or so. Fit another part while you are waiting. After the glue has
soaked into the grain apply a little more glue and put the part in place.
What I actually do is squeegee the glue back and forth for a minute or so
using a popsicle stick or toothpick to force the glue into the grain.
 |
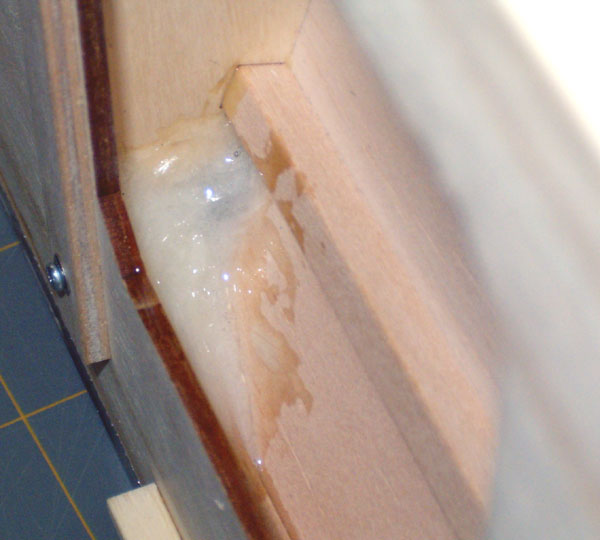
Glue is applied to end grain wood and
allowed to soak in for a minute or two. I usually squeegee it back
and forth instead of just letting it soak because it is faster, but
either way works. |
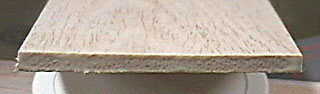 |
Note the small amount of glue that is left.
Apply a little more glue and then put the parts together.
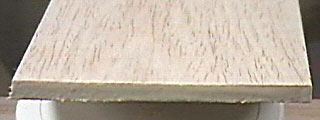
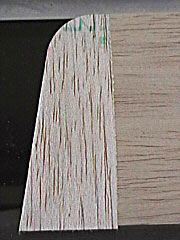
You can see that the wood has cupped
slightly. The wood was like that before the glue was added.
Weight will be used while the end cap dries to help flatten it out.
It will not fully resolve the problem, however.
This is the reason I make some parts from
thicker wood than called for on the plan. It allows the part to be
sanded flat but
not end up with a part that is too thin. |
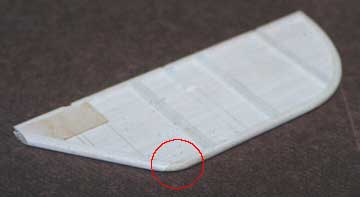
 |
The stabilizer end cap glued in place.
I almost always use caps on plank tail surfaces to help prevent the wood
from cupping. I also use end caps on built up tail surfaces to cap
the end grain spars making it more attractive under transparent
coverings and easier to cover with any iron-on film. |
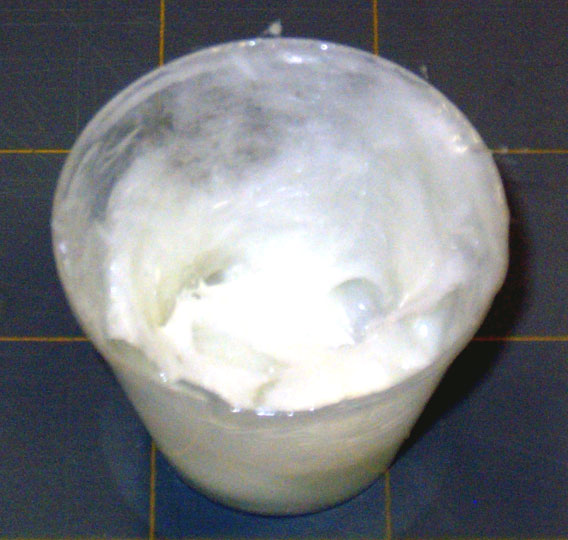
Another type of double-gluing is when using Solvent glues (Airplane glue). These glues
dry so fast that when you put glue on one piece it is dry by the time you join
it to another piece. It actually is not dry but has gelled. The
answer to this problem is to add glue to both pieces. When you join them
the solvent that is trapped under the gelled glue will dissolve the gel long
enough for the pieces to adhere to each other.
Tack Gluing
A part is tack-glued knowing that it will be broken or cut loose later when
there is no other practical way to hold the part in place temporarily.
Use only the smallest amount of glue necessary to hold the part so removing it
is not more difficult than necessary.
This technique is usually used for shaping parts in place that you will want
to remove later. Clamps and pins are not feasible because they will
be in the way when it comes time to sand. Examples are wood cowls, wing tip blocks that will be
hollowed after they are shaped on the airframe and ailerons shaped in place on the wing.
|
|
|
|
Aliphatic Resin
Also called Carpenters Glue
Aliphatic resins are inexpensive, light and strong. Carpenter's glue
is the primary adhesive I use to build flying model aircraft. Its longer
working time allows me to ensure everything is as it should be before the glue
sets up.
Because it is water-based, aliphatic resin also
allows neat glue joints because excess
glue removes easily with a damp sponge or paper towel while the glue is still wet.
In addition to common aliphatic resins, there are also so-called "sandable" resins. I do not use them
because the additive to make them sandable probably weakens the glue. I
do not know this for a fact, but it makes sense to me. Carpenter's glue sands easily enough that it is not
an issue in most cases.
-
Fuel proof
No. They are fuel
resistant to a
point, but extended exposure to raw fuel or exhaust residue will break them
down.
-
Clean-up
Water while wet. Acetone when dry.
-
Examples
- Titebond
-
Elmer's Carpenter glue
-
Pica Gluit
-
Use for
-
Do not use
for
-
Non-porous surfaces.
-
High-stress areas (firewalls, landing gears, etc.).
-
Edge joining sheets of balsa
— it does not sand as easily as soft balsa and will leave a nasty
ridge when you try to sand the sheet flat.
-
Laminating broad areas
— it will cause severe warping.
These glues are water-based and dry by evaporation. If you place the part
under a lot of weight until it has dried thoroughly then it might work for
laminating,
but I wouldn't do it. However, it can take several days for it to dry
— even
longer if you have put plastic on both sides to prevent the part from sticking
to the bench or whatever weight is used. Generally it is a better idea to
use a different type of adhesive for laminating parts.
|
|
|
|
Traditional Solvent or Cellulose-Base Glue
Also called Airplane Glue or Tube Glue
This is the type of glue that comes in a tube
and is used for wood models. It is fast-drying and lightweight. The
solvent in this glue has a noxious odor and it should only be used in a well
ventilated area.
This type of glue is the best thing going for
joining sheet wood together. It sands very easily and is more than strong
enough for the task. First, trim the two pieces of wood so they mate
squarely. Then use a few short pieces of masking tape to hold the pieces
together. Only tape one side at first. Next, open the joint and run
a bead of glue down the joint. Place the wood with the masking tape side
down on the board and press it flat. Wipe up any glue that has squeezed
from the joint and then tape this side and allow to dry.
Another use of this type of glue is to seal
grain so that it does not fuzz when sanding. For example, I was recently
working on a part that had laminated edges that butted against a stick.
The stick was radiused on the end making it go from end grain to face grain.
What happened was that I could never get the radius smooth when sanding due to
the different types of grain —
the end grain kept "fuzzing."
To solve the problem, I put some Ambroid on the
end grain and rubbed it in with my finger. I did this twice more and then
it was easy to finish sand using 400 paper. If you rub the glue in with
your finger until it is dry (about 20 seconds) you can sand immediately.
|
|
|
|
Contact Cement
Contact cement is heavy and has very limited
uses in model-building. Doesn't tend to warp sheeting badly enough to
cause problems.
Contact cement is applied to both surfaces and
allowed to dry to the touch. Then the two parts are brought into contact
with each other and they are instantly and permanently stuck together. You
do not get second chances to align things when using contact cement. I do
not use contact cement at all.
|
|
|
|
Cyanoacrylate (CA)
Also called Super Glue
Any time there are a zillion tips in magazines
on solving a problem, the real message is that there is a fundamental problem
with the item that will probably never be solved. Clogged tips on CA bottles
are a great example of this kind of problem.
I generally avoid cyanoacrylate glues because
they are expensive, make messy joints, skin from my fingers almost always ends
up on the structure somewhere, and the fumes are horrible. Cyanoacrylates
also allow builders to make mistakes faster which are very difficult to correct.
When this happens the time savings over the use of a slower adhesive are more
than nullified.
I have noticed
that CA joints on some of my older models started to disintegrate by turning
into some white, powdery substance.
Lastly, many people have extreme allergic
reactions to these glues. The manufacturers of CA try to capitalize on our
inherent impatience by selling the "speed" of these glues. Impatience and
model-building do not go well together.
In spite of their short-comings, cyanoacrylates
are fast and strong.
-
Fuel proof
No.
They are fuel-proof to 0% nitro fuel (FAI fuel), but nitro methane dissolves
cyanoacrylates.
-
Clean-up
Acetone
or nitro-methane. Some companies make debonders that are a mix of
these items.
-
Examples
-
Satellite City Hot Stuff
-
Pacer Zap
-
Use for
-
Hardening threads
cut into wood.
-
Gluing fiberglass
or carbon fiber (epoxy is preferred)
-
Gluing difficult to
clamp items when you do not want to hold the part for the two hours another
glue would take to dry.
-
Use for some types
of dissimilar joins such as carbon fiber to wood.
-
Do not use
for
An item made for use with cyanoacrylates is called
accelerator. It sets CA glues instantly and is made for people who
think that waiting 60 seconds for a microwave to cook a hotdog is too long. |
|
|
|
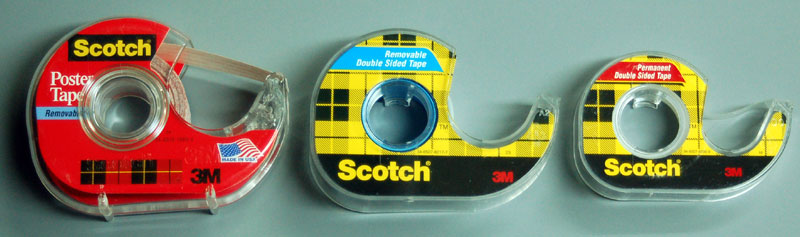
Double-Stick Cellophane Tape
 Also
called Double-Sided Tape. Also
called Double-Sided Tape.
Double-stick tape is used to join multiple blanks together so they can
be shaped and machined at the same time to make matched parts.
It is fundamental to the way I build so not having it on hand can be a
real problem in my shop.
This type of tape is made by
Scotch and others and can be purchased from office suppliers.
There are several types of double-stick tape. Some of them are
surprisingly tenacious.
Important Points
Sand then vacuum parts with a brush attachment before applying the tape.
The tape will let go
at the worst possible moment if it's stuck to dust between the blanks
rather than the blanks themselves.
Do not use too
much tape.
Some of these tapes are very strong. The force required to
separate the parts may damage or destroy them. This is an easy
problem to avoid.
When separating thin pieces, peel them apart slowly.
At times I used too strong of a tape or too much I managed to get the
parts separated by being patient. I pulled the parts as much as
I could safely and waited for the tape to release which can take
longer than you think. But it will let loose. Parts break
when you pull too hard. Parts get damaged when you try to wedge
something between the blanks to separate them such as a spatula or
knife.
Types of Double-Sided Tape
-
Removable Cellophane
This is definitely the type to use for most purposes when stacking thin,
delicate parts such as light ribs or thin sheeting. It is also
good for large parts (fuselage sides, for example) that will need
several small pieces to keep the parts from bending and bowing
differently while shaping. When parts in a stack can move
individually you get individual parts — not matched parts.
It will hold
the parts securely while being cut and sanded but will release without
the parts breaking. If you use rough sawn parts the tape may not
stick at all or may seem to stick and then come apart when you start
working on the stack. Sand and vacuum blanks before taping them
together.
-
Permanent Cellophane
The word "Permanent" by tape manufacturer's standards and builder's standards
do
not have the same meaning. Do not use permanent tape as an adhesive for
anything your models. It's not that permanent. It's
permanent in that it will hold together two pieces of cardstock and will
tear the face from the stock if you try to separate it.
That said, permanent tape has a much more aggressive bond and should not be used on
delicate parts. Use it for holding small but strong parts that
don't have much surface area such as hardwood blocks. Also use for
holding plywood parts. Again, this tape is very strong so a few 1/2"
squares of it strategically placed will make separation much easier.
If the parts you want to hold together need a better bond than removable
tape but not as strong as permanent then you can try not sanding the
parts first and then use permanent tape.
Do not leave parts together any longer than necessary when using
permanent tape or you'll regret it. In other words, don't tape
parts together this weekend that you plan to work with next weekend.
-
Poster Tape
I purchased this tape when I couldn't find removable tape locally.
Its strength falls in between removable and permanent tapes. It's
more expensive than either of the other tapes and more tedious to use
because it has a backing that must be removed.
-
Carpet Tape
I use carpet tape for various purposes around the shop.
There are several brands of this tape and they're all different.
Some are reinforced having rovings through it that appear to be
fiberglass. Others are simply adhesive on both sides of a plastic
strip. Some of the adhesives are gooey and others aren't.
My problem is that the carpet tapes I've purchased that I like aren't
marked inside the roll so I can never remember what to buy.
The main purpose I have for carpet tape is making
sanding blocks.
I now consider my home made blocks to be disposable because they're
super inexpensive to make and my old method of using spray glue and then
removing it to replace the paper was very time consuming and just not
worth the effort. Now I use
carpet tape to attach the paper and throw the block away when it's worn
out.
|
|
|
|
Epoxy Glue
Epoxy is strong but heavy and expensive.
Epoxies are used for bonding high-stress areas as well as items that no other
adhesive will bond together. Additionally, epoxy can be used for
applying
fiberglass cloth and making fiberglass parts.
There are two kinds of epoxy resin that I know
of. The most common type is used as an adhesive. The second type is
used for laminating and tends to be thin in consistency. There are also
various epoxy putties, etc. This section pertains only to the adhesive.
Use slow-drying epoxy (30-minute to 4-hour
working time) whenever epoxy is called for. 5-minute epoxy is of little
use except in special circumstances. It is heavy and weak, does not cure
properly and gets brittle with age. You really shouldn't make field
repairs which is a common use of 5-minute epoxy. Generally, epoxy should
only be used on load-bearing components.
If the part that breaks is not a load-bearing
member, then using epoxy adds unnecessary weight. If the part is a
load-bearing member, then it is probably important enough to get it repaired
right that the repair should be made in your shop and not at the field.
The sort of "special circumstance" I would use
5-minute epoxy for is to create a smooth, non-porous surface for servo tape.
Place a sheet of waxed paper on a flat surface and apply a thin coat of epoxy to
it. Then put a piece of 1/32" plywood that is approximately the same
size as the servo directly over the wet epoxy. Put another piece of waxed paper
on top of the plwood followed by a
thicker piece of scrap wood as a clamp block. Clamp or weight the piece to
the table.
After the epoxy has cured, peel the plate from the
waxed paper and trim off the excess epoxy. Allow the epoxy cure fully (at least over night) and then give it a wipe
with alcohol to remove any residue before applying the servo tape.
Locate the plate in the fuselage and glue it in
place with the cured epoxy side out. You now have a smooth, non-porous
surface that servo tape will stick to very well.
|
|
|
|
Hot Glue
I have seen some ARF's that were assembled
using hot glue. They are the sloppiest looking model aircraft structures I
have ever seen. I do not believe strength is an issue with hot glue, but
it is very heavy. I would never use it on any part of a model. I do
use hot glue for miscellaneous tasks around the shop.
For example, I may use hot glue to hold a
runner in place on a shelf so it does not move when I drive screws into it.
Other than things like that I do not find hot glue to be very useful.
-
Fuel proof
Don't know.
-
Clean-up
Contact
Manufacturer.
Examples
-
Use for
-
Do not use
for
|
|
|
|
Plastic Cement
Unless you've built a lot of
plastic models,
you probably are not aware of the choices available for gluing plastic.
Most of us are aware of Testor's tube glue and that's about it.
All plastic glues pretty much work on the same
principle. The glue contains a solvent (or is a solvent) that melts the
plastic together. In essence, the parts are welded together. This is
why more glue is not better unless your goal is to create a molten puddle of
plastic.
Generally speaking, I like medium viscosity
glues such as Testor's Model Master Cement. When using this type of glue or tube
glues, the glue is applied to one part and it is then joined to the mating part.
When joining parts
having long, thin edges, such as cowls or wheel pants, I like watery-thin glues
that can run along the joint (capillary action) after the parts are joined.
There are several glues of this variety as well. I use Tenax.
-
Fuel proof
Yes.
-
Clean-up
This
type of glue is a solvent and melts the plastic. Therefore you should use
as little as possible. If you get a small amount of glue on a plastic
surface then just allow it to dry thoroughly.
If you happen to spill
a larger amount on the plastic then carefully blot as much
up as possible while it is wet but do not smear it around. Allow the
remaining glue to dry thoroughly.
After the glue
is dry the blemishes can be sanded and polished — even from clear plastic.
In fact, I often sand and polish clear canopies for plastic models to improve
their appearance. A
polishing kit
for motorcycle windscreens includes very fine sandpapers and polishes that will
make the canopy blemish free and crystal clear.
-
Examples
-
Use for
-
Do not use
for
|
|
|
|
Polyurethane Glue
I use polyurethane in many situations where I
have used epoxy in the past. For example, I use it whenever I want a bond that has more
strength than an aliphatic resin, but epoxy seems to be too much.
I do not use polyurethane for general
construction because it is messy and expands out of the joints.
The main thing I use polyurethane glue for is to
laminate parts. It does not
cause severe warpage (if weighted).
I have read that these glues have a short
shelf-life. My first bottle of Gorilla glue lasted about 18 months before
it was too thick to use. My shop is not climate controlled and generally
very humid because I live on the Gulf coast of Florida. 18 months did not
seem particularly short to me.
|
|
|
|
Silicone Adhesive
Flexible, relatively strong and fuel proof.
It comes in quantities that no modeler will ever use and most of it ends up
being thrown out when it goes bad. The glue cures in the tube and is hard
to remove to get at good glue. The high-temperature variety can be used to
seal mufflers and other engine parts (with care).
Recently a person told me he uses silicone to
glue his servos in his planes. He wraps the servo with heat shrink tubing
and then cleans the tubing with alcohol. A healthy dose of silicone is
applied to the heat shrink and the servo is placed in the structure on a
non-porous surface (see epoxies above for a method to create the surface).
He claims he has never had a servo come loose.
I used silicone for the first time to attach radio components inside my
JGRC Aggressor. It has held up fine so far, but at the time
of this writing, the plane only has a handful of flights on it.
|
|
|
|
Spray adhesive
Basically aerosol contact cement. Very
convenient around the shop.
I use spray glue for a lot of tasks in the
shop, but not on my models. I have noticed that it hardens and crumbles
after a year or so. I do not want my models falling apart in the sky.
Some people say you can use spray glue to attach sheeting to a foam core.
Conversely, I have heard several stories about the sheeting delaminating after a
while. I do not know either way because I have never tried it.
Generally I use spray glue for attaching
sandpaper to sanding blocks, patterns to wood, etc. When attaching
patterns, I spray only the pattern with a light coat and let it dry for several
minutes. Then I attach the pattern to the wood. The pattern will
peel off easily after the part is cut out.
When attaching sandpaper, I
spray the paper and the block and attach the paper when it gets tacky. I
have to remove it with a heat gun and then use solvent to clean up the glue.
Spray glue is expensive, so I try not to use any more than necessary.
I recently priced these glues in a Home Depot
store. The 3M 77 cost approximately three times more than the Elmer's for
the same quantity. Because I only use it for gluing sandpaper to sanding
blocks, templates to wood and similar non-critical bonds, I stick to the cheaper
glue.
|
|
|
|
Thread Locking Compounds
Unless you have a reason not to use it, always
use the type that is called "Removable." I think it is the "Red" formula,
but I could be wrong about that. It comes in a red bottle, but the
compound is actually blue. In any case, do not use the permanent
kind —
especially for set-screws or you will never get them out again.
If you can
put the part in an oven or have a torch then you may be able to heat the part
enough to get it loose, but if it is inside your R/C car, I doubt you will want
to put your car in a 300º oven.
-
Fuel proof
Yes.
-
Clean-up
Contact
manufacturer.
-
Examples
-
Use for
-
Do not use
for
|
|
|
|
White Glue
White glue is very economical and is strong enough for many modeling tasks.
Small rubber-powered aircraft can be built entirely with this type of glue.
I personally wouldn't use it for anything larger than 1/2a size models.
-
Fuel proof
No.
-
Clean-up
Water.
-
Examples
-
Use for
-
Do not use
for
-
Plastic
-
Metal
-
High stress areas
|
|
|
|
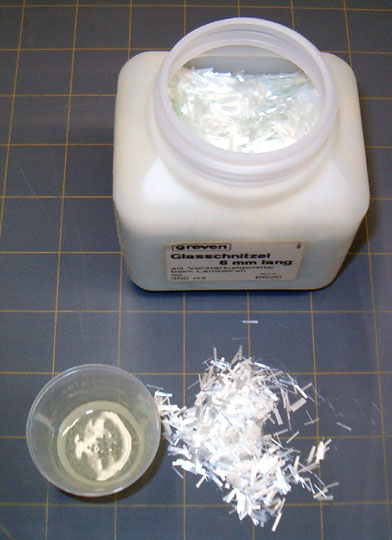
Adhesive Additives
-
Micro-balloons
These are microscopic glass beads that look a
lot like baking soda. They are generally used with epoxy to create an
easily sanded putty. The gotcha here is that when you use them on balsa,
some of the epoxy will soak out of the mix into the balsa and still create areas
that are difficult to sand. It is not a big problem, but just something to
be aware of.
When I need something extremely easy to sand, I
mix micro-balloons with tube glue (Ambroid). It dries very fast so I only
mix small amounts and use it immediately. Working time is something like
30 seconds, so obviously it can not be used for big jobs. Basically I use
it to fill in small seams between sheets of balsa or similar tasks. It can
be sanded after about 10 minutes.
-
Talc
Essentially used for the same purposes as
micro-balloons. Talc
makes a putty that is smoother, denser and has fewer pits than micro-balloons,
but is also heavier. Talc can also be added to some paints to create a
sanding sealer or filler.
-
Thickeners
Various thickeners are made for epoxies. I have
had no reason to use them so I also can't give any real guidance to using them.
I would guess that these would be needed when applying epoxy to a vertical
surface so that it doesn't run.
If you think you may have a use for a thickener, then
contact the manufacturer for guidance as to what will be appropriate for your
application.
|
|
|
|
|
|
|
|
Back to
Construction Materials
Airfield Models Home |
|
|
|
Copyright © 2002 Paul K.
Johnson |
|
|