Airfield Models - How To

Make Foam Tape Servo Mounts

December 18, 2021


Home
About
What's New
History
Models Gallery
Model Building Safety
Articles
Mail & FAQ
Site Map
Site Feedback
Contact
Add to Favorites
Comments
Search Airfield Models

Back to How-To Articles


Airfield Models (http://www.airfieldmodels.com/)How to Make and Install Foam-Tape Servo Mounts

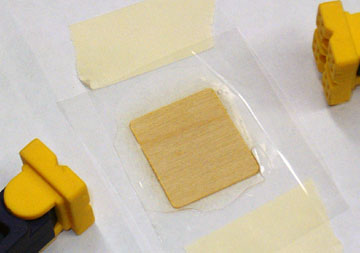
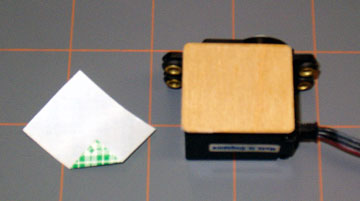
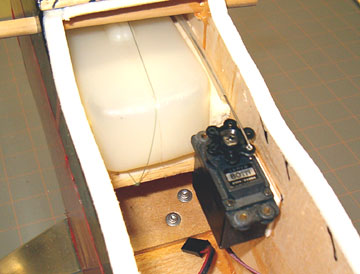
Double-sided foam mounting tape is an excellent way to mount servos in the right circumstances.  Although the installation is semi-permanent making it tedious to remove and replace the servo, there are many benefits that outweigh that drawback.

  • The lightest servo mount that allows the servo to be removed (gluing the servo directly is lighter, but not a good option unless absolutely necessary).
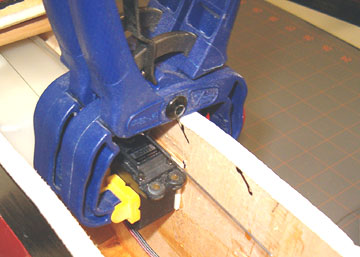
  • Very secure, strong and rigid if installed properly.
  • Easy to install.  No rails, trays, drilling or cutting servo openings.
  • Low profile.

There are several reasons foam tape mounts don't get used lack of trust being the main one.  A lot of people have installed them improperly and then servo came loose.  After losing the plane, the pilot will understandably swear that foam mounts are the worst of all time and he'll never use them again!  Chalk another myth up to the poor technique of a few builders.

I don't claim to have extensive experience with foam tape mounts, but I have used them in a handful of planes and have yet to have a servo come loose.  In fact, my experience has been just the opposite when I wanted to remove the servo it put up a good fight.

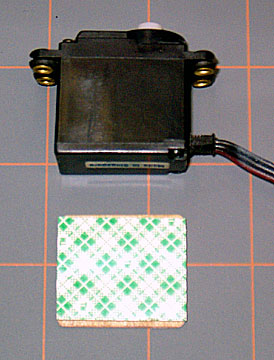
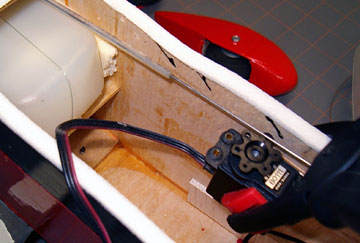
There are two situations when foam tape mounts should not be used:

  • When there is not a wall or floor located to mount the servo so it aligns properly with the linkage/control surface.
  • When the long side of the servo is 90° to the pushrod.  The servo should be in line with the pushrod if foam mounts are used.

Use foam tape mounting appropriately and you'll grow to love them.

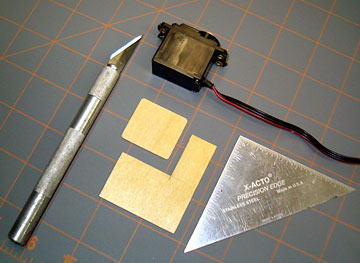
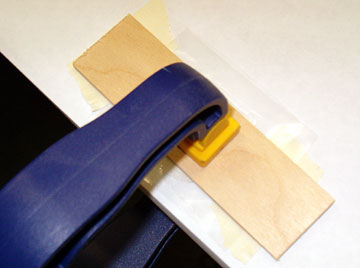
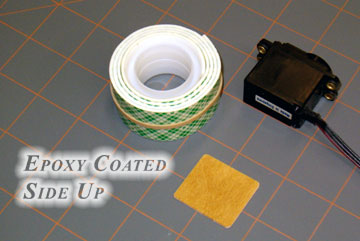
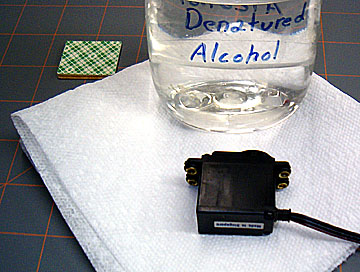
Double-sided foam mounting tape can be purchased in small rolls in a variety of places such as home improvement centers, office supply stores, etc.

Foam tape doesn't always last forever depending on the climate.  Replacing mounts will be addressed at the end of the article.

You can tell when the mounts need to be replaced if you check them.  Prod the edge of the foam with the tip of a ball-point pen or similar object.  If it has hardened and can be chipped like paint, then it's time for a new mount.  It should take years for the tape to get to this state.

After opening the package and using what you need, store the rest of the roll in a Ziploc bag to keep it clean and prevent it from drying out.


Making the Mount and Installing the Servo

A mounting plate must be fashioned unless the wall the servo is mounted to is plywood.  I would make the mount anyway just to make it easier to create the epoxy-coated mounting surface.

You don't need to use a large thick mounting plate unless you are installing a monster large-scale servo.  I've never done it, so you're on your own if you choose to use foam tape to mount a servo in you 40% aerobat.

A 1/32" aircraft plywood plate is plenty for even .60 size aircraft.  The plate may need to be larger than the servo.  Adjust the size of the plate to spread loads as needed.

Cut a 1/32" plywood servo mounting plate. This is a throttle servo mount.  I made the plate the smallest it should ever be — the same as the side dimensions of the servo.

Don't make the mount smaller than the maximum contact area of the servo unless you know what you're doing.

Some supplies to make the mount. The plate isn't ready until it has a smooth, flat, non-porous surface for the foam tape to stick to.

You'll need the plate, epoxy, two pieces of something the epoxy won't stick to (Saran Wrap, wax paper, etc.), a clamp and clamp block.

You can use 5-minute epoxy, but I really don't like that stuff.  The fastest epoxy I use is 30 minute.

Creating the surface takes all of 5 minutes (plus time for the epoxy to cure).

Tape a piece of wax paper down.  Apply epoxy to the wax paper. I pulled a piece of paper from my printer and taped a piece of drop cloth material to it.

Spread a layer of epoxy on the plastic.  It doesn't need to be too thick.

I used way too much epoxy for this mount and 90% of it went to waste.

Put the mount over the epoxy and cover with more waxed paper. Place the plywood plate over the epoxy.  Move the plate around to ensure it is coated.

Do not put epoxy on the side of the mount that is up.  This is the side that will be glued to the fuselage wall later.  It should be free of glue.

Place the second piece of plastic on top to prevent the clamping block from being glued to the plate.

Clamp the mount down until the epoxy is fully cured. Add a piece of scrap plywood or something flat that is larger than the plate and clamp it down.
The next day, remove the mount from the waxed paper. After the epoxy is fully cured (at least over night) remove the clamp and retrieve the mounting plate.

You can see how much epoxy oozed out.

Trim off excess epoxy and sand the mount to have finished edges. Trim off the excess epoxy and sand the edge if you want to be neat.

You have now created a smooth, non-porous surface for the tape to adhere to.  Unless you buy poor quality tape or you don't change it as needed it won't let go.

Place the plate on the table with the epoxy coated side up.

Apply foam tape to the epoxy coated side of the mount.  Trim off excess tape. Give the mount a wipe with alcohol and allow it to fully evaporate.  Give it a minute at least.

If the mount is larger than the servo then you should apply the tape to the servo first.

I find that it's harder to trim tape around a servo than it is around a plate, so when possible I put tape on the mount first.

More than one piece of tape may be necessary for larger servos.

Clean the servo for best adhesion to the foam tape. If the side of the servo is too hollow (caved in) or bowed out then you should probably select a different servo.

If the depression isn't too deep then you may be able to sand the side of the case enough to get the contact area needed.

If the side is fairly flat then you don't need to do anything but wipe with alcohol.  Don't drench it you don't want alcohol inside the servo!

Remove the tape backing and place the mount on the servo. Now apply the tape to the second surface.  You only get one shot at this so take your time aligning before making contact.

This one is slightly off center.  My OCD doesn't like it, but it's close enough.

If the tape is too far wrong then peel it off, clean the servo and try again.

Find the location where the servo will best align with the linkage.

This is important!

Install the pushrod and connect it to the control surface.  Place the servo such that it naturally aligns with the pushrod.

I use a clamp to hold the servo lightly in place so I can work with both hands and see how the pushrod feels going to the servo.

Mark the location when you're happy by drawing a few lines around the mount.

Glue the mount permanently and clamp securely. The servo can be removed after the mount is glued into the airplane but it's not fun so wait until you're pretty sure you won't need to remove the servo for any reason.

Glue and clamp the mount in place when you're ready.  The exposed side of the plate is not coated so it will take wood glue well.

I used regular model airplane cement.  This servo isn't going anywhere for a long time.

The finished servo installation using foam tape. If this fuel tank needs to be removed then the servo tape will have to be cut and replaced.

There was a lot of room to mount the servo back farther, but it would have made it more difficult to work on the other installed servos and generally been in the way of everything besides the fuel tank.


Servo Removal and Replacement

Every time the servo is removed and replaced the aircraft's trim will change because it won't go back exactly where it was.

Before you remove the servo you should find a way to ensure you get it back in place as closely as possible to the original mount.  Note the servo arm and pushrod locations.  Also note the control deflection.  You want those things to be identical when the servo is replaced.

You can minimize the risk of error by gluing a few pieces of 1/8" spruce to the fuselage or servo mount around the servo so it keys back into the same location.

Servo removal

Slice the tape between the mount and the servo.  X-Acto carving blades work well.  Peel the servo away as you cut and the tape will start to tear helping it come off faster.

I suggest you remove all remnants of the tape now rather than waiting.  The tape and glue will harden over time and will more difficult to remove later.

Clean all surfaces well by removing excess tape and glue.  You can use lacquer thinner if you don't rub too hard which may damage the epoxy.  Alcohol works but takes longer.

Servo replacement is the same as initial installation except that the mount is already in place.  Apply the tape to the servo or mount, but leave the backing on the other side of the tape.  Determine the installation location again as closely as possible to where it was before.  Practice putting the servo in place a couple times until you are sure you can get it right when the backing is removed.

Tape the servo permanently in place, replace the arm and hook up the linkage.  Don't forget to replace the screw that secures the servo arm!  Check for proper operation of the controls and adjust as necessary.


Previous —
Next —

Make Pushrod Exit Fairings for Flying Model Aircraft
How to Align Model Aircraft Cabane Struts

Comments about this article


Back to How-To's
Airfield Models Home


Copyright © 2005 Paul K. Johnson