Home Made Sanding Blocks
Flat Sanding Blocks
I have dozens of sanding blocks if you count the little
sanding sticks I make, but only a few of them get frequent
use. My most
used blocks are cut from 1/2" medium density fiberboard (MDF).
Each block is double-faced with the same grade of paper. I have a dozen of
three different sizes of
these blocks ranging from 50 to 400 grit sandpaper.
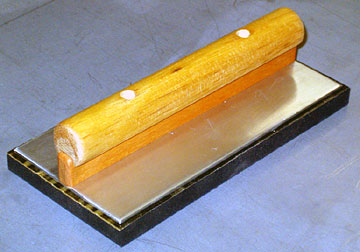
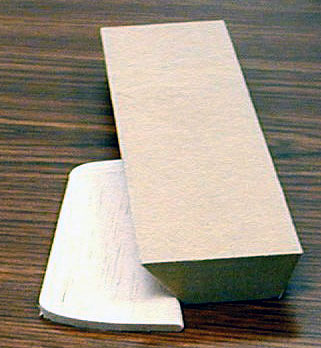
Another block I use is made of oak that is 3/4" thick. I sanded it flat
on both sides and glued a piece of 1/16" neoprene to one side to soften it
slightly. That is the face I use most often. On the other face is a
piece of 1/2" black foam rubber that is relatively firm. I use that face
for compound curves such as fuselages and wingtips.
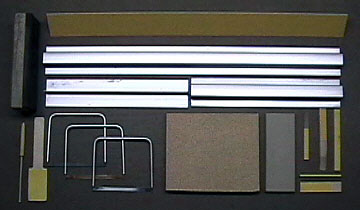
A variety of sanding blocks
|
Top left —
An oak block with 1/16" neoprene on one side and 1/2"
firm foam rubber on the other.
Top right —
Four
T-Bar sanders.
Bottom row from
left to right
Small dowel wrapped with sandpaper.
Paddle-sander.
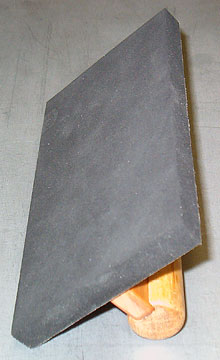
Flex-I-Files bow sanders
—
Excellent for plastic models and hard to reach areas of any
model.
1/2" MDF fiber board sanders faced on each side with
sandpaper. These are the blocks I use to sand sheet balsa tail
surfaces.
Various purpose made sanders for sanding spar notches, etc. |
 |
These are my general use sanding blocks prepared to get new
paper. Each block is made from 1/2" MDF and is double-faced with the
same grade of sandpaper. I clamp the block in a bench vise and use
a heat gun and spatula to remove the old paper.
After the paper is removed I use lacquer thinner to clean off residual
adhesive. When the thinner is evaporated, I put the new paper on.
It's not something I enjoy doing but it's necessary.
In normal use the blocks last about a month. It was even worse
when I had two different grits on each block. Eventually I made more
blocks so I could double-face them and change the paper less often. Note:
I don't make sanding blocks this way any more. The 1/2" MDF is so
inexpensive that it's actually less expensive to throw them away than it is
to clean old glue from them. Now I use
carpet tape to glue on the paper. |
Making Sanding Blocks
I cut my general use blocks from 1/2" MDF. After you cut your blocks,
sand them flat. The best way to flatten a block is to spray glue a
full sheet of sandpaper to a piece of glass and hone the block on it.
The MDF I use is already pretty flat so it only took a few seconds using 220
grit paper to make them perfect. Hit all
the corners with a sanding block to knock off the sharp edge and radius it very
slightly. The small radius (maybe 1/16") is important to ensure your
blocks don't gouge your work if you don't put it down perfectly flat and also
helps prevent the sandpaper from getting caught on a raised edge and tearing
from the face of the block (which ruins the block).
Sandpaper comes in 9" x 11" sheets. It is best if you size your blocks
to use the paper efficiently. Use a dull razor blade to cut the paper and
to trim it after it is glued to the block.
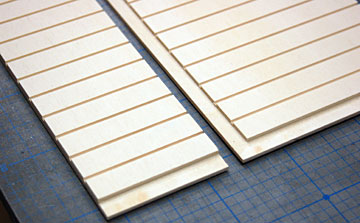
Spray Glue Method
Spray a light, even coat of spray glue on both the block and the paper.
Let the glue get tacky (about 30 seconds to a minute). Put the paper on
the block and then turn the block so that the paper side is down. Roll the
sanding block onto all its edges to ensure the paper isn't curled up at the
edge. This is why you radius the edge slightly.
Apply
pressure to the block or clamp it down for about 15 minutes. Trim off the
excess sandpaper all the way around.
I used a permanent marker on all four edges to indicate the grit on the
blocks so I can identify them easily. The lacquer thinner I use to clean
glue from the blocks also dissolves the marker unfortunately. You can
write directly on the sandpaper using a Sharpie marker and it won't come off but
if you stack the blocks you also can't tell which block is which without pulling
them all out.
By the way, on the
adhesives page, I mentioned that I use cheap spray glue for things like
making sanding blocks. That used to be true, but the paper kept coming
loose. Loose paper is annoying and can damage the work. I use 3M 77
spray adhesive now. It costs a lot more, but it doesn't come loose, so
it's worth it.
Carpet Tape Method
I made a framed tray to lay several blocks in side by side to tape several at
the same time. The tape is fairly expensive and it's not the right width
for some of my block sizes. If I made blocks individually I would be
trimming off a lot of excess tape and throwing it away.
Be sure the block is absolutely free of dust and crud. It should feel
smooth and flat. Anything between the block and the sandpaper ruins the
sanding block.
Lay down tape over the block and then burnish it down well using a squeegee
or something with a firm, straight edge. Cut your sandpaper slightly
oversize and lay it upside down on the workbench. Wipe any dust or crud
from the back of the paper.
Remove the backing from the tape and attach the block to the sandpaper.
Apply pressure for a minute to ensure a good bond. The best way to do
it is lay a blank sanding block on top and use a couple clamps. Hand
pressure is ok.
Trim excess paper and tape from the block by guiding an old single-edge razor
around it. This ruins the blade so don't use a good knife. I can get
about 20 blocks from an old razor. The corner of the blade rounds over but
it stays sharp enough to cut the paper cleanly.
Now roll the block on all its edges. Mark the block with the sandpaper
grit and it's ready to use.
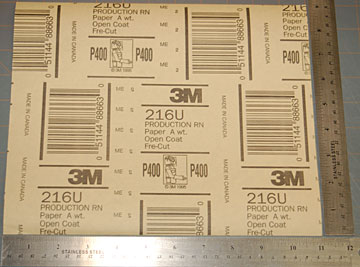 |
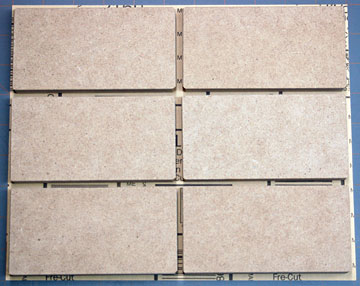
A standard sheet of sandpaper is 9" x 11". It is
best to size your sanding blocks to use the paper efficiently.
I suggest that you divide the sheet into individual sheets for one size
sanding block instead of cutting off one piece at a time.
Sometimes the pieces you cut won't have the grit marked on them so be
sure to write it on the backs as soon as you finish cutting the sheet
apart so you know what grit paper it is later. |
 |
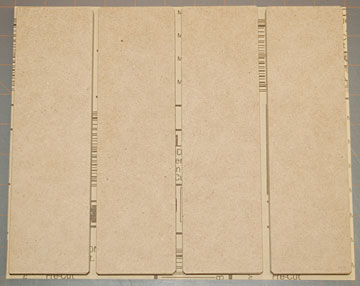
I'm currently experimenting with using double-sided carpet
tape to apply sandpaper to sanding blocks. The tape is 1-7/8" wide.
I made these blocks 1-7/8" x 5-1/4". Because I double face each block
with the same grade of paper I can cut eight sheets to make four sanding
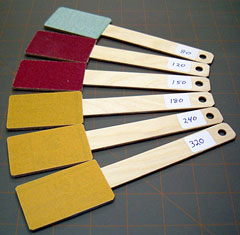
blocks from one sheet of sandpaper. |
 |
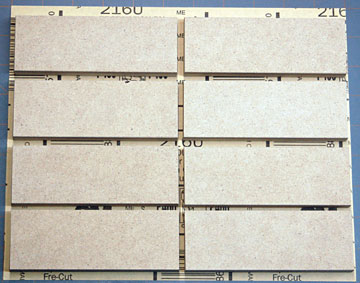
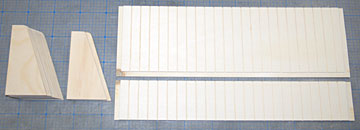
These blocks are 2-3/4" x 5-1/4". I can get six pieces
for 3 double-faced blocks from a standard sheet of sandpaper. |
 |
These blocks are 2-1/2" x 8-3/4". I can get two
double-faced blocks from a sheet. |
Sanding Block Rack
 |
This rack is very simple to make and helps keep your sanding
blocks organized. The reason I made mine is because I was stacking my
blocks on top of each other and every time they rubbed together it rubbed me
the wrong way. I wouldn't throw my good kitchen knives in a sink to
clatter together for the same reason — they need
to stay sharp. |
 |
I glued a short stub of wood in my table saw sled and ran a piece of
1/4"
light ply through the saw. With each cut I moved the plywood over
so that the new groove was over the wood stub. That ensured identical
spacing. The edges were routed on my
router table. |
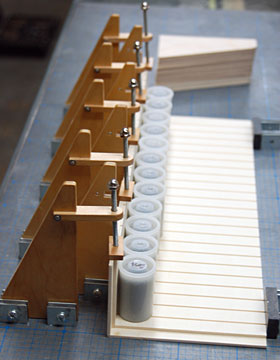 |
The bottom was glued on first using
carpenter's glue. It is held perpendicularish to the back by
propping it against
magnetic fixtures using film canisters filled with lead shot.
Vertical presses on the fixtures clamp the bottom firmly while the glue
dries. |
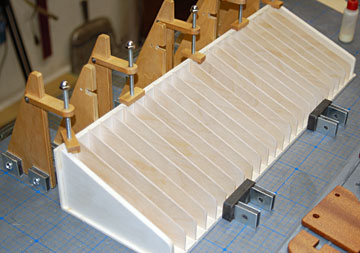 |
The dividers are cut from 1/16" aircraft ply and glued in the
grooves using carpenter's glue. When the glue had set up for a
little over a day, I applied several coats of Watco Danish Oil using a foam
brush. I used paper towels to remove excess after letting it set for
about 30 minutes. I applied two coats a day for three days.
I'm not real familiar with Danish Oil and it seems to take forever to
dry. My test has always been if I can smell the paint then it's still
releasing solvents and isn't fully dry yet. In this case that was a
couple weeks. |
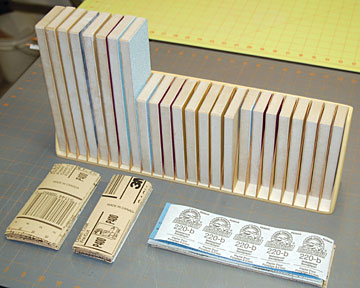 |
The completed rack. Now I just need to find a place to
put it. If I knew in advance where it was going to go I would have
drilled holes to mount it before I glued it together. I may mount it
to a wall or on top of a bench. For the time being it's just going to
drift around the shop until I have a good place for it. In the
foreground are sheets of sandpaper pre-cut to fit the blocks I use. I
won't have to cut more paper for several months. |
|