|
Tip: If you use
epoxy and
micro-balloons, you should make the wing saddles
before
covering the airframe.
If you use silicone, you should do so after covering
the airframe because covering will not stick to silicone.
Time required to do this is twenty to thirty minutes. You will need slow-drying epoxy and
micro-balloons or silicone sealant.
I
usually do not use silicone because it is difficult to trim neatly, it can not be sanded and
it does not take paint or iron-on coverings.
If you choose the micro-balloon method, then I
suggest you do not begin unless you know you will be around when the
epoxy begins to set. That is the best time to trim off the excess.
The epoxy is much harder to trim after it is fully cured.
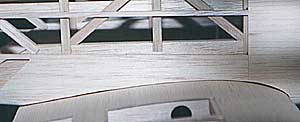 |
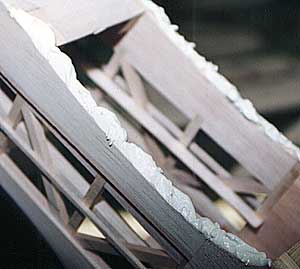
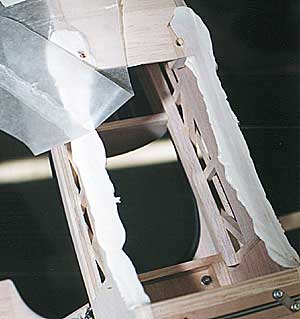
Note the unsightly gaps around
the wing saddle. I think these gaps seriously detract from the model's appearance. If it is your
model I am looking at I will keep my opinion to myself, but that is what I am
thinking.
 |
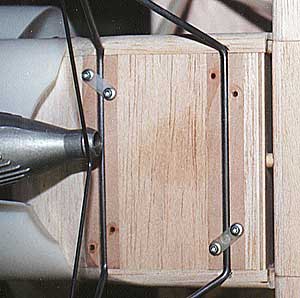 |
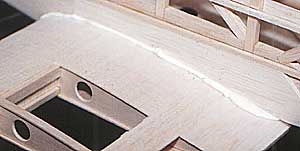
There is an unacceptably large gap at
the
leading edge as well. The
muffler exhausts
underneath the fuselage directly down the centerline. This is a great
place for all that exhaust oil to enter the airframe.
I will fill the gap with wood first and then use epoxy and
micro-balloons to finish it off.
Fixing this gap will wait until after
the wing saddles are done. Doing too much at once is a sure-fire recipe
for mistakes. |
 |
You can wrap the wing using anything thin that epoxy (or silicone) will not stick
to. I use masking tape on the opposite side of the wing to hold it in
place.
For straight wings I usually use waxed paper because it is a little
easier to work with. I use plastic food wrap for tapered wings because it
can be stretched tightly in all directions.
You can also use an iron on covering, such as SolarFilm. Just iron it down
normally and peel it back off when you're finished.
Regardless of what you use as a release film, wrinkles will be faithfully
reproduced in the finished wing saddle so be sure to smooth it out. |
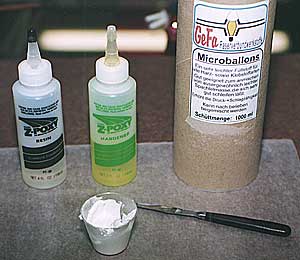 |
Normally when I mix micro-balloons with epoxy I mix in as many balloons as
the epoxy can absorb. For wing saddles, I mix in only enough that the
mix won't run which is far less.
The mixture will not compress properly if it is too thick which can distort the wing - thus creating a distorted wing saddle.
The amount shown here (less than 1/2 ounce)
made the entire mess in the next several images. The wing saddle area
is 3/8" thick and about 8-1/2" long.
Work fast — you do not want the mix to get
too thick before you put the wing in place. I have noticed that
micro-balloon/epoxy mixes tend to cure faster than straight epoxy. I
think this happens because the friction created when mixing in the micro-balloons
tends to heat up the epoxy and accelerate the curing process.
|
By the way, this container of micro-balloons was purchased in
Germany in
2001. It is much larger than anything I have seen in the states yet cost
less than the small bottles I have purchased in the U.S. Why is it that
American micro-balloons cost so much???
I am guessing it is because American sand is better than European sand and
therefore makes higher quality glass which equates to more expensive
micro-balloons (which are made from glass in case you did not know). My
other theory is that we're simply being gouged by the micro-balloon tycoons.
 |
Get over your indignation of American
micro-balloon prices quickly because the mixture is beginning to set up.
Trowel it on the saddle area nice and thick. Use plenty so that there
will not be any voids. |
 |
Carefully put the wing in place but do not push
it down. Bolt it down slowly and evenly. The mixture should squeeze out and
look something like this. If you didn't use waxed paper or
cling-wrap you have now glued the wing permanently to the fuselage.
This technique works with rubber-banded on wings as well.
Use just two or four rubber bands that are not too tight and put
them on evenly. It is helpful to have someone hold the wing to the
fuselage so it is
not shifting around while you are putting the bands on.
|
|
Tip: |
If you use micro-balloons and epoxy then you should
not attempt to remove excess mixture while
it is still wet. The mixture
will be pulled from the wing saddle which creates voids instead of
filling them. Just let the mix set up for a while. If you
use Silicone then you should remove the excess while it is still
wet. It is a real pain to remove silicone after it is dried - especially if
it is stuck to the covering on the fuselage side. It's not a bad idea
to mask the side and trim the tape to match the wing saddle. |
 |
The excess is easy to remove if you remove it at
the right time. |
 |
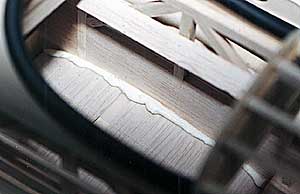
Check the
wing incidence again while the mixture is wet
and can be removed if necessary. Make sure the wing is level (looking from the front or the rear of the
model) to ensure you have tightened the bolts
fully and evenly. In this image the wing is about 1/4º
positive which is exactly what I wanted (somewhere between 0º
and 1º - closer to 0º
being better).
If for any reason you have to remove the wing at this
point then remove as much of the micro-balloon mix as possible and start
over. There will not be time to reuse what you've already mixed. |
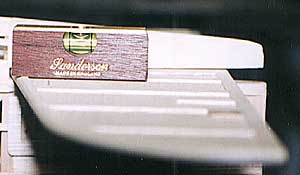 |
Just to make sure everything
was as it should be I checked the
stab again to ensure that it is level. I
have checked my incidence meter against this level to make sure they jive. |
 |
After the mixture is set, but
before it is fully cured remove the wing with the waxed paper still attached
or remove the wing from the waxed paper and then peel the paper from the
fuselage. I chose the latter.
Be careful when removing the wing not to distort
the mixture.
Remember - the epoxy is not fully
cured at
this point. It is best to leave the wing off for now. If you
can not help yourself, at least dust the wing in the saddle area with a little
baby powder or dry micro-balloons to prevent the wing from becoming
permanently adhered to the fuselage.
Note that the epoxy/micro-balloon mixture migrated around the wing bolts.
I have never had
a problem popping the bolts loose and the mixture can be easily picked from
the bolts after it has fully cured. |
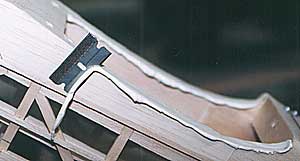 |
Place a razor blade flush against the fuselage
side and trim off the excess mixture. The razor blade refused to stay
where I wanted it while I was taking the photo, but the top of the blade
should be angled so the excess is trimmed toward the saddle (that would be
down in the above photo).
If you hold the blade so it cuts away from the
saddle, it is possible for the micro-balloons to stick the blade and be
pulled from the wing saddle. |
I have
had no problem getting iron-on coverings to stick to the epoxy/micro-balloon
mix. Heat from
the iron makes the epoxy tacky. Once it is cooled the covering
is held firmly in place.
|

