-
Always cut the longest sticks first.
What I mean is cut the longest structural pieces such as spars and longerons
before cutting shorter pieces such as cross-braces. Manufacturers
normally give you enough extra wood in a kit to make a mistake or two.
If you cut all the cross-braces first you may end up with a bunch of
scraps and have nothing long enough for the wing spars or longerons.
Additionally, you should always use the shortest piece that's big enough for
the job.
-
Be sure to remove pins, magnets or
anything else that shouldn't be there before you add the sheeting that will completely enclose an
area.
I once built a magnet into a wing and had to perform surgery to get it back out.
Until I announced it here nobody ever knew about it but I still felt pretty
stupid at the time.
-
If a part looks straight, it might be... or it might
not be. If it does not look straight it's not. It's easy to get
caught up in measuring the
wing attachment to the fuselage to make sure it's on
straight but once you think you have it perfect don't drill the bolt holes.
Instead stand the plane on it is nose with light coming straight at it so
shadows don't play tricks.
Now stand back about fifteen feet and take a
good look at it. If it looks good and it measured ok, then it's probably
straight. If it looks wrong, then something probably is even if it seemed
to measure out OK. Check your measurements again. It might not be
the wing that is wrong, but the fuselage. This philosophy does not only
apply to wings.
-
Don't assume the plans are perfect. Paper
expands and contracts with the weather. Lines may not be straight and may not
be spaced correctly. It's probably
less likely that two symmetrical drawings (such as wings) are not drawn the same
with the advent of CAD drawn plans
but it's still a possibility.
-
Generally speaking, any time I build two
identical parts, I build the first and then build the second upside down over
the same drawing or directly over the previously built part. It is more
important that an aircraft is symmetrical than it matches the plan exactly.
The best case is to build some kind of
jig that you can leave in place after
building the first part. Then the second part is built in the same jig and
you end up with two very closely matching components.
-
Always add a chord-wise grain cap
to the end of the sheet balsa control surfaces.
This will help prevent the sheet from
cupping. I also cap surfaces built
up from sticks because it looks neater and covering does not adhere well to the
end grain wood.
-
I use Carpenter's glue as
the primary
adhesive in my construction. It gives me plenty of time to
work which is important in some cases such as attaching the
leading edge
sheeting on a
D-Tube wing. Normally there are
cap strips aft of the
sheeting. The sheeting and cap strips meet at the center of the main
spar.
First I use a piece of masking tape
to mask off the aft half of the main spar. Run a bead of glue along the
spar. Place the sheeting on the spar and insert a pin about every 6" or so to get
started. (Rocket City Pin Clamps are very useful in these situations).
Then I go back and add a pin between each of these pins (every 3"). Then add another pin in between those so that pins end up being space about every 1-1/2".
Use as many pins as necessary to ensure the entire sheet is held firmly to the
spar.
The idea is to get the
sheeting glued along the entire length at first so that the glue is not setting
up at one end of the wing while putting pins in the other end. Now remove
the masking tape and use a scrap piece of balsa with a square edge to clean up
any excess glue on the aft edge of the sheeting.
Allow this to dry thoroughly before
gluing the sheet to the ribs.
The next step is to add glue to the
ribs and sub-leading edge if there is one. Start
at the center of the wing panel and pin the sheeting to the rib at the mid-point
between the leading edge and the spar. If you think the sheeting will not
bend without cracking then use a wet sponge to dampen the outside of the
sheeting to make it bend more easily.
I run my palm along the
sheeting from the spar to the leading edge to make sure the sheeting is actually
being glued to the rib before putting the pins in. Pin the sheeting in
place working your way from the center towards each end of the panel. Use
additional pins as necessary.
Lastly pin the sheeting to
the sub-leading edge starting at the center and working towards the ends of the
panel as above. The carpenter's glue gives plenty of time to get all this
done but you do have to keep going once you start.
-
Measure from the same base point to
each part when laying out multiple parts such as ribs. Don't
measure from rib to rib. If your measurement is off a little at each
point then the entire wing well be off by the sum of the errors.
In other words if your measurement is off by 1/32"
inch for each of 16 ribs then the first rib is off by 1/32", the second by
1/16" and so on for a grand total of 1/2". If each panel is off in a
different direction then the panels can differ by as much as 1".
I realize that's extreme but it gets the point
across. Instead of measuring from rib to rib measure each rib station
from the wing root. Then the most the wing can be off is by the 1/32" (in
this example) and the most the two panels can be off is 1/16".
-
 If you're like me you have a maximum error tolerance when measuring with
various tools. This tolerance is a percentage of the measuring tool I am
using.
If you're like me you have a maximum error tolerance when measuring with
various tools. This tolerance is a percentage of the measuring tool I am
using.
For example, I can measure to about 1/2 of the smallest division
I can read on a ruler. For me that's about 1/64". Anything closer
together than that makes my eyes start vibrating and my brain shuts down.
Whenever measuring points, try to measure them as far apart as
possible. No one can transfer a point from a ruler to a piece of
wood with 100% accuracy.
By moving the points farther apart, the error becomes
negligible.
In other words, if you draw a 6" line that is off by 1/64" and you draw a
12" line that is off by 1/64" then the 12" line is twice as accurate.
For example, let's say you have a former that is 4" wide. When
you draw a centerline on it, you could measure 2" from one edge at both
the top and the bottom of the former. If you extend the line and
then measure, the resulting centerline should be more accurate.
Normally I will push the part against a straight surface and then measure
from the surface rather than the part. I can measure as far apart as
the surface is wide.
-
Because of the error tolerance I mentioned, I use a drill bit that is
smaller than the finished hole initially if hole placement is critical.
I might be off by 1/32" if I use a 1/4" bit, but only 1/64" if I use a 1/16"
bit. After the hole is drilled, it guides the end sized bit and
results in more accurate hole placement.
-
Whenever I am building something flat on a board that has straight edges
(wings, flying surfaces, etc.) I pin one of my heavy straight edges or a level
to the board and push one of the outline pieces (leading or
trailing edge)
against it. This virtually guarantees a straight surface and less
sanding to true things up. If possible I will pin down a straight edge at
both the leading and trailing edge. If I am building two identical
surfaces then I will leave the straight edges down and build the second part
upside down in the same location.
-
Do not try to make a part an exact fit if you can glue
it on oversize and easily sand it flush later.
-
If you are building a
two-piece
elevator that is joined
by a U-shaped piece of
music wire it's easier to bend the wire and drill holes
to match than the other way around.
-
Anyone who has ever installed radio equipment inside
an R/C aircraft knows that sometimes it gets cramped inside the fuselage.
I have gotten some pretty deep scratches from various components inside the
fuselage and finally decided to do something about it. First, any time I
make a
Z-bend, I make sure to deburr and round off the end of the wire.
For throttle/nose-wheel steering cables, I melt solder into the ends of the
cable and then use a cutoff wheel in my moto-tool to smooth the sharp edges.
I knock off the edges of cutouts in formers with fine sandpaper so that I do not
get cut up by plywood splinters and I round off the edges of wing bolt blocks
before I glue them in. Now when I put my hand inside the fuselage, all I
feel is nice, smooth parts.
-
I use a countersink to chamfer the edges of fuel line
feed holes in the firewall on both sides of the firewall to prevent sharp
plywood edges from cutting the fuel line. I
use fine sandpaper to finish it off.
-
Do not be afraid to scratch build a part if you do not
like the kit part. Likewise, don't be afraid to modify a kit if you have a
better way. If a kit rib needs to be thicker for some
modification you are making (retracts, for example), you can use the original
part to trace a new part but leave it slightly oversize. Put some masking
tape on the neighboring ribs and sand it to shape once it is in place.
-
Just because the wing fits in the
saddle perfectly does not mean it's straight.
Measure and trim or shim as necessary until every part of the aircraft is lined
up perfectly. Don't trust your eyes. Set up something solid that
will give consistent measurements. The airplane needs to be firmly held in
place the entire time. If you move the plane you have to start measuring
all over again.
-
Always use
shear webs between spars if the wing is not
fully sheeted. Add them to sheeted wings as well if you think the spars
may not keep the wing from twisting. Webbing will stiffen a wing panel
without adding appreciable weight. On wings that have no sheeting webs
will do more to resist torsion loads than any other component other than the
covering.
-
There is a big difference
between dented wood and gouged wood. To remove a dent from wood you can
wet the area slightly and then run a hot iron over it. To prevent water from
running all over the wood fold up a paper towel and then wet the towel.
Squeeze out most of the water and then press it down onto the wood.
Another method is to put white vinegar on the dent. You can use any kind
of vinegar but dark vinegars will stain the wood.
Gouges can be handled the
same way to bring the wood up as much as possible but a gouge means that the
wood grain was cut and it will not magically be repaired. You can strengthen
the area if needed by putting some type of glue in the gouge. In most
cases you will need to use a filler to completely smooth the gouged area.
I like to use Ambroid glue and micro-balloons for small areas because it dries
quickly, is light and sands easily.
-
Hinging is a tedious process. Learn to do it
properly on scraps of wood. There are a lot of gizmos available that
help or hinder the process. None of them make it painless no matter what
the manufacturer says. Hinges that are located and glued in properly will
significantly improve the aircraft.
-
If you use
Robart Hinge Points, you can make the holes before you ever build the
control surfaces. I use a
drill press and they come out right every time.
All I do is align the fixed portion to the moving portion of the control surface
and then draw a fine line with a marker at each hinge location.
When I
build the control surface, I place dowel stubs in the holes so the parts stay
aligned properly while I build. It is much faster and easier with
less chance for error than any other method I know of.
-
I always glue hinges into one surface at a time and
let the glue cure before attaching the surface. It is very difficult to
keep the hinge line straight when trying to glue the hinge to both surfaces at
the same time.
I use slow drying epoxy that has been heated slightly to
allow it flow better. Even using slow-setting epoxy, I usually have barely
enough time to get all the hinges glued into each surface before it starts to
set up. This is a job that you do not want to rush.
-
When I am between projects, I spend the occasional
evening making things that I use frequently. For example, I have
gusset
patterns for 3/16", 1/4" and 5/16" stick structures (built-up fuselage).
I will make a copy of the pattern and attach it to a piece of 1/64" or 1/32"
plywood and cut out a baggy full of them. Then they are ready when I need
them.
These gussets are designed to be cut out with an X-Acto knife, so
unless you need the extra strength of 1/32" gussets and want to torture
yourself, I suggest using 1/64" ply for most purposes.
-
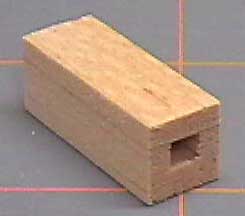 Another thing I like to make is routed balsa blocks to
glue to the fuselage sides to guide the outer throttle housing. They look
sort of like landing gear blocks, but smaller and made from balsa.
Another thing I like to make is routed balsa blocks to
glue to the fuselage sides to guide the outer throttle housing. They look
sort of like landing gear blocks, but smaller and made from balsa.
I make
the blocks from 3/8" x 1/4" balsa and then glue a piece of 1/16" balsa over
them. I cut the blocks to about 1/2" long and slide them over the housing.
After the housing is in place, I glue the blocks to the fuselage using
CA.
The reason I do this is because I normally set up the throttle
servo so the arm
is about 1/8" away from the fuselage side.
These blocks space the cable
from the fuselage side and anchor it in as many spots as necessary. It is
fast, neat and solid.


