Airfield Models - How To

Paint a Scale Pilot Bust

December 19, 2021


Home
About
What's New
History

Models Gallery
Model Building Safety

Articles
Mail & FAQ

Site Map
Site Feedback

Contact
Add to Favorites

Comments
Search Airfield Models

Back to Painting Pilots


Airfield Models (http://www.airfieldmodels.com/)How to Paint a Scale Pilot Bust — The Face

The eyes and face make or break the pilot.  How difficult it is depends a lot on the particular figure.  The right eye on this figure wasn't at all difficult but the left eye squints more and even while wearing magnifying glasses and using a good quality brush with a fine point I had problems controlling the paint application.

Aces of Iron has detailed instructions on probably the most difficult way imaginable to paint your pilot.  I have tried it their way twice and ended up wiping off all the paint with thinner both times.  Their pilot is close to right but I don't think it is right.  I wouldn't want my pilot to look like theirs but that's just a matter of personal taste.  What I will say is that their figures are some of the best I've ever seen and if you're a talented painter people will ask if that's a real guy in the plane when you show them photos.

The Aces of Iron technique is the same as the "The System" by Francois Vernlinden who is an excellent modeler but paints some of the most garish figures I've ever seen.  Feel free to try it.  Maybe you'll have better results than I did.


Painting the Face

A new "flesh" base is painted over the entire face and given several days to dry. The face ended up with stray paint, smudges, etc. that came about when I was painting the uniform.  I felt it would be better to put a new base coat down than try to work with one that already had problems.

I didn't measure the exact mixture to create the standard white guy flesh color but a good start is 8 parts Flake White, 1 part Burnt Sienna and 2 parts Cadmium Yellow.  I started by mixing the yellow and red and then took a small amount of it (the tip of a toothpick) and added white to it until it was the shade shown here.

All paint on the face is oil paint.  For dry-brushing I used it straight from the tube.  For brushing I thinned it to a warm butter consistency using turpentine.

Note how the glass on the goggles has been toned down using the black wash and some light gray highlighting.  I applied the wash all over the goggles and then wiped up the middle with a genuine Johnson & Johnson Q-TipTM.

Burnt Sienna is used for shadow areas. I allowed the base to dry for two full weeks before beginning with the shading and highlighting.  The extended drying time is a good idea to allow the paint to harden and lessen the likelihood of going through it while shading the face.  I didn't mention this before but you can probably paint the entire pilot without waiting for paint to dry as long as you keep it mounted and don't touch it.

I find it easier to correct mistakes if the paint is fully dry before going to the next color so I usually start projects like this while I'm working on the main project.  Then when I want to take a break from that project or am waiting for something to dry I can continue with the pilot and not be stuck waiting for paint to dry when the rest of the project is finished.

Burnt Sienna is dry-brushed into shadowed areas of the face. I applied the shadow areas first using Burnt Sienna.

Dry-brush with a flat brush using upward strokes to get shadow areas under the cheeks, nose, eyelids, lips and brow.  Use the brush sideways to work paint into deep crevices.

Blend the Burnt Sienna but don't carry it too far from the shadowed areas.  Apply Flake White to highlighted areas. Use a clean soft brush to blend the burnt sienna into the base color and gently fade it into non-shadow areas.  I did the blending immediately after applying the paint.

Next I dry-brushed Flake White onto the bridge of the nose, over the nostrils and the upper cheeks.  Using another clean brush I blended it.

Blend the Flake White into the base.  Choose any dark color you like for the beard. It's very easy to make the beard way too dark.  For whatever reason the beard looks darker in this photo than it does in person.  When you dry brush the beard you can use any dark hair color you want.  I used straight black.

I brushed on a piece of white paper until I could brush back and forth in one spot and not see the paper turn gray.  If you can still see color on the paper then you can bet the beard will turn almost black immediately.

Mix Red, Blue and White oil paint to make a light violet color. I mixed up a light violet for the top of the lower lip.  Don't brush this on.  Dry brush it sparingly or everyone will wonder why your German WWI fighter pilot wears purple lipstick.

By the way, when I don't know what the right color is I just look in the mirror.  I was surprised that my lip color had a lot of blue in it.  Maybe my air conditioner is set too low.

Lightly dry-brush the violet onto the upper portion of the lower lip. I lightly dry-brushed the lip until I could see the color turn and then stopped.


Painting the Eyes

On this pilot you get to try to paint inside little slits.  The pilot's left eye is less than 1/16" open.  The right eye is slightly more open.  There's not a lot of room to work.

I suggest you mount the pilot so it can't move and find a good seated position so you can guide the brush with both hands.

You need a brush with an extremely sharp point.  I used a good sable Round #1 brush.  A pair of magnifying glasses such as reading glasses is very helpful when working on fine details.

How Not to Paint a Gargoyle

The biggest mistake people make when painting eyes is to paint a round iris.  This is the basis of all gargoyle-eyed pilots and it ruins the pilot every time.  It's a very easy mistake to make and very easy to avoid.

Take a moment to think about how your eyes feel right now.  If you're squinting stop it.  Just take a mental snapshot of how your eyes feel when you're relaxed and just looking at something normally.

Go to a mirror and look at your eyes the same way.  Don't squint and don't stare.  Just look with your eyes relaxed normally.

What you should see is that the bottom of your iris just barely touches your lower eyelid.  The upper part of your iris goes above your upper eyelid where you can't see it.  Use Google Images to search for "eyes" to see photos of various eyes and get a good idea how they should look.

Your pupil is probably somewhat dilated if you've been indoors.  Next time you're in the sun for a while, come back in and look at your eyes again.  Note the proportion of your pupil to the iris when your pupils are constricted.

Apply white or a VERY light gray to the entire eye.

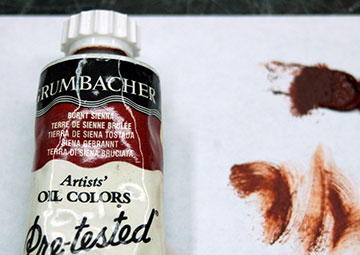
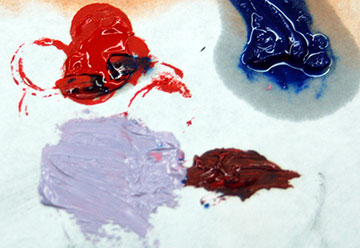
I used oil paints exclusively for the eyes.  I thinned the paint to the consistency of melted butter so that it would flow off the brush nicely and not clump on the tip.

Begin by using white or a very light gray to paint the entire eye.  Try to avoid the inside of the eyelids but don't worry if you get paint on them.  When the eyes are finished you can use a clean brush dipped in thinner to carefully remove paint inside the lids.

You can stop here if you have an application needing a zombie pilot although the skin tones aren't quite right for the living dead.

Paint the iris outline, iris, pupil and reflection. Begin with black oil paint for the outline of the iris.  Fill in the whole area but remember that it extends higher than the upper eyelid and just touches or maybe goes slightly below the lower eyelid.

Mix whatever color you want the iris (eye color) to be.  I decided to stick with the blue eyed German cliché.  Apply the paint starting in the center of the black area and carefully working your way out.  Leave a black outline around the iris.  If the iris is too small then you may need to add more black to enlarge the outline and then add more of the iris color.

The pupil is added using a very small amount of black paint and a sharp brush.  It too should be off-center toward the top of the eye.

Lastly, a tiny drop of white is added to create a "reflection" on each eye.  In studing various photos I've noticed that the reflection often half-overlaps the iris and the pupil.  Be sure the reflection is on the same side of each eye.
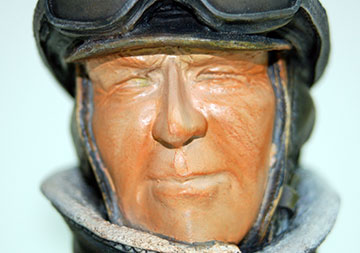
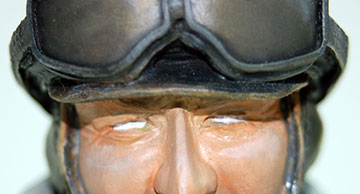
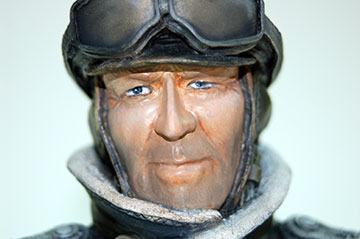
It took me two attempts to paint the left eye because I lost control of the brush and got blue all over the place.  I removed all the paint using a clean brush dipped in thinner.  It's still not perfect but it's about as good as I can get it.  The more I try to "fix" things the worse I make them so I quit while I was ahead.

This photo was taken with a macro lens.  From a couple feet away the eyes look very good.

Almost ready for clear. 
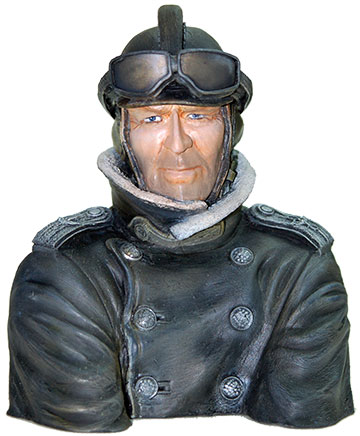
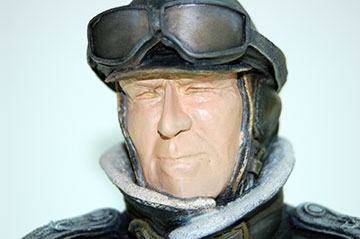
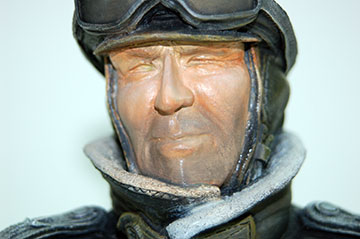
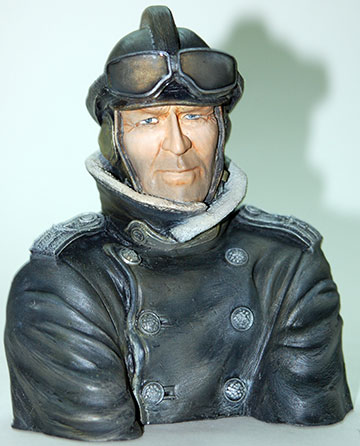
At this point I've touched up various items on the uniform and face.  I added more highlighting on the upper cheeks and nose.  I also added some random "dirt" splatters and smudges to the jacket.

More work has been done to the goggles.  The shadows are deeper to indicate farther distance to the helmet behind them.

I'm going to blend the uniform highlights some more and then give the pilot several days to dry.

The next step is to add a flat sealing clear-coat.

Use epoxy to create the "glass" on the goggles. 
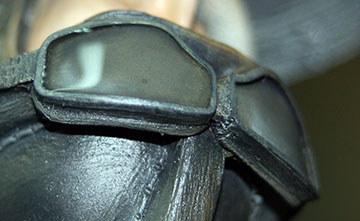
After the satin clear coat is dry we're ready for the last step creating the "glass" lenses in the goggles.

I use slow-drying laminating epoxy because regular epoxy glue gets a lot of bubbles trapped in it when it is mixed.  These bubbles are usually there to stay and visible after the epoxy is cured.

In this case I used 30-minute EZ Lam epoxy from Aerospace Composites.

Begin by placing the pilot on a bean bag or soft folded rag such that the lens is level and the pilot can't roll.

Add epoxy to the lens one small drop at a time with a toothpick or something similar.  Use the toothpick to spread the epoxy all around the edges.  Add a few more drops until the lens fills in.  Don't use too much epoxy because you don't want it overflowing to someplace you don't want it.

Do one lens at a time and allow it to fully cure then do the other lens.

Completed Aces of Iron WWI German pilot bust 
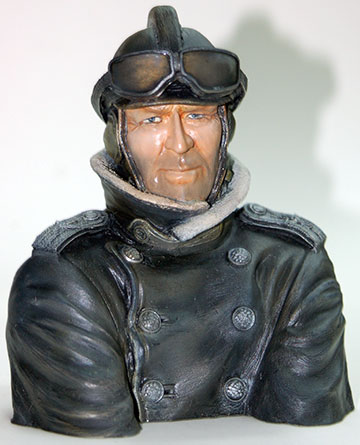
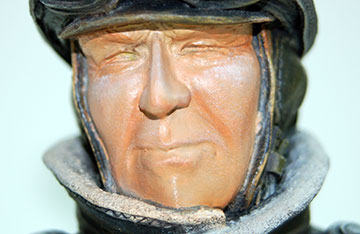
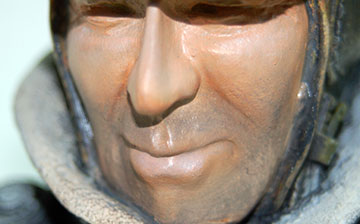
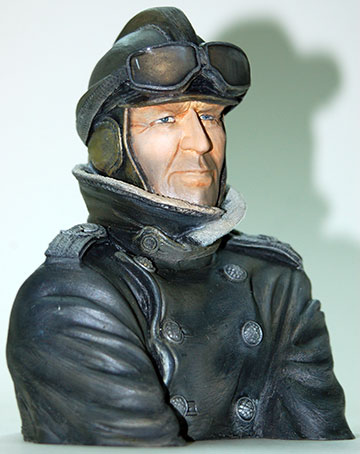
Sweaty Hunter in the Sky!  The satin clear turned glossy on me.  I hereby declare satin clear to be my mortal enemy!
A different type flat clear was necessary to clear the pilot's oily complexion. I mixed a flat clear using Tamiya acrylics (Tamiya flat base plus gloss clear).  I sprayed at very low pressure using my Hansa 351 airbrush just over the face and the uniform while avoiding the goggle lenses.  It did the job.
Poser Who da man?  Oh yeah?!?  Let's see your Blue Max!


Previous —
Next —

How to Paint a Scale Pilot Bust
Make a Magnetic Model Aircraft Building System

Comments about this article


Back to Painting Pilots
Airfield Models Home


Copyright © 2007 Paul K. Johnson