Make
a Wood-Composite Landing Gear for a Model Aircraft
This is a complete rewrite of an article posted several years ago.
When I began building the landing gear featured in that article I didn't believe it would
actually work so documentation of the procedures involved were more of a
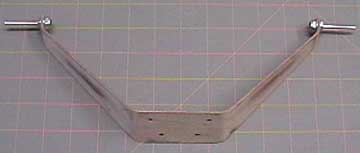
very brief overview than a how-to article. I called it an "all-wood"
landing gear but it's actually a wood/fiberglass composite
landing gear.
That landing gear is still going after withstanding unreasonably hard
landings, really rough fields and life under water. It fell from the model in flight one day, landed in a swamped area and
lived there until the ground dried enough to retrieve the gear.
Several weeks later the gear delaminated in one of the upper bends. I repaired it using thin CA. It's held up since then
but has a slight gimp.
I don't believe a durability test for any part of a flying model aircraft should
include being submerged in a swamp unless, perhaps, the model is built to
operate from them. As far as I'm concerned the
gear is proven.
My current model wants a wood landing gear and I want my new model to be
happy so I made her one. This time I took a lot of new photos
to more realistically show what goes into making one of these.
|