|
|
Trimming,
Sanding and Axles
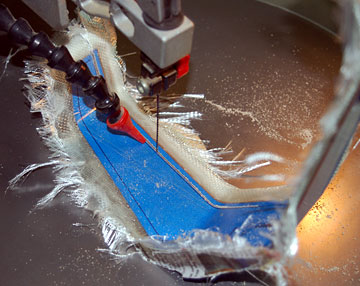
From the beginning I intended to trim the gear with my scroll saw because
I knew I would be able to. I could also have used a jeweler's saw or
if the gear is not too much oversize, a disk or belt sander.
I wouldn't even think about a wood plane or a knife due to how difficult
it would be to cut through the laminations and the awkward shape of the
gear. |
|
|
|
Trimming and Sanding the Landing Gear
 |
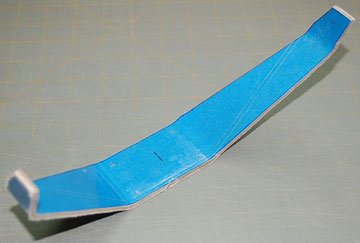
Before laying up the gear I drew the outline on the
underside. As with everything else, aligning the drawing to the
drilled blanks was done by aligning the pin holes (which later became
holes for the mounting screws). |
 |
I could only cut to the middle from the end at the front and
back because the area where the gear was being cut was suspended above the
table which is not only dangerous but causes a lot of tear-out. The
gear was suspended because the leg under the saw hit the underside of the
upper arm and the gear couldn't be rotated any farther.
It came out well and now it just needs to be cleaned up. |
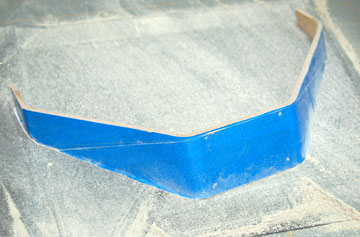 |
I taped a piece of 120 grit sandpaper to my workbench and
worked the gear over it for until I was happy. Probably about
10-15 minutes all together. |
|
|
|
|
Adding the Axles
 |
The second gear I made had one axle hole above the other
because I used marks I made on the underside of the blank before the
lay-up instead of measuring afterward. It wasn't a big
difference but the plane had a noticeable list and it really bothered
me. There wasn't enough material left in the foot of the gear to
correct it.
With the third gear I didn't take any chances. |
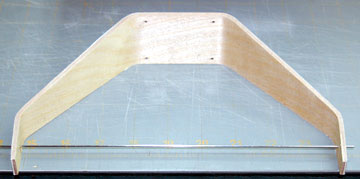 |
I drilled the hole 5/64" and then put a 1/16" music wire
through it to ensure I could fix the location if I mis-drilled again.
I need to learn to take more care when measuring and I'd have fewer
do-overs. |
 |
The axles have a 1/4" threaded hub. |
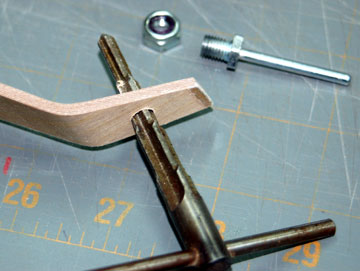 |
Which is a little tight in a 1/4" hole so I reamed the
hole to get a slip fit. |
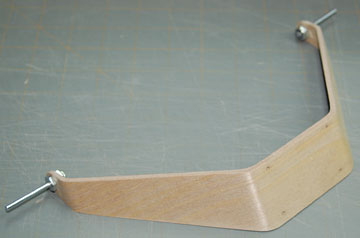 |
All that's left to do is clean up the feet and drill out
the mounting holes. I've considered some additional work on the
gear such as a balsa lamination on the top and bottom with added leading
and trailing edges. The whole thing gets sanded to an airfoil
shape.
I've also considered just a hardwood lamination to the leading edge
to hide the laminations and provide something easier to round over.
Right now it's just a sharp edge from being sanded on my bench.
It will work fine like that but it looks unfinished. |
Whether you fly glow, gas or electric, this is an unfinished wood piece
so fuel, water, dirt, etc. will all get into the grain. I glassed mine
with lightweight cloth and resin but any finish you'd use on a flying model
can be used. |
|
|
|
|
|
|
|
Back to How to Build a
Wood-Composite Landing Gear
Airfield Models Home |
|
|
|
Copyright © 2003-2008 Paul K.
Johnson |
|

