Airfield Models - Wing Construction Example

Build Wing Tips for a Model Airplane Wing

December 18, 2021


Home
About
What's New
History
Models Gallery
Model Building Safety
Articles
Mail & FAQ
Site Map
Site Feedback
Contact
Add to Favorites
Comments
Search Airfield Models

Back to Wing Construction Example


Airfield Models (http://www.airfieldmodels.com/)Build Wing Tips for a Model Aircraft

Some items on a model aircraft are always attention getters.  The overall finish, cockpits, and a few other items get closely scrutinized.  
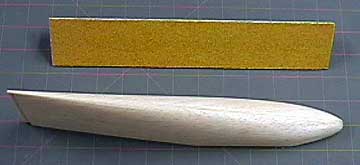
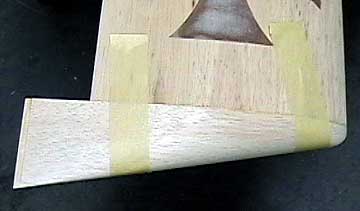
Wing tips are one of these aesthetic focal points.  Sandpaper, elbow grease and time will pay off in your model's overall appearance.

Wing Tips are usually not critical components, but there are some things that you should pay attention to while making them.

They should be as close to the same 
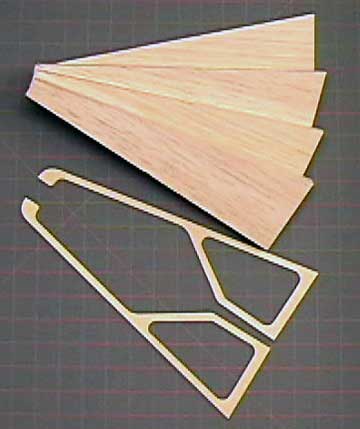
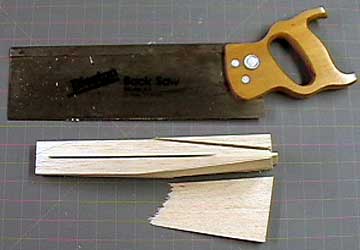
shape as possible.  I normally stack the tips to cut the outlines which 
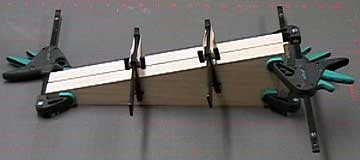
gets me started in the right direction.  Each tip must be shaped independently, however.  Making a few templates isn't a bad idea.

One thing I've noticed is that I tend to get into a "zone" when working on items like this.  I like to do matched sets at the same time so that whatever I did to the first part is still fresh in my mind when working on the 
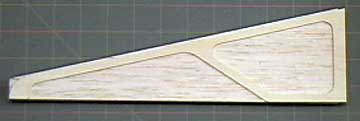
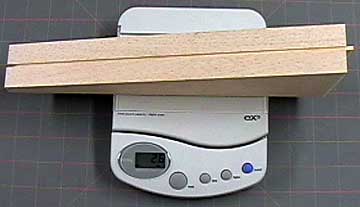
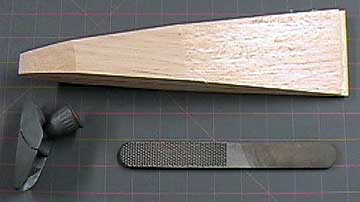
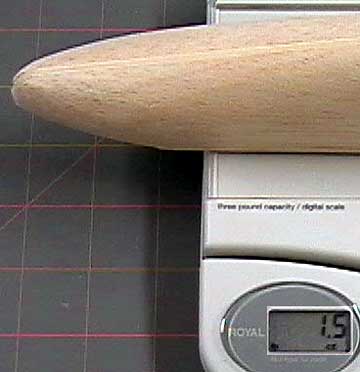
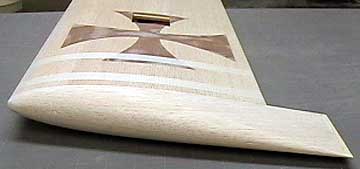
second.

Watch out for weight!  Solid block tips can increase the weight of a wing dramatically.  In fact, the blocks I used for these tips weighed over half the weight of the rest of the wing after the outline 
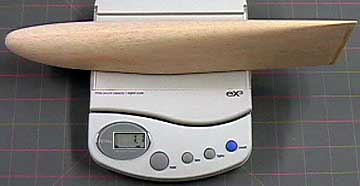
was cut, but before further shaping was done.  By the time the tips were finished, the weight dropped significantly.

Using blocks in your 
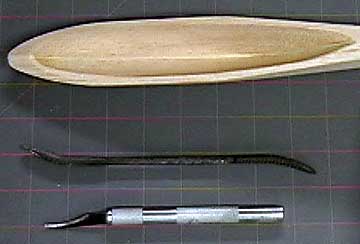
model isn't heavy.  Using heavy blocks and not hollowing blocks is 
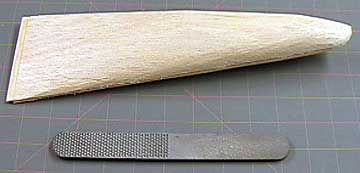
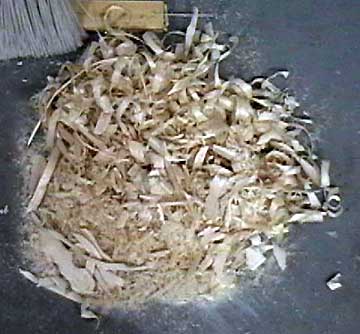
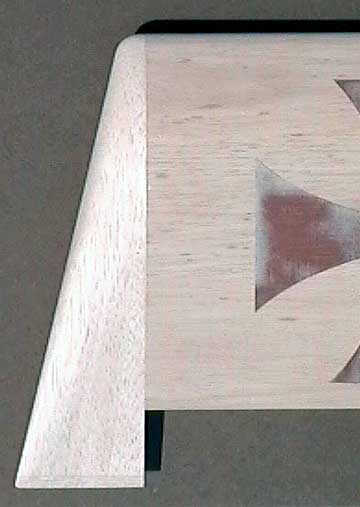
heavy.  Always hollow blocks.

What may not be obvious is that I spent more time working on these tips than any other part of the wing.  In fact, I probably spent as much time on the tips as the rest of the wing combined or at least close to it.


Parts to make the wing tips. The balsa wood blocks I have on hand that are large enough for these wing tips are too heavy so I elected not to use them.

Instead I selected a sheet of lightweight 3/4" balsa to laminate the tips.

The 3/4" sheet is not quite thick enough with two laminations the tips need to 1/8" thicker (1-5/8").

I could use a piece of 1/8" balsa, but I decided to use lite ply instead.  The lite ply will act as a sanding stop and help guide me while shaping the tips.

I cut away as much as possible from the lite ply to save weight.

All four balsa blocks are taped together using double-stick tape and gang-sanded to a consistent outline.

The lite ply core glued to the first layer of balsa. The core is sandwiched between the two balsa layers.
The second layer is added and the assembly is clamped to dry. Shown here is one tip assembly glued and clamped.  When both tips are glued up and dry they are taped together again and sanded to match.

The edge that glues to the wing should be perfectly flat as should be the wing.  Block-sanding these parts ensures a good fit with a minimal seam.

Each tip weighs approximately 2.6 ounces. The wing without ailerons, hardware or wing tips weighs 8.5 ounces.  Just for reference purposes I weighed the tip before shaping it.  Each tip weighs 2.6 ounces roughly 1/3 the weight of the wing.

Parts were swapped around prior to gluing them so that the tips were very close to the same weight.

Note the plywood core extends beyond the balsa tip at the trailing edge.  The trailing edge will become very thin and the plywood will help protect it during handling and shaping as well as act as a sanding stop.

Remove the bulk of the excess wood in the most expedient manner. Begin by tracing the outline of wing on the tip.  This is most easily accomplished by taping the tip to the wing and using a fine-point marker.

Remove as much wood as possible using whatever means works best.  I started by cutting large chunks away with a back saw.

A razor plane and rasp are used to roughly shape the tip. A razor plane and rasp removes a lot of wood quickly.
More rasp work brings the tip closer to shape. More rasp work brings the tip roughly to shape.  Believe it or not, I have seen planes at the flying field that looked like the builder stopped here.
Coarse sandpaper is the next step after completing the rasp work. Coarse sandpaper brings the tip as close to the final shape as it will get before it is glued permanently to the wing.
Each tip weighs 1.5 ounces after removing the bulk of the excess wood. Over an ounce of weight has been removed from each tip.
Always hollow large blocks to remove significant amounts of weight. A carving knife and riffler rasp are used to hollow the wing tip.  A moto-tool can also be used.  Remember that the tip is over-size and much more material will be removed from the outside after it is glued to the wing.

I like to leave the tip about 3/16" thick all the way around to give me room for additional shaping without worrying about going through the wood.

Each tip is 0.4 ounces lighter due to hollowing the tips. Almost another half-ounce has been removed from each wing tip from hollowing.  Light wing tips allow the aircraft to begin and end rolling maneuvers quickly and crisply.  This aspect might be considered more important than the overall weight savings of the airframe.
By the time the tips are shaped, you'll be covered in sawdust. Here's where all that weight went.
Block sand the wing tip and the tip rib for a neat seam. Pin or tape the wing tip in place and allow to dry thoroughly.
Use masking tape to protect the wing while shaping the tip to match the airfoil. When the tips are dry, put masking tape on the wing to protect it and sand the tip to match the airfoil.  Use coarse paper to bring the tip close to its final shape.
Use a foam rubber padded sanding block to finish sand the tip using fine sandpaper. When the tip matches the airfoil, continue shaping it until it has a nice, flowing curve.  Compound curves can be very tricky.  Work slowly when shaping and look at the part from many angles to see where it needs work.

Do not be in a rush and be especially careful when using rasps and coarse sandpaper.  It is much more difficult to put material back than it is to take it away.

Switch to progressively finer grits to remove scratches and facets.  When they were very close to their final shape I sawed off the lite ply protruding at the trailing edge and capped it with balsa.

Use a sanding block all the way up to final smoothing with very fine paper (at least 800 grit).

I use a sanding block faced with 1/2" firm foam rubber.  It does not leave facets and works better than hand sanding.

This pair of wing tips required approximately ten hours to complete.  The photos don't do them justice.


With the completion of the wing tips, the wing is all but finished.  It has been finish-sanded and is ready to be fiberglassed.  All that is left to do is mount the control horns on the flying surfaces and make a fairing to blend the forward center of the wing into the fuselage. 

The fuselage must be mostly finished before the fairing is made and the fairing will be glued on the wing after the wing is glassed.  Otherwise the fairing will make it difficult to glass and sand the wing.


Previous —
Next —

Mounting a Model Aircraft Wing to the Fuselage - Part 2
Make the Fuselage to Wing Fairing

Comments about this article


Back to Wing Construction Example
Airfield Models Home


Copyright © 2003 Paul K. Johnson