 |
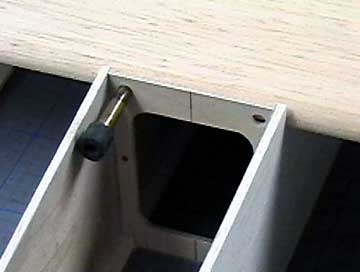
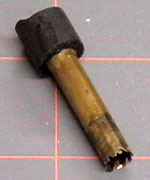
With the wing held firmly in place, use the
holes in the former as a guide and hand turn the hole-cutter into the
leading edge of the wing.
Cut one hole and then put in the first dowel to ensure the wing stays in
place while cutting the second hole.
I have never trusted a dowel glued only into the balsa leading edge to be
strong enough. That is why I used plywood
shear webs in the center
section. The dowels go through the leading edge and into the shear
webs. |
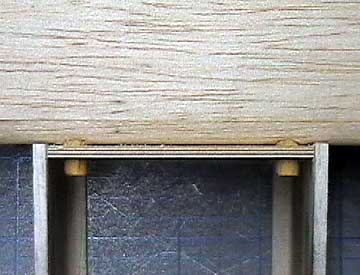 |
Put the dowels in place to ensure the wing
will remain in alignment while drilling for the nylon bolts at the
trailing edge.
Do not glue the
dowels in place until the aircraft has been finished. It is much
easier to sand, cover and paint the model without the dowels in place. |
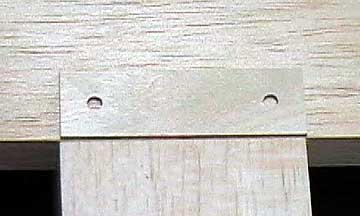 |
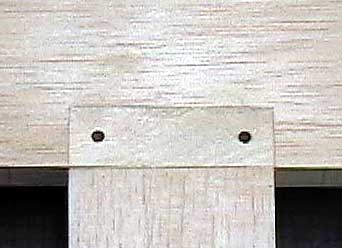
A 1/16" plywood plate is used to spread the
force of the tightened wing bolts and prevent the wing bolts from
crushing the balsa wing. The holes are spaced so that they will go
into the center of the wing bolt blocks in the fuselage.
You can either inset the plywood into the trailing edge as I will do here, or cover it separately and glue it on
later. If you choose to go that route, then remove covering from
the wing in the area where the plate will go. Cover the visible
side of the
plate and over-lap the covering to the bottom about 1/8" all the way
around.
Epoxy the plate in place. |
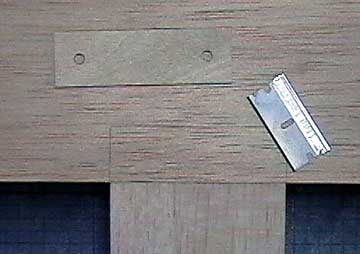 |
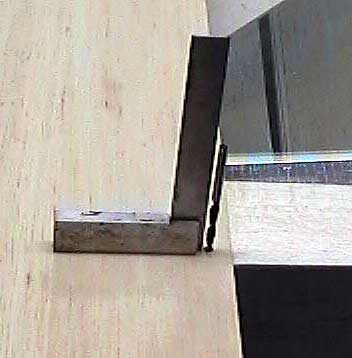
I use the plate as a template to mark the outline with a
razor blade. |
 |
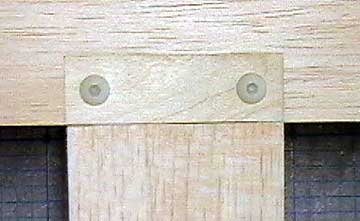
The balsa wood is relieved and the plate is
epoxied in place. |
 |
Use the plate as a drill placement guide.
The holes in this plate are 3/16". A #7 bit is actually the
correct bit to use when tapping for 1/4" x 20 threads. I am not
sure there is a difference in these bits, but 3/16" is close enough.
The holes should be drilled so that the
bolts are perpendicular to the outside of the wing. This allows
the bolt heads to seat properly against the plywood plate.
Drill through the wing and through the blocks in the fuselage. |
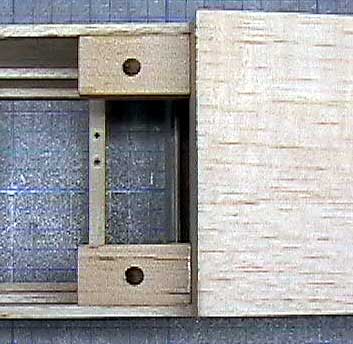 |
The holes in the wing bolt blocks ready to
be tapped. The holes are well centered due to care taken when
drilling the plywood plate before gluing it to the wing.
Careful alignment of the plate when gluing it to the wing ensures the
bolt holes will end up in the right place. |
 |
I run the tap in and out of the holes
several times to ensure the thread is cleanly cut. After I
test-mount the wing I use liberal amounts of thin
CA to harden and oil-proof
the holes.
Let the CA set up for a couple hours and
then tap the holes again. I might repeat this step two or three
times to get the threads really hard.
When soaking wood with CA it does not always
set up quickly. You do not want to get wood fibers glued in your
taps, so it is best just to do something else while it sets up.
Note that the wing bolt blocks will be flush with the bottom of the
wing. This is important to prevent the bolts from flexing.
It also allows the bolts to break cleanly in a crash. However, if
this plane crashes, it will not matter if the bolts break or not — there
will be a lot of damage. |
 |
The holes in the wing still need to
be enlarged. In this case the holes need to be 1/4".
After drilling them to their finished size,
harden the holes with thin CA. Again, allow the CA to cure for a
couple of hours and then drill the holes a second time.
Here the wing has been mounted in place using nylon bolts. You can see that the bolt heads are flush against the plywood plate. |


 Many
instructions tell you to glue the dowels at the leading edge of the wing
that key into the fuselage into the wing during construction.
The completed wing is placed in the
Many
instructions tell you to glue the dowels at the leading edge of the wing
that key into the fuselage into the wing during construction.
The completed wing is placed in the