 |
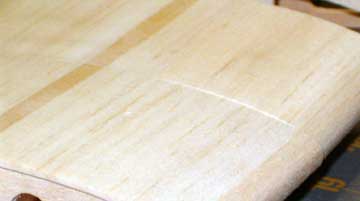
Always sand the entire panel, not just the area that doesn't
match. For example, this photo clearly shows the leading edge is
not the same on both panels. We could just sand the leading edge in
the root area until the panels match, but the edge is probably wrong along
the entire length of the panel.
Use a long
sanding block, such as a T-Bar, to sand along the entire leading
edge.
Again, work slowly and check your work frequently. Be sure to
carefully align the wings on the
building board as if you were going to
glue them together. |
 |
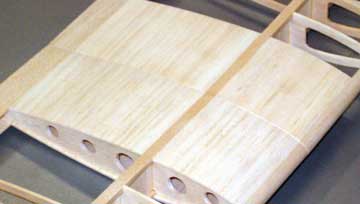
This photo was taken immediately after the one above.
It looks like the leading edges match well but nothing has changed from
the photo above. Note that the sheeting on one panel is
slightly higher than the sheeting on the other panel.
While this could be left alone because it won't cause problems from
an aerodynamic point of view, it will make it more difficult to finish
the wing.
If the panels are off significantly then there is no question that
you should spend some time on them using a sanding block. |
 |
I spent over an hour working on the two panels
individually (taken apart) to bring
them to a close match. Remember, we aren't actually working on
just the center, but the entire wing. I frequently fit the
panels back together to check my progress.
Before the
panels are actually glued together, I dry fit them and work out a
jigging system to ensure everything is ok and that the panels will
stay in the correct position while the glue dries.
I already did this several times when I was sanding
the wing root in the previous installment
of this article. |
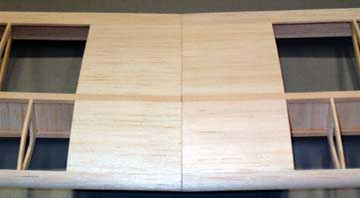 |
The panels are a very close match, the leading edges are
the correct shape and I'm a happy guy. |
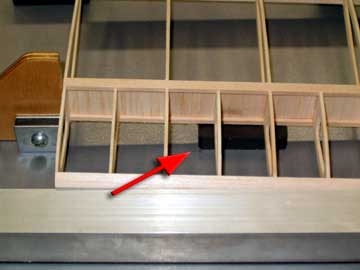 |
The
magnet shown here is propping up the wing panel. You can prop
up the panel anywhere you like as long as the tip is the correct height
off the board. Another magnet is used for the opposite wing
panel. It is in an exact mirror image location as the magnet for
this panel. |
 |
Joining the wing panels properly is extremely important.
I could just prop up the tips to the correct height, eyeball the center
sections and leave it at that. I don't care for
this practice because on more than one occasion I've had the panels
shift while the epoxy cured. The only fix was to saw the panels
back apart.
It's better just to do it right in the first place by jigging the
panels so that they stay in the correct position until the glue is dry.
This wing is a rectangular planform so a straightedge at the
leading or trailing edge will ensure the wings align properly.
Some instructions indicate that one panel should be flat on the board
and the other panel is propped up. While that works in theory,
what can sometimes happen in practice is the propped up panel slides
down which creates a strange center section. As long as the panel
is propped up to the correct height and the panels aren't twisted, you
can use the method if you prefer.
My preference is to prop up both panels. I think it gives a
better end result. |
At this point you can permanently join the wing panels if you are
satisfied that everything is correct and that you have a way to keep the
panels aligned while the glue dries. Put a piece of wax paper
under the center of the wing so the wing isn't glued to the board or the
plan.
Do not join wings using fast-setting glues such as cyanoacrylate or
5-minute epoxy
I use 30 minute or slower epoxy to join wing panels. Having time is
something I especially appreciate when an operation is critical.
Straight wings fall under this category.
Smear a thin coat of epoxy on both root ribs. Take some time
to work it into the grain. A thick coat of glue is not necessary or
desirable. Butt-joins are inherently weak and more glue won't improve
the situation, but will make sanding much more difficult later.
If the wing has a dihedral brace then you can join the panels in your
hands and then put them on the board.
Coat both sides, the top and the bottom of one half of brace.
It is a good idea to also coat whatever the brace contacts inside the wing
panel if you can reach it.
Slide the brace into one panel and then coat the other half. Slide
the second panel on the brace. Pay attention to the brace to ensure it
doesn't slide too far into the first panel. Push the panels together
firmly. Wipe up excess glue using paper towels and alcohol.
You'll be glad you did this.
If the wing does not have a dihedral brace then you'll have to join the
panels on the board unless you have a helper to hold the panels together
while you wipe up excess glue. Ensure that there isn't too much glue
on the root ribs because it will squeeze out from the bottom of the joint
where you can't get to it to wipe it off.
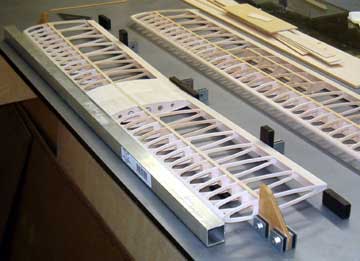
Put all the jigging back in place after the panels are on the board.
In the photo above you can see two
magnetic upright fixtures placed at the spar ends. These fixtures
are applying clamping pressure to the wing center section. You can
also use heavy weights such as cinder blocks, car batteries or
whatever you happen to have.
Measure everything immediately. Ensure the two panels are not
twisted. Check that the wing tips are propped to the correct dihedral.
If you find that you simply can't get everything aligned properly then it is
best to take everything apart and wipe off all the epoxy using alcohol.
If this happened then you skipped one or more steps of preparation.
Assuming that everything is correct, leave the wing to cure thoroughly
before removing it from the board. If the wing does not have glass
cloth wrapped around the center then all you need to do is some final
touch-up sanding and the join is finished. |

