 |
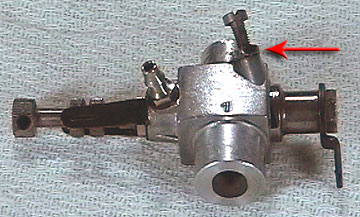
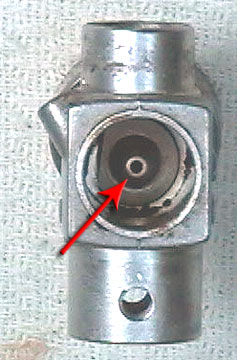
This is the front of the carburetor. This particular
carb is made by O.S. Max and is typical of most R/C carburetors. |
 |
The back of the carburetor. The arrow points to
the throttle stop screw. This screw has two purposes. It
limits the amount the throttle barrel can close and prevents the
throttle barrel from falling out.
Never use this screw to prevent the barrel from
fully closing.
You should always be able to kill the engine from
your transmitter. Using this screw to prevent the barrel from closing
will also prevent you from being able to shut off the engine. |
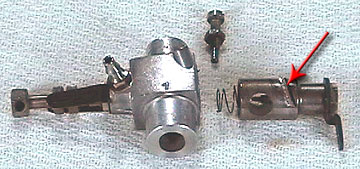 |
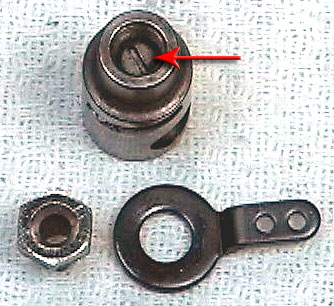
This arrow points to the milled slot that the throttle
stop screw engages. The angle at which the slot is cut causes the
barrel to slide in and out of the carburetor body as the barrel rotates.
The spring to the left of the barrel assists the barrel in moving
properly. |
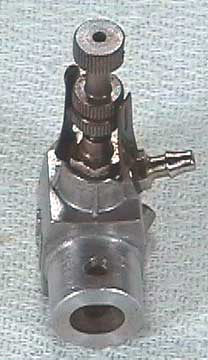 |
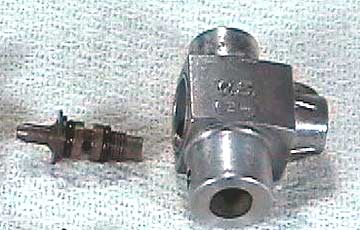
On the opposite side of the barrel is the high-speed
needle valve. It is threaded directly into the spray bar assembly. The needle is used to adjust the amount of fuel that
can enter.
The nipple to the right of the photo is where fuel enters
the carburetor.
The spray bar is a tube in the carburetor where the
fuel actually enters the engine. Most spray bars have a slot in
the tube that atomizes the fuel as it leaves the spray bar. |
 |
This nut retains
both the needle ratchet and the spray bar. When this nut is
removed, the spray bar body is pushed through the carburetor body and
pulled out from the other side. The needle valve should be
treated carefully. It has a precision ground taper and will not
function properly if it is bent, nicked or has other damage. It
can be cleaned with very fine steel wool, but don't over-do it. |
 |
Another view of the spray bar. This is another delicate piece and should
be handled carefully. Any damage at all such as nicks
or bends will almost certainly cause erratic engine runs if the engine runs at
all. |
 |
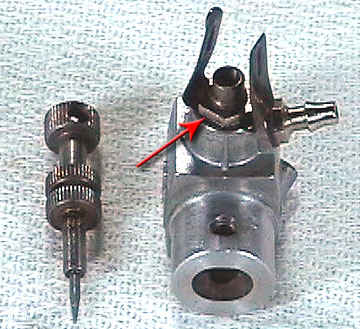
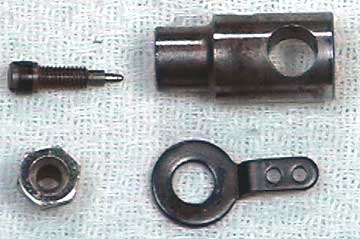
The spray bar body shown on the same side of the
carburetor body from which it was removed. Although it is difficult
to see, there is a hole in the spray bar toward the middle. This
is where the fuel comes out of the spray bar and into the engine.
Again, the spray bar on your carburetor may be attached to the body
in an entirely different manner. In some cases it is a press fit
and is not intended to be removed except at the factory. |
 |
Most carburetors have the low-speed needle opposite the
high speed needle. This is why the carburetor barrel moves in and
out.
As the barrel closes, it moves into the body allowing the
low-speed needle to enter the spray bar which leans the idle mixture.
Therefore the low-speed needle affects the mixture from idle to
mid-range. When the barrel is opened farther than approximately
half-throttle, the idle needle has no effect — the mixture is solely
controlled by the high speed needle.
However, the high-speed needle affects the entire throttle range
which is why it must be adjusted properly before setting the low-speed
needle. |
 |
The low speed needle removed from the carburetor barrel.
There is an O-ring seal near the head of the needle. These
seals are important so take care of them and replace them if necessary.
Air leaks will cause havoc with your engine and you will never get it
tuned properly. |
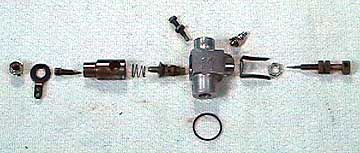 |
The carburetor completely disassembled. By the way,
the O-ring at the bottom of this photo is hard as a rock. This engine is
over 20 years old and has all its original rings.
This one must be
replaced because it will not seal properly and will probably break with
the slightest force. |

