 |
A light oil such as sewing machine oil is a good choice for
lubricating and protecting carburetor parts. |
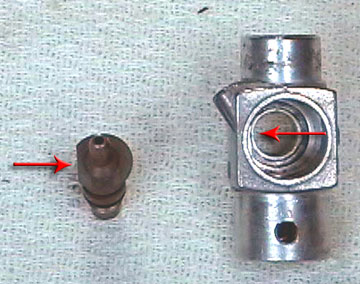 |
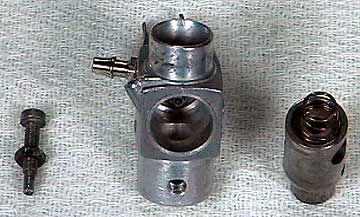
The first item is putting the spray bar back in the
carburetor body. In this case there is a flat on the spray bar that
keys it to the body. The spray bar is oiled well and then pushed
through the body until it keys in place. |
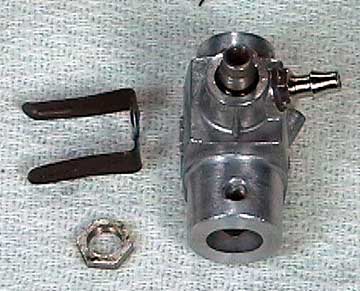 |
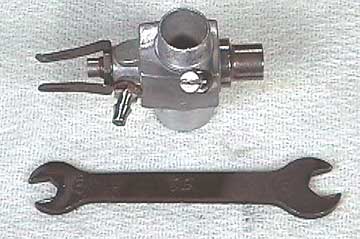
The high-speed needle ratchet and nut are replaced.
This nut also retains the spray bar. I have also threaded the
fuel nipple back on the body.
It is important that you develop a touch for how much to tighten
these items. The carburetor body is soft aluminum and easily
stripped.
Items should be snug but not over tightened. The nipple has a
seal that will spread slightly as the nipple is tightened. You
do not need to completely flatten this seal. Just snug is good. |
 |
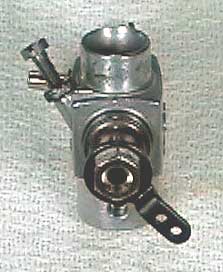
The low speed needle is threaded back into the carburetor
barrel. This needle engages the spray bar as the barrel is closed.
It is likely the spray bar will be damaged if it is threaded in too far and then the barrel is forced closed.
Just thread it in a
couple turns for now. |
 |
The spring is replaced on the barrel. The throttle
stop screw retains the barrel in the carburetor body. |
 |
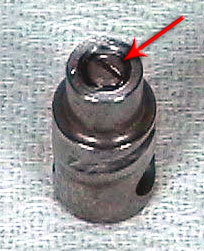
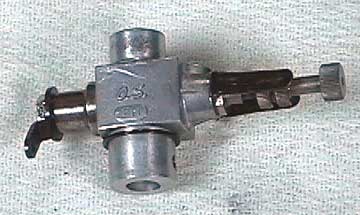
Put the barrel in the body and rotate it so that the slot
in the barrel is toward the back and up and so that you can see straight
through the carb opening (full throttle). Insert the throttle
stop screw. If it does not engage the slot you will know it
because it will jam the carburetor barrel and prevent it from turning.
Be careful with this step so that you don't gouge the barrel.
The stop screw should be threaded in so that it allows the barrel to
fully close. Move the barrel from fully open to fully closed.
Adjust the screw so that the barrel can
move smoothly and doesn't jam at either extreme.
Tighten the lock nut. |
 |
The throttle arm and retainer nut are replaced.
With this particular carburetor, the low-speed needle needs to be
threaded in far enough to allow the nut to tighten. Once the
nut was tight, I unscrewed the low-speed needle until it hit the
retainer nut. Again, this is to prevent the needle from damaging
the spray bar.
Next I closed the throttle fully and turned the low-speed needle in
until it just started to feel snug. From there I turned it out 2
full turns. That will be the starting point for the needle when I
run the engine. Undoubtedly this setting will be too rich and require
further adjustment but the engine needs to be run to determine this. |
 |
The high-speed needle is replaced. It is threaded
in until it just becomes snug and then turned out 2-1/2 turns.
That will be the starting adjustment for this needle. |

