Adding the upper and
lower
decking to the fuselage brings it close to completion
(structurally). Once this sheeting
is in place the fuselage should be very rigid. That means the fuselage will stay how you've built it
— straight or
warped
— forever.
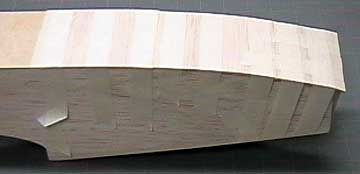
Sand the upper
aft portion of the fuselage
flat to receive sheeting. I have a jumbo sanding block specifically
for tasks like this.
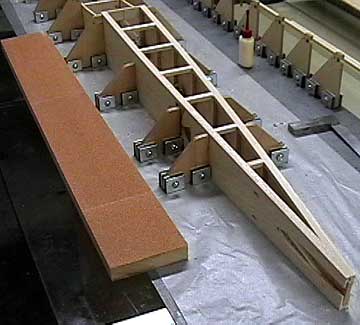
Put the
sheeting in place. I allow
overlap all the way around so that the sheeting can be sanded flush.
It is simpler than trying to get it to align perfectly and gives a neater
end result.
Glue the sheeting in place and weight or pin
it in place with the fuselage still pinned to the board. This is
important to prevent the fuselage from shifting and losing its symmetry.
If for some reason the fuselage warps at this point, then your choices are to remove the sheeting
and try again or to live with a
warped fuselage. Personally, I would remove the sheeting, but I would
rather take the time to get it right in the first place.
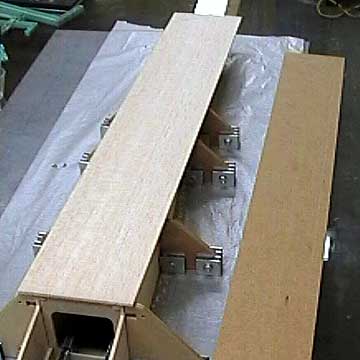
Plane and sand the sheeting
flush with the fuselage sides. This is not a finish sanding.
It is only to remove the excess sheeting so that it does not snag items
on your workbench and get damaged.
At this point I added the wing bolt blocks
and mounted the wing.
The forward deck sheeting is done in the
same manner as the aft deck.
Again, I like to use weight whenever
possible. It provides more evenly distributed pressure than pins
or tape and does not leave holes in the wood.
After the upper deck sheeting has dried
thoroughly the fuselage should be very stable. The bottom sheeting
is glued on with the grain running across the fuselage. The
opposing grain of the top and bottom sheeting stiffen the fuselage
tremendously.
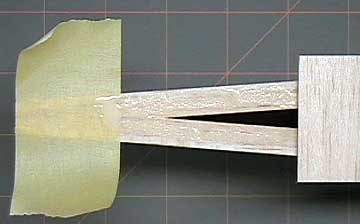
True the edge of the
sheet before cutting the blanks. Cut blanks for the widest portion
of the fuselage first and work your way to the narrowest.
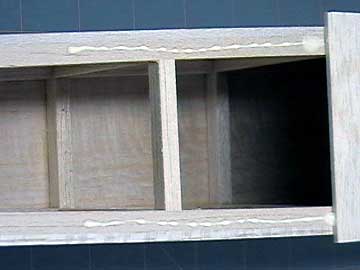
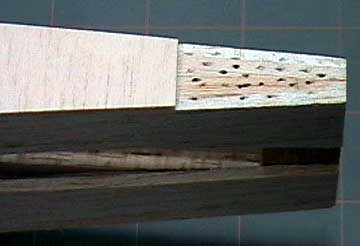
Plywood is used instead of balsa in the
radio compartment area. This is for two reasons:
The
landing gear will be mounted in this
area and repeated work in the radio compartment during the lifetime of
this aircraft will take its toll on the fuselage bottom.
Be sure you have all the sheeting prepared
before you begin gluing it in place. Start by gluing the plywood
sheet in place and work your way to the rear. If the forward
fuselage is also flat then you can glue that sheeting on as well.
If the bottom of the fuselage is
not flat, then you will have no choice but to use pins, clamps and tape to hold
the sheeting in place.
The area for the plywood
tail wheel mounting
plate is masked.
Put the fuselage on a flat surface and
weight it down until it is dry.
Add the lower forward sheeting.
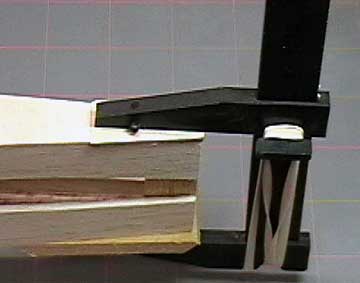
To help strengthen the tail wheel bracket
mounting plate, I have punched shallow holes in the area using a
toothpick. Smear
epoxy over the area forcing it into the holes.
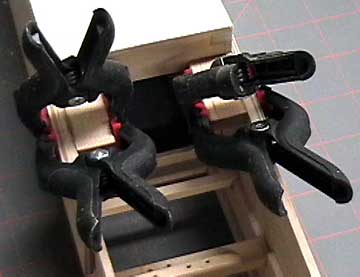
Squeegee off the excess and put the plate in place.
The plate is clamped
in place.
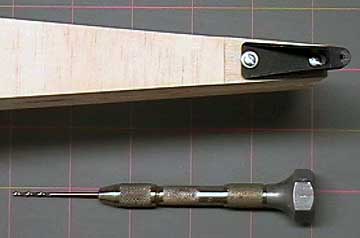
Sand the plate flush with the fuselage
sides. Now is as good a time as any to mount the tail wheel
bracket. The tool I use for drilling small holes is a pin vise.
It gives better control than a drill with much less chance of damage to
the work from the tool slipping.