 |
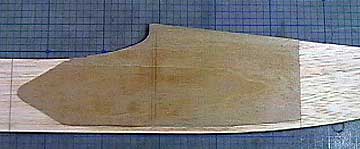
The forward fuselage
doubler is cut from 1/64"
plywood. The wing saddle area
on the doubler is left oversize and will be sanded to
final shape after the doubler is glued to the fuselage side.
Epoxy glue is used to minimize the tendency to
warp. Also, water-based glues can take a long time to dry when used
for laminating.
After the doubler was positioned, a piece
of waxed paper was placed over it and then a great deal of weight was
placed over the doubler until the glue cured.
|
 |
The
wing saddle area has been shaped and
former positions have been transferred to the inside of the doubler. |
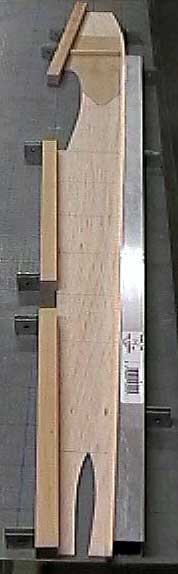 |
A straight-edge is used to align the
longerons inside the fuselage. This will help with alignment later
as well as minimize sanding. |
 |
Vertical supports are used
to prevent the fuselage sides from
cupping. They add a lot of
strength across the grain and their weight is negligible.
A triangle is used to ensure
they are square to the bottom of the fuselage. |
 |
After gluing the longerons in place they are
weighted down to dry. Weight is
added a second time after the vertical pieces are added. |
 |
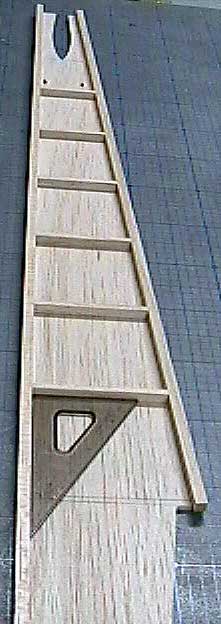
The fuselage sides are taped back together
and block sanded to an exact match. Because of the care taken
during assembly, only a light sanding was needed to remove excess glue.
I used my long sanding block used for
truing
edges of sheets.
Instead of moving the sanding block over the work, I did just the
opposite after clamping the block to the workbench. |
 |
The fuselage side is
jigged up on the board
so that the bevel can be marked at the tail post to bring the fuselage
sides together. The first step is
to determine how thick the fuselage should be at the tail and mark half
that measurement on each fuselage side from the outside. In other
words, if the fuselage is to be 1/4" thick at the tail, then measure
1/8"
from the outside and mark the bevel at that point parallel with
the fuselage center-line. In this case the tail post is 3/8" wide,
so each side is 3/16". |
 |
The fuselage side is trimmed to the line
shown. The line is drawn on one side only. The sides are
laid next to each other and the line is extended across the inside.
Both sides are sanded up to the line. It does not hurt to put a
piece of appropriate diameter music wire at the tail post to act as a
sanding stop.
Sanding to the bevel is not difficult but
take your time and stop to check your work frequently. If you sand
too much away you can add a shim in between the sides to bring back some
thickness. |
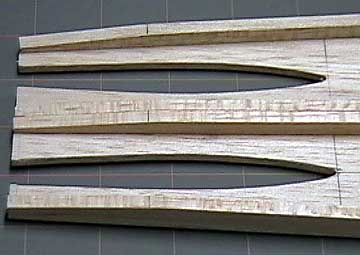 |
The tail end of the fuselage sides after
they have been sanded. |

