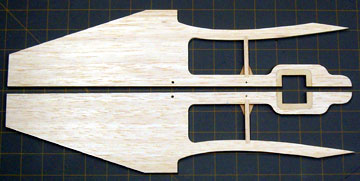
Airfield Models - Warren Truss Fuselage Construction Example

Build Warren Truss Fuselage Sides for a Model Aircraft

December 19, 2021


Home
About
What's New
History
Models Gallery
Model Building Safety
Articles
Mail & FAQ
Site Map
Site Feedback
Contact
Add to Favorites
Comments
Search Airfield Models

Back to Warren Truss Fuselage Construction


Airfield Models (http://www.airfieldmodels.com/)Preparing the Fuselage Sides

OK, I'm not even started yet and I've already told a lie.  A few steps were already completed before I decided to write this article, but you didn't miss out on anything much.

Most trussed fuselage sides have solid sheet in the nose.  This is to add vibration-absorbing mass.  I prefer thicker, lighter pieces to thinner and harder pieces because I feel it has better vibration absorption properties.

Some designs will have doublers glued to the inside of these pieces.


The forward fusleage sides.

Lightly sand the sheet to remove fuzz.  If doublers need to be added before the sides are built go ahead and add them.

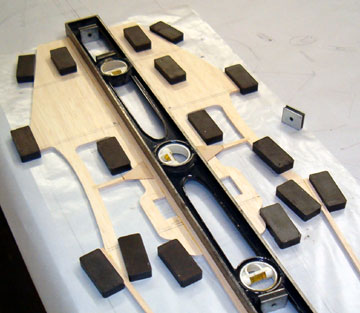
Join the fuselage sides using double-stick Scotch tape.  Sand the sides to an exact match.  Take your time aligning the sides so that you don't remove any more material than necessary.

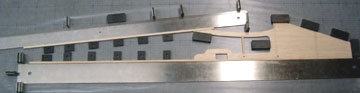
Note that the right side may be shorter than the left side due to right thrust.  If this is the case with your model then take that into account when sanding.

As always, remember to build a left and a right side.  I find that placing them next to each other as a mirror image helps prevent building two of the same side.  I am proud to say that this is one of the few mistakes I have yet to make.

The longerons are glued to the upper and lower fuselage sides. There is normally a longeron that runs the full length of the fuselage from nose to tail.  There is also one that will start behind the wing saddle.

Glue these longerons in place while clamping the assemblies against a good straightedge.

In this image you can see two strong magnets at the rear of the wing saddle that are applying clamping pressure to the lower longeron.  The magnets are set up to attract to each other.

I jumped the gun and glued the small plywood gussets you can see in this photo.  I chiseled them back off because they would have impeded construction later.

The fuselage side is set up over the plan using straightedges to guarantee alignment. Place waxed paper over the plan to prevent the plan from becoming a permanent part of the structure.  Align straightedges over the plan outlines to guarantee that the outlines of the structure are straight.

I set up the fuselage so that the outside is down.  That ensures that the longerons, uprights and diagonals will be flush.

If either the top or bottom longeron is curved then you will have to bend it to match the plan and pin it in place or use magnets if you use the same type system I use.


Previous —
Next —

Build Warren Truss Model Aircraft Fuselage Sides
Making Upright and Diagonal Bracing that Fit

Comments about this article


Back to Warren Truss Fuselage Construction
Airfield Models Home


Copyright © 2004 Paul K. Johnson