Airfield Models - How To

How to Silk a Model Airplane Wing

December 22, 2023


Home
About
What's New
History
Models Gallery
Model Building Safety
Articles
Mail & FAQ
Site Map
Site Feedback
Contact
Add to Favorites
Comments
Search Airfield Models

Back to How-To Articles


Airfield Models (http://www.airfieldmodels.com/)How to Silk a Model Aircraft Wing

How to Silk a WingAs far as I'm concerned the most beautiful model aircraft finish is dyed silk finished with clear dope.  I don't know how long silk has been around but either it or tissue is the oldest model airplane covering still in common use.  There may be other coverings in use from back when but if so they are very obscure.  Nowadays, silk is most often used to finish old-timers.  
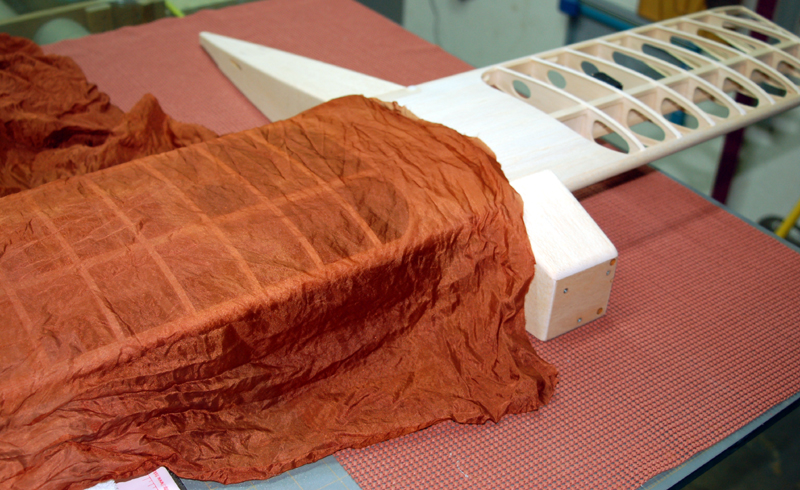
The only type silk I've used is Habotai which is available in several colors and weights.

Silk has extremely high tear strength.  Unfortunately, tearing isn't how coverings are usually damaged so in a practical sense, silk is no more durable than any other covering that would be appropriate for the same model.

Like any fabric or film stretched taut over open framework, doped silk is not difficult to puncture.  This can happen by dropping something on the wing, laying the wing on something sharp or running the model through tall weeds that whip over the wing and pop holes all over it.

If you decide to apply this finish thinking it's going to be your silken masterpiece and it must remain mint forever then you're probably going to be disappointed.  I just want to avoid patches until I get good photos of the finished model.  Actually I want to avoid patches forever, but that's like believing a new car won't get dents.

By the way, I don't think I'd silk any model that is easily ground-looped.  I'm willing to apply patches but it's not an activity I seek out.

Silk is not a difficult finish to apply and is actually very relaxing if you're patient and think each step through.  The fact is I was using silk to cover model airplanes before I owned my first X-Acto knife and I was able to apply it successfully.

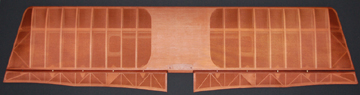
The last wing I silked was my Carl Goldberg Falcon 56 circa 1976 or 1977.  Up to then every model I built was covered with silk, tissue or silkspan.  Even though Monokote was available at the time, I wasn't aware of its existence.

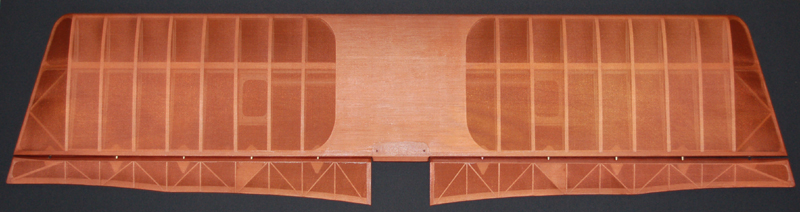
This wing is part of a project that I've put a lot of effort into.  I wanted the silk to be right without making excuses like, 'Well, it's good considering how long it's been since the last time I silked a wing.'

I'm not convinced that dope is actually glow fuel proof.  Dope is claimed to be "hot fuel proof" which isn't the same as fuel proof.  Hot fuel proof actually means exhaust proof.  Exhaust contains mostly oil and shouldn't contain anything more than trace quantities of alcohol or nitromethane which are the ingredients that will break down a lot of finishes.  Oil is generally harmless as long as the model is sealed.

I don't remember any of my doped finishes being melted by fuel but then the models I built when I was a kid were so poorly built that a deteriorating finish would have fit right in.  I plan to make a test piece and see how fuel proof dope is.  I'm going to use it anyway because I don't plan to pour raw fuel on the wing.

Also see


Dying Silk

Silk is available in a wide range of colors but I'll explain what I did in case you want to do something similar.

I purchased a good quantity of white 5 mm silk with the intention of dying it for any given project.  In case you're wondering, mm = momme, not millimeter.  It's a weight measurement.  I didn't know what it was either.

This is the first fabric I've dyed so I may not have done it exactly right but it came out well and close to the color I wanted.  It probably would have been better if I read these instructions first.

I did a Google search on the dying process to see if there were any pitfalls I should be aware of.  I learned two things that I wouldn't have guessed and would have probably messed up the project.

  • The sizing in silk can keep it from taking dye evenly.

    There is a product several people recommended to wash the silk but I used tri-sodium phosphate with the assumption it would do a good job.

  • Silk should be wet before putting it in the dye solution.

    Had I not come across this information I would have put the dry silk in the hot dye not knowing any better.

I cleaned a stainless steel pot to ensure there was no oil or anything that could get into the dye solution and mess things up.

I filled the pot about 2/3 full and brought the water to a boil.  I then backed off the heat to a rolling simmer.  I added about one tablespoon of TSP to the water and stirred it with a wood spoon.

The wet silk was added and stirred for about five minutes.  The silk was removed and placed in a clean metal colander where it was thoroughly rinsed with warm water.  Then I rinsed it a couple more times.  A colander is a bowl of holes used by bachelors to drain spaghetti.

The pot was dumped, cleaned and filled with fresh water that was again brought to a rolling simmer.

I used Jacquard acid dyes.  My mix was 3 parts Sun Yellow, 1 part Cherry Red and 1/2 part Jet Black.  Each part was 1/4 teaspoon.

The dye was stirred thoroughly with the wood spoon.  Some of the dye stuck to the pot at the top of the water.  I dropped in a paper towel and stirred it around with the spoon to remove all the dye crust stuck to the pot.

The wet silk was placed into the dye mix and constantly stirred for about twenty minutes.

I removed the silk and added white vinegar to set the dye.  The silk was placed back in the pot and stirred for about five more minutes.

The silk was removed and rinsed.  I placed the silk in the washer on a gentle cycle set ahead to Rinse and Spin.  When that was complete I put the silk in the dryer on low heat for about 10 minutes.

Jacquard Acid Dyes Jacquard dyes were recommended to me for dying silk.  They are easy to use.  I bought what looked to be the closest to primary colors so I could mix about any color I want while having only four bottles on hand.
Dyed silk I dyed the silk in very hot water on the stove.  The silk had been set and hand rinsed before this photo was taken.

In the upper left is my big non-dyed silk wad.

The final product I was looking for a blood red color that would become a closer match to the salmon-colored balsa fuselage as the color fades.  I don't know that it will work out that way but at least I rationalized myself into action.

I always get stuck when it comes time to finish a model because I basically have to sit around and wait until a color scheme pops into my head which can take a very long time sometimes never.

I still didn't know what I was going to do with the fuselage as far as coloring it.  I knew it was going to be glassed but wanted it to be a closer match to the wing than my previous models.

I decided to silk the wing first and go from there.

I'm very happy with how the silk turned out.  Now let's see if I can do it justice by applying it properly.

In this series

Also see


Previous —
Next —

How to Apply Fiberglass Cloth to a Model Aircraft
How to Create Multi-Part Film Covering

Comments about this article


Back to How-To's
Airfield Models Home


Copyright © 2009 Paul K. Johnson