 |
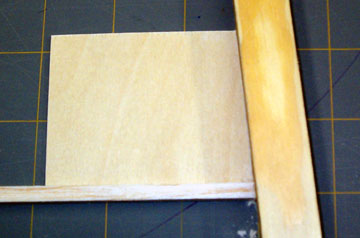
I skipped another step. You may think that you see
uprights in this photo but you actually don't. You're either
imagining things or maybe you can see into the future. What you
should see is a plywood sanding template. Cut a piece
of scrap plywood that aligns perfectly on all sides. Take
measurements from the plan to ensure the angles are correct.
Take care making the template because it will determine how well the
joints of the uprights and diagonal bracing will fit. |
 |
Make a
sanding block having faces that are all square to each other.
I used 3/4" square pine.
Use
spray glue to attach medium (220)
sandpaper to one side and fine (400) paper to the other.
Note:
This sanding block will come in handy for all kinds of
purposes, so don't think of it as a limited use item.
Place
the upright brace against the side of the template and gently
sand the one end.
Balsa sands away at a much faster rate than plywood so the template should easily last
through the project. If you happen to sand too much of the
template away, correct it before sanding any more braces. |
 |
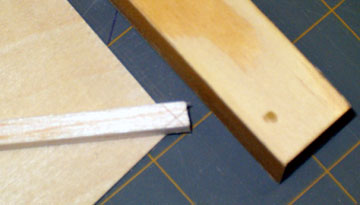
Fit the sanded end of the upright to ensure the angle is
correct. Lightly mark the other end with a single-edge razor blade.
Use the template to sand the end of the brace to fit. Be conservative and
leave the brace over-length at first. Sand a little away at a
time. Fit often.
The bracing should be a good fit — not too snug and definitely
not loose. |
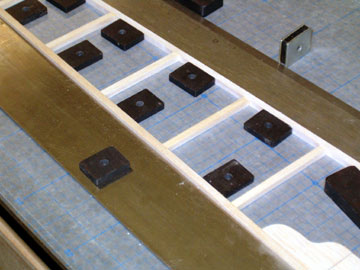 |
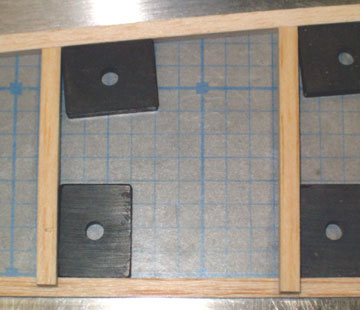
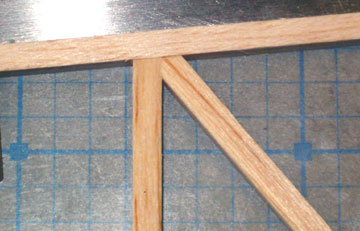
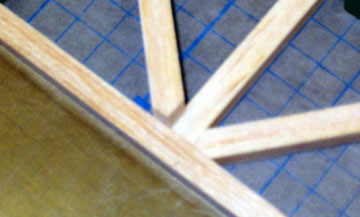
Here you can see several upright braces glued into place. |
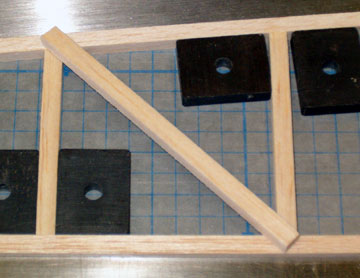 |
The template you made will make short work of
this task and for a change, the diagonal braces will actually fit properly.
Cut the piece over-length as shown. Lay the brace over the
fuselage side aligning it with the plan.
I normally ignore the plan and instead align the brace so that it centers on the corners made by
the upright and longeron. |
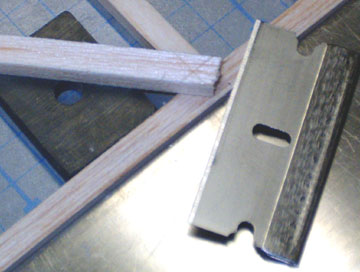 |
Carefully align the razor over the longeron and existing upright
and use it to lightly mark the bevels.
You do not have to mark directly above the joint. In fact, it's
best to mark slightly over-size.
It is important that the
angle of the cut lines exactly match the corner in relation to the
centerline of the diagonal piece. Read that a few times until it
makes sense. |
 |
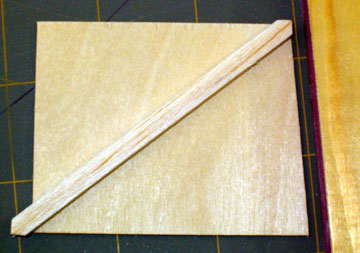
Place the diagonal brace over the correct corner of the
template ensuring that the marked lines are aligned properly with
the template and that the end of the brace is centered over the template
corner. |
 |
Sand the end to shape. Although I didn't do it, a piece of sandpaper spray glued to
the template would have helped prevent the diagonals from sliding around while
I was sanding. |
 |
At this point only one end is sanded to shape but look at
both ends. The opposite end should
be too long but should center over the existing joint.
If the other end isn't centered properly then note which way
the diagonal must rotate.
Take the diagonal back to the template to correct it.
When you are satisfied with the first end, mark it with pencil so that you know
which side is up and which end is which. It's easy to flip the
part around when adding glue or whatever. Once glue is on the
ends, it is more difficult to tell which end is which. |
 |
Repeat the above steps for the other end. Note
that if the fuselage has straight outlines, but also tapers, then the
angle on the ends will always be the same on braces that are aligned in
the same direction.
However, the diagonal braces are not parallel to each other and
therefore the angle on the end will not be at the same angle to the
centerline of the brace.
I know that sounds confusing, but once you start making these pieces
you'll understand what I mean. My point is that you can't stack up
all the diagonals and cut them at once. They won't fit if you do
that. |
 |
If the diagonal is still too long then you can make
adjustments while sanding away the excess. Always use the
template. If
the length of the diagonal is correct, but one end or the other doesn't fit
properly then
there's not much you can do. Your choices are to live with it or try
again with a new part.
This was my first time using a template and I only had to discard two
parts. I have a higher reject ratio using a disk sander and a much
higher reject ratio making braces when cutting and sanding by hand. |
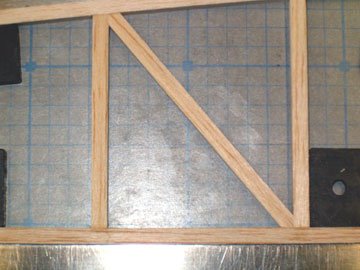 |
This is how the diagonal should fit. The diagonal
slips in place easily but is not too loose and not too snug.
Do not force a tight brace into position. It will create
undesirable internal stresses and may weaken the longeron by crushing
the wood fibers. It will also be forcing the glue joint apart of
the upright braces. |
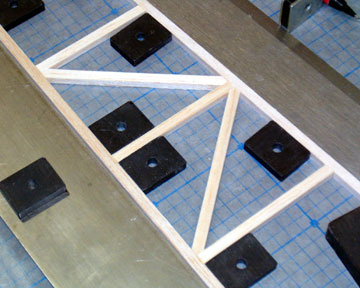 |
Double-glue the ends of the
braces using carpenter's glue. Put some glue on each end
and set the part aside for a minute. Put some glue in the existing
joint as well. After giving the glue some time to soak into the
end grain, add a little more glue and put the part in place.
Ensure everything is flat on the board while the glue dries.
Make a scooper from a toothpick or bamboo skewer by
cutting a long bevel on the end. Use it to scoop up all the glue
that oozes out.
Your work will look especially neat now that you have made perfect
fitting joints using nicely sanded pieces and there is no visible glue. |

