Airfield Models - How To

How I Make Magnetic Fixture System II Fixtures

April 02, 2024


Home
About
What's New
History
Models Gallery
Model Building Safety
Articles
Mail & FAQ
Site Map
Site Feedback
Contact
Add to Favorites
Comments
Search Airfield Models

Back to Magnetic Building System


Airfield Models (http://www.airfieldmodels.com/)How I Make Magnetic Fixtures

News About My Magnetic Fixture System (Pricing and Availability)

I enjoy seeing how people make stuff.  I don't think it's a stretch to assume most people visiting this site do the same since most of this site is about seeing how things are made.

Since I've released my Magnetic Fixture System II, I've received a number of emails from customers who comment to the effect that I must be using CNC or some other automatic process to make my fixtures due to their consistency and accuracy.

While I am sincerely complimented, the idea that I use CNC really minimizes the amount of work I put into making these.  Besides, I can't begin to afford that kind of equipment even though I'd love to have it.  I'm in the same shop you see all over this site a 10' x 30' garage.


Cutting the Fixtures

Because this is a one-man operation I have total control over quality each step of the way.  Rejects average a little over 5% with nearly 90% of those rejects being defects in the wood.  Other fixtures are rejected due to mis-cuts, excessive splintering and that sort of thing.

I hang on to rejects to make test cuts and check various tool setups.

Anyone who has ever worked with plywood can tell you that it is anything but flat.  So before doing anything else I grade my wood.  The flattest wood is used to make the tallest fixtures.

Out of forty sheets only six were good enough to make 6-magnet fixtures.  The plywood that is too warped to use for anything goes into my wish pile where one day I will pull the sheet out and it will have become magically flattened.  I'll let you know if that ever happens.

I keep track of what I'm selling so that I can cut out fixtures in a ratio roughly equal to what I've sold.  Next I make a chart detailing how many fixtures of each size I plan to make.  Using that information I pull the wood and cut it into strips.

Two widths of strips are cut to make four and six-magnet fixtures.  What you see here is twenty sheets of plywood to make 1,056 fixtures before rejects.  When the run was complete I had exactly 1,001 fixtures.  When I pull fixtures for orders I will discard any fixtures that have defects I didn't catch before.  That hardly ever happens though because by the time the fixtures are finished I've handled each one many times and have viewed it from every angle imaginable.

I get into a rhythm with each step so sometimes minor defects get by and make it into the final stock.  I inspect each fixture again when I put together an order so those last few don't make it into orders I ship.

Templates are used to trace out the blanks for each fixture size being made.  Each blank makes a pair of fixtures.

When I cut the blanks I use every bit of wood that I can.  If a left over piece is big enough to make a fixture I use it.

The blanks are separated using a scroll saw.  I don't leave a lot of room between fixtures so I can get as many as possible from each board.  Therefore I use a good blade that won't splinter the wood.  If the blade did cause significant splintering I would have to discard the piece(s).

Update: I finally acquired a band saw and I make a lot more fixtures at a time than shown here.  The last run took me three days to separate them in this step.  Using a band saw took me about three hours.  I could cut apart ten blanks at a time instead of two which means I didn't have to draw the pattern on nearly as many blanks.

Additionally cutting apart the stack of ten blanks on the band saw was faster than cutting apart a stack of two blanks on the scroll saw.

I broke one $25.00 blade though.  It was very much worth it in time saved.

The front face of every fixture is manually sanded straight on a 180 grit sanding board.  Fixtures that need a lot of work are first milled straight using my router table as a jointer.

If you purchase a fixture set from me that has a fixture with a front edge that isn't straight you should return it.  That is a defect that can't be corrected because it will cause the drilled accessory mounting holes to be too close to the front edge of the fixture.  You will get no hassle from me just a very sincere apology and a replacement fixture.

The top of the fixture is sanded square to the face.  A 20" disk sander is on my list of future tools.
Every fixture now has the front face sanded straight and the top edge sanded 90° to that face.

A photo of all the fixtures after completing a step is going to be a repeating theme on this page.  From here on out these photos will be thumbnails.

Each stack you see is approximately twenty fixtures.

I have a dedicated table saw sled for each fixture size.  Smaller fixtures are cut using my Byrnes 4" table saw as shown here.

I very highly recommend this saw to anyone who cares about achieving extreme precision.  I've been using mine for a couple of years and can honestly say that you can achieve precision between 0.001" and 0.002" consistently if you also purchase the micrometer accessory, use the correct blade and take the time to make test cuts that are checked with a caliper.  I'm really not exaggerating.  This is just a fantastic saw.

 Larger fixtures are cut using a high quality plywood/laminate blade with my 10" table saw.  The saw itself isn't very accurate but the sled and other jigs I've made makes it not matter.
This cut-off sled is really nice.  I use it to cut all fixtures to their final height.

My last run of fixtures was cut using a similar sled that was hastily thrown together.  It worked but it used a stop that was bolted in place for each fixture size which wasn't very convenient.  When the first run was finished I made this sled which is much better.  The ruled lines on the aluminum extrusion are more than 1/32" wide which means they can't be depended on.  There is just too much margin for error.

I used a sharp razor knife to scribe markings on top of the extrusion on both sides of the stop at each fixture height location to ensure that fixtures made in the future will be very close to the exact same height as the fixtures I am making now.  Of course that requires the same saw blade to be used as well.

I have also come to love melamine because it's durable, easy to maintain, stands up to every solvent I use and it's slippery.  What that means is when I'm sliding stacks of fixtures around the bottom fixture doesn't stick to the board while the rest of the stack topples over.

The final saw cut brings all fixtures to their finished width.  Next stop the drill press.

As you can see there are several saw cuts required to make each fixture.  None of this was automatic as I had to experiment with a lot of different saw blades to get consistently good results.  Plywood splinters very easily particularly cuts parallel to the grain of the outer laminations.

All done.


Drilling Holes

(Oh how I LOVE to drill holes!  Lots and lots and lots and lots and lots and lots of holes...)

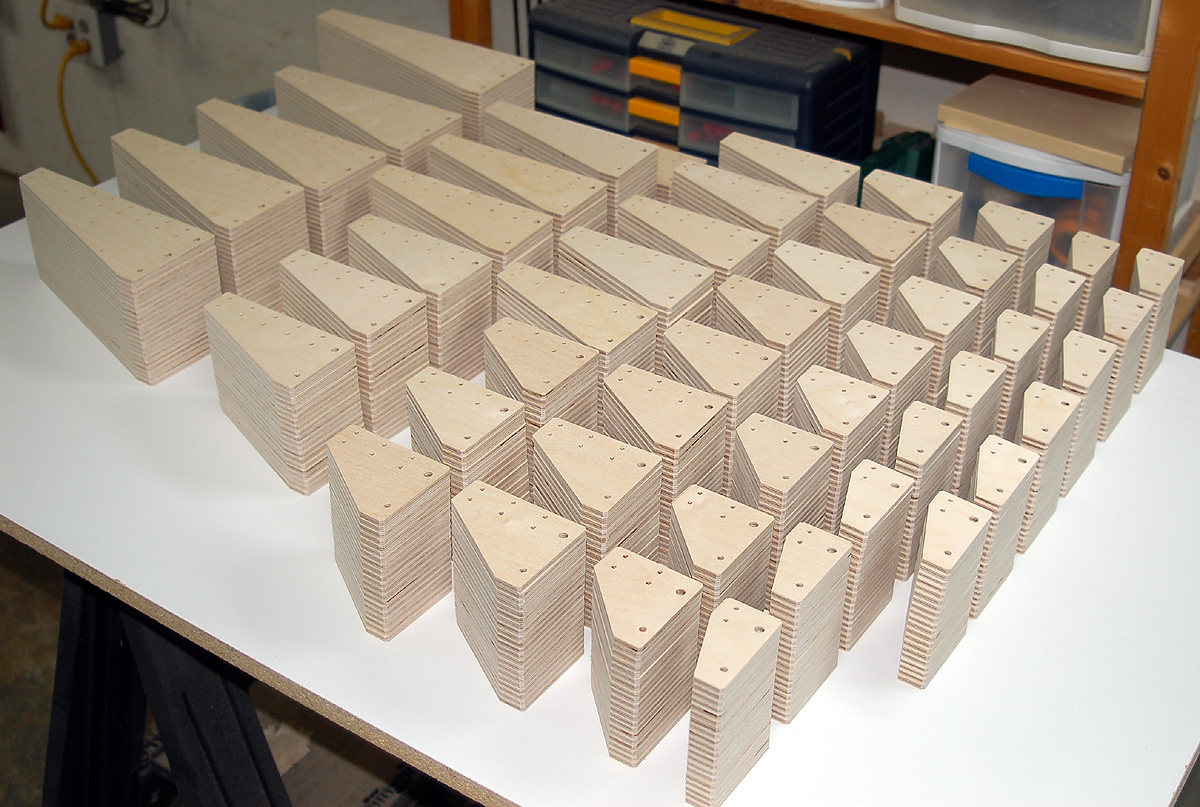
By the time I was finished I drilled 9,116 holes not counting however many holes got drilled in fixtures that were rejected after the holes were drilled.  If a fixture is going to be rejected it's a lot better to 
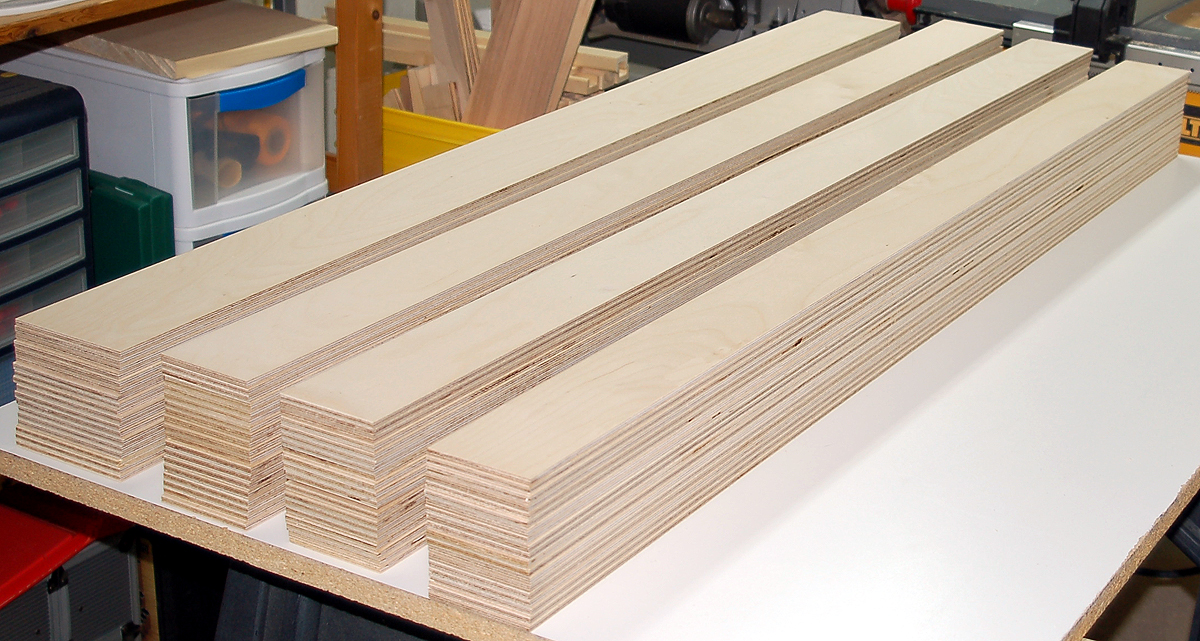
find out before drilling holes in it.  Magnet-mounting holes are drilled into a pair of fixtures at a time.  But the accessory holes are drilled one hole at a time in individual fixtures for maximum accuracy.

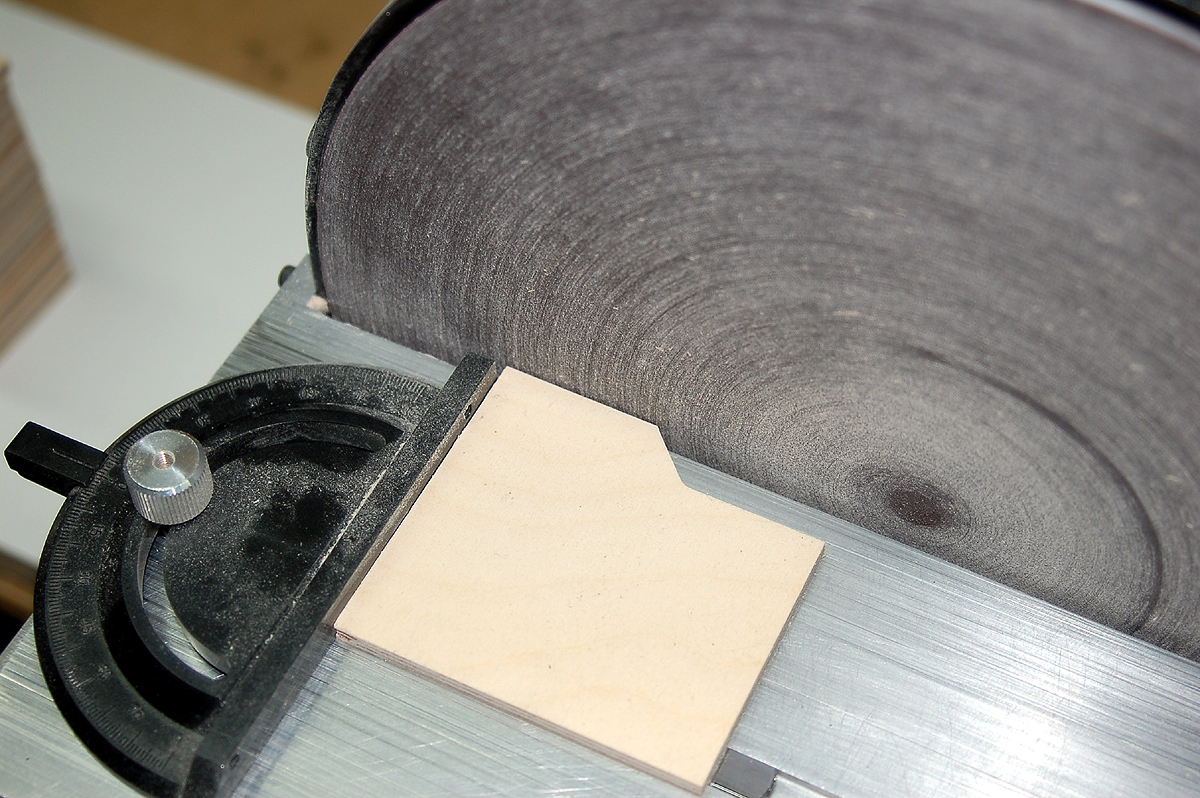
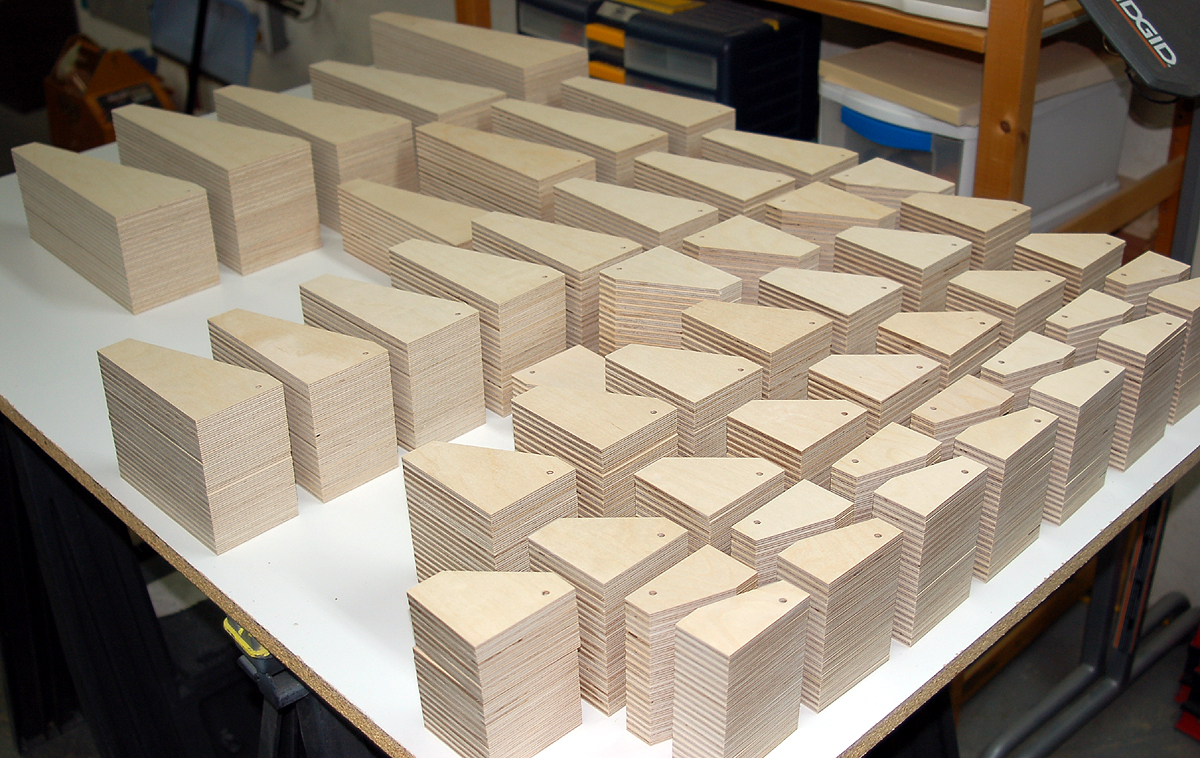
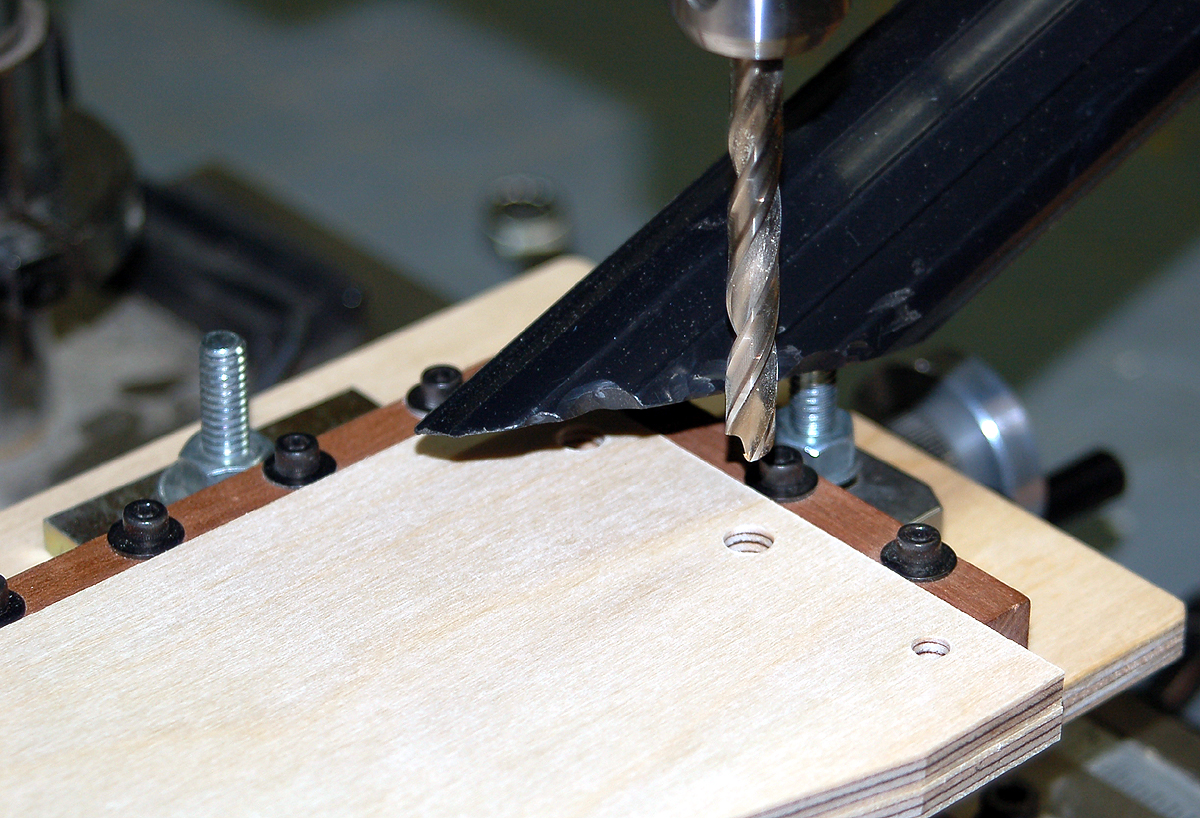
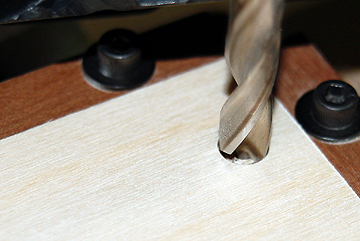
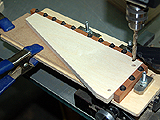
I begin by drilling the magnet-mounting holes.  These holes are two sizes with the forward hole (and middle hole in six-magnet fixtures) being larger than the rear hole to allow the fixture to be squared 90° to the building board.
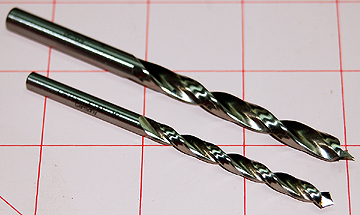
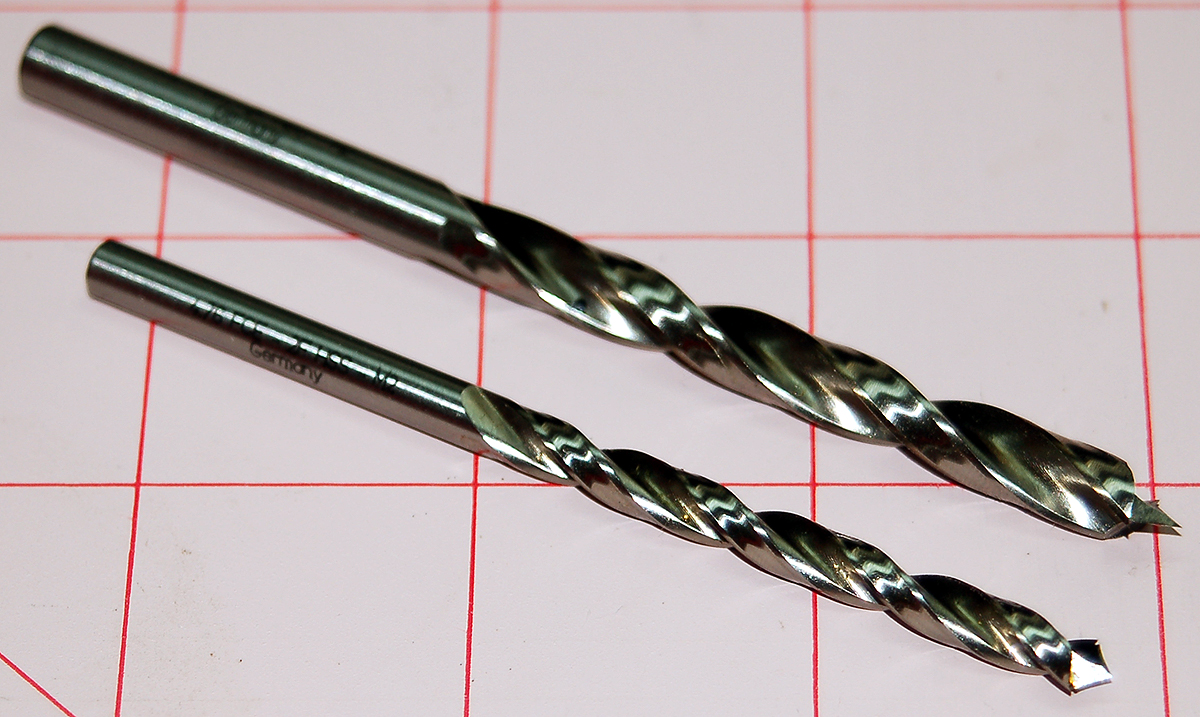
These 
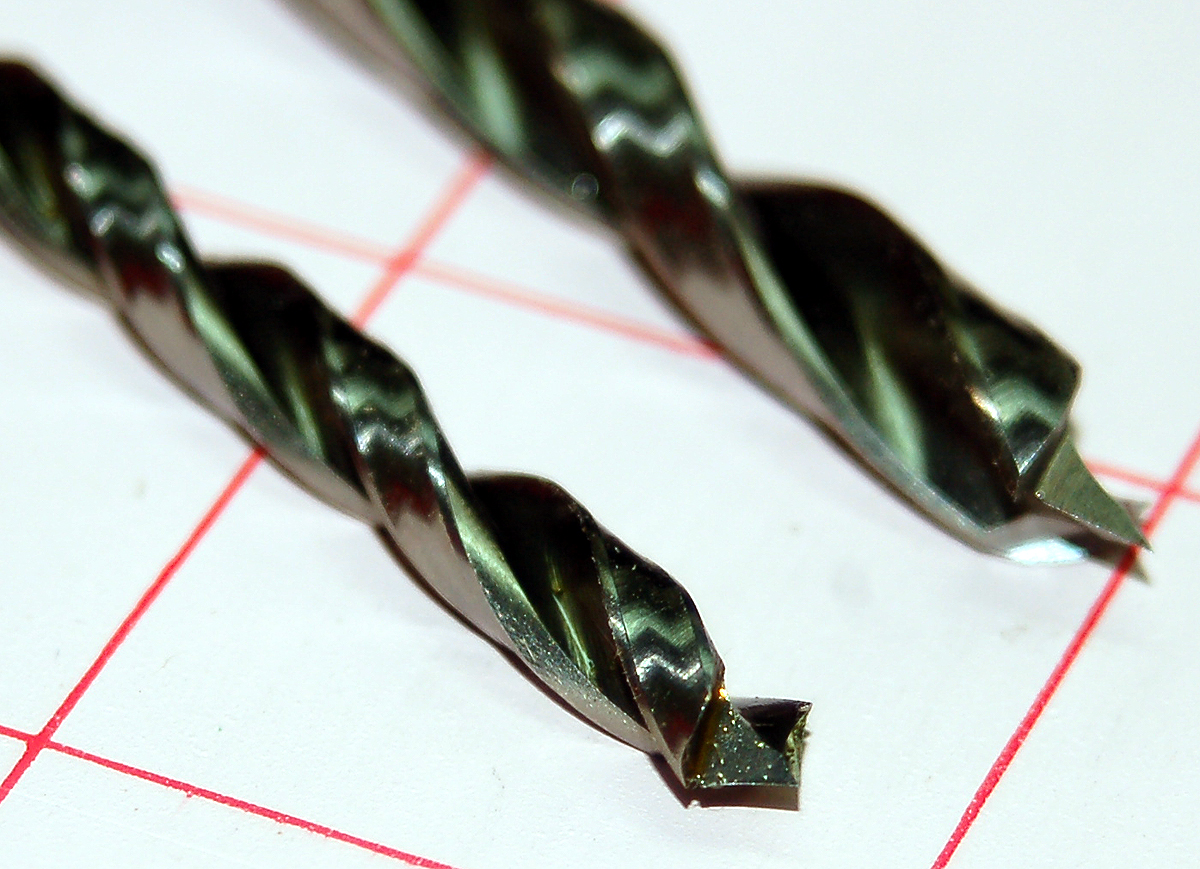
are German made brad-point drill bits.  They are somewhat expensive but last longer than the brad points I've purchased at local hardware stores making them worth the investment.
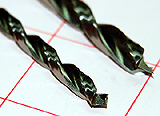
A close up of the drill bit tips. 

I started with the rear hole.  The drill press is set up and tested using a rejected fixture before drilling the good fixtures.

The fenced table I made for my Microlux X-Y table (compound table) allows very accurate drilling.  It's a small table but very appropriate for what I do.  I have looked for larger tables to use with my larger drill press but they are very heavy and I doubt the drill press table could support the ones I've seen.

Compound tables are generally intended for use with milling machines, not drill presses.  They can be used with a drill press but the  drill press table needs to be able to support the weight.

All done.


Next I drill all the front holes.  Because the front and rear holes are centered the exact same distance from the bottom and the front or rear of the fixture all I need to do is change out the bit, test drill one of the rejects and start drilling if everything is ok.

All done.

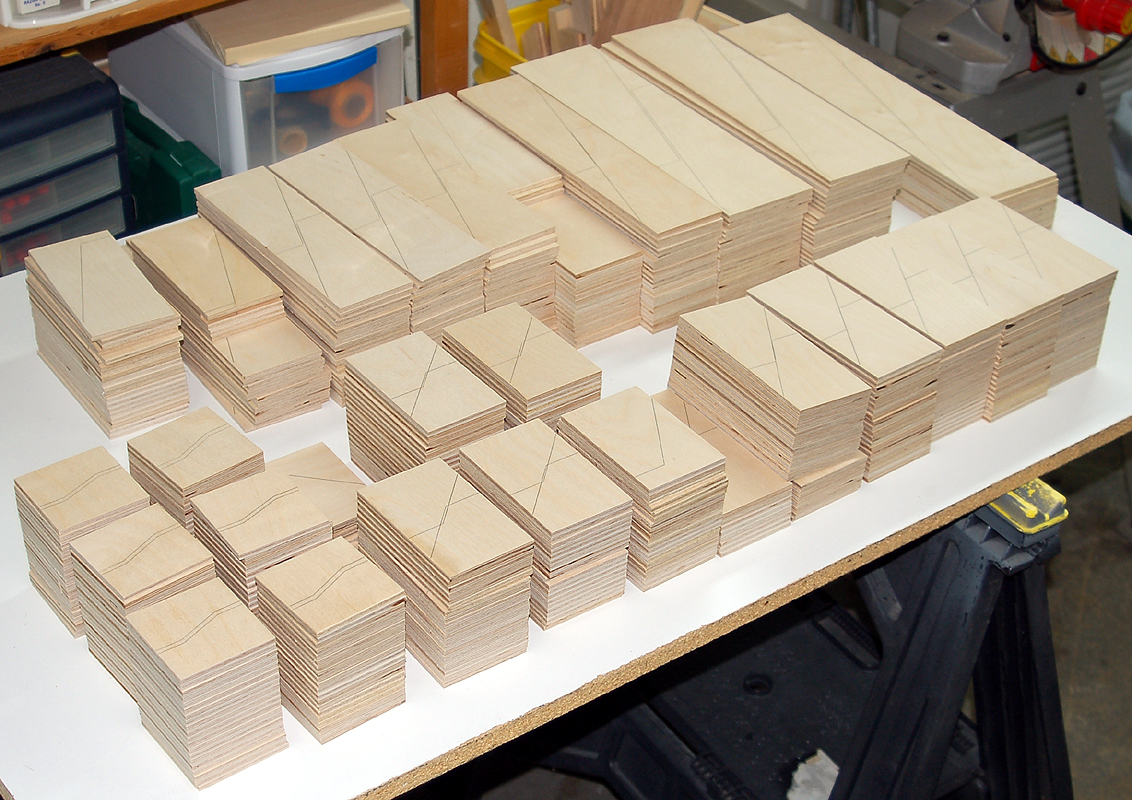
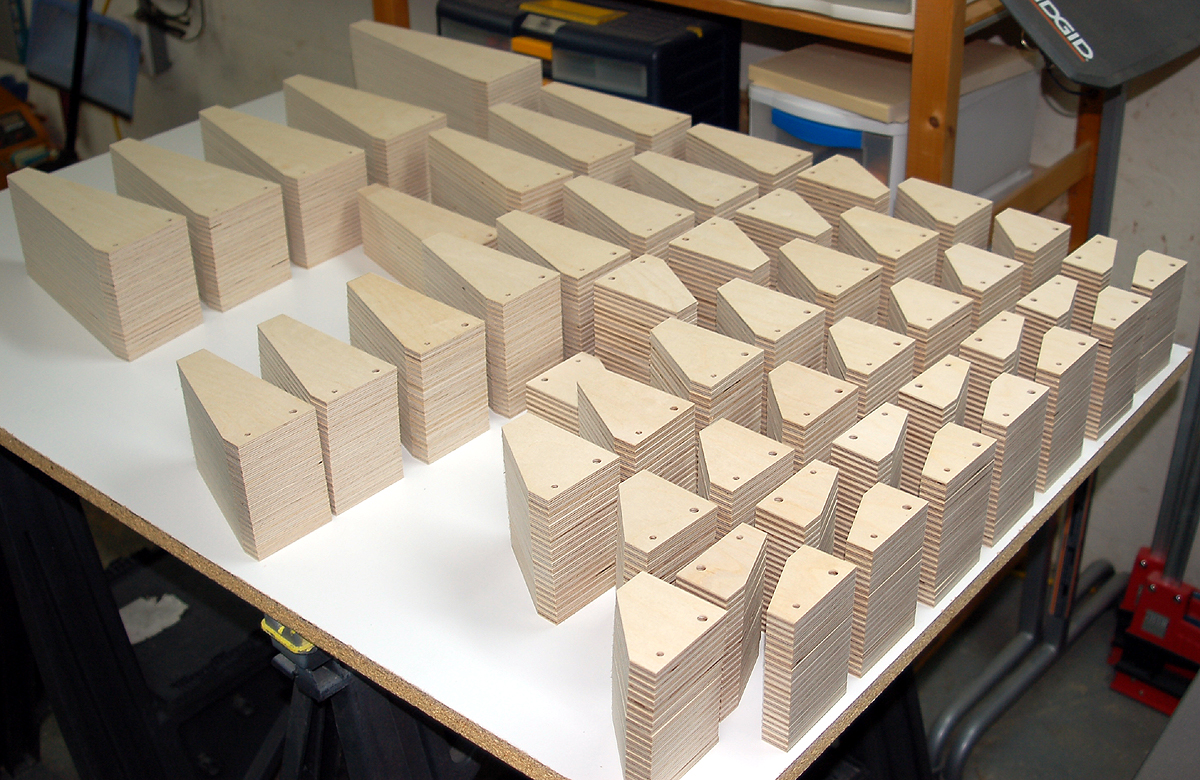
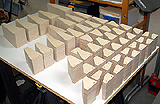
Finally the center magnet-mounting holes are drilled in all six-magnet fixtures and that completes the drilling of magnet-mounting holes.

All done.

I won't be drilling any fixture holes using my miniature drill press in the future.  I built a mount so I can install this X-Y table on my larger bench top drill press which is more suited to production work.  In fact, I strongly recommend that you do not buy the drill press shown here.  I will be writing about it elsewhere on this site and when I get to it there will be a link from here so you know why you shouldn't buy it.

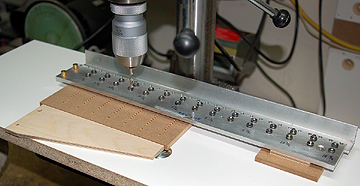
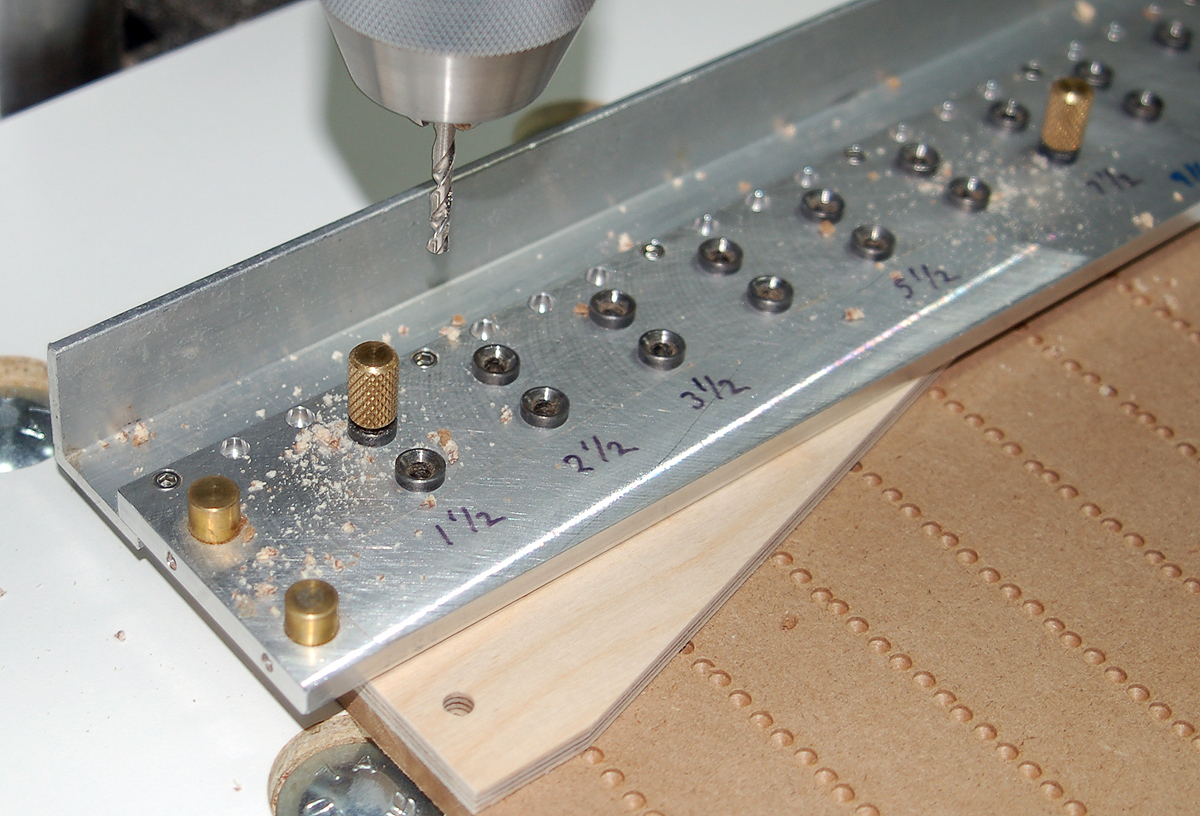
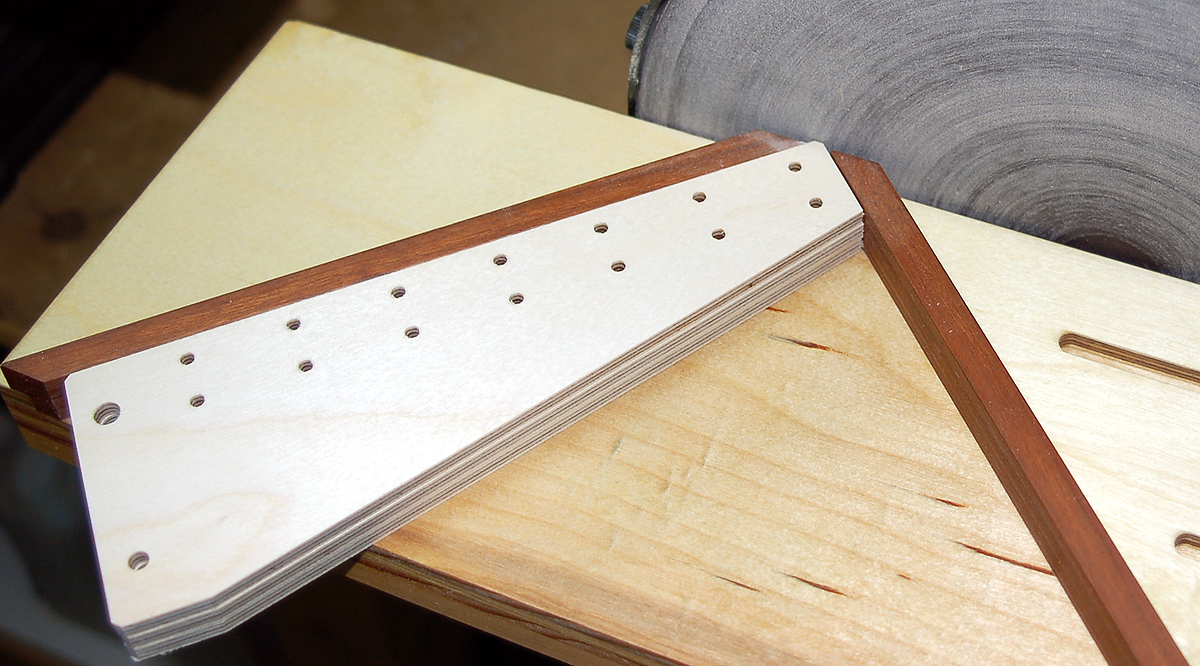
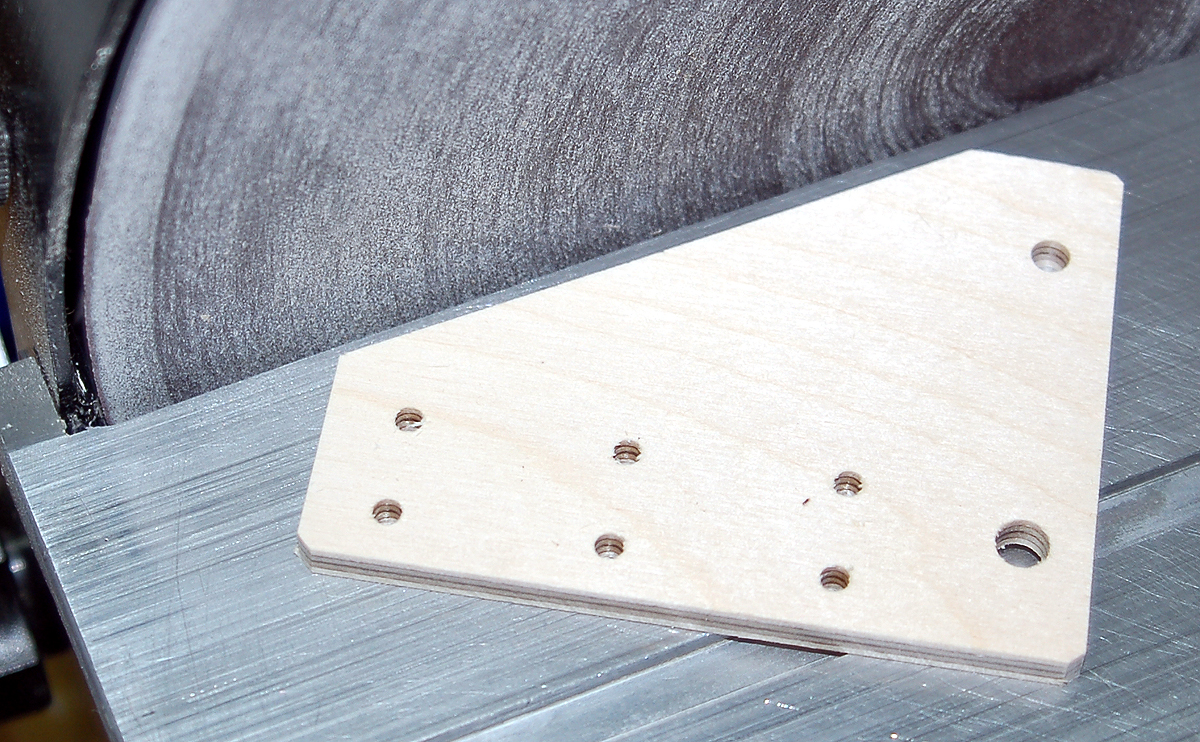
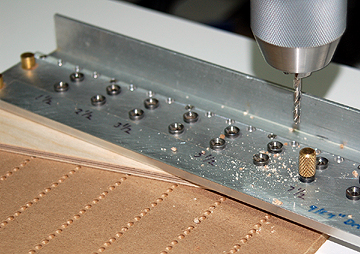
Now it's time to get serious about drilling.  A repeating pattern of mounting holes is drilled to allow the mounting of various accessories such as Vertical Presses and Press Bridges.

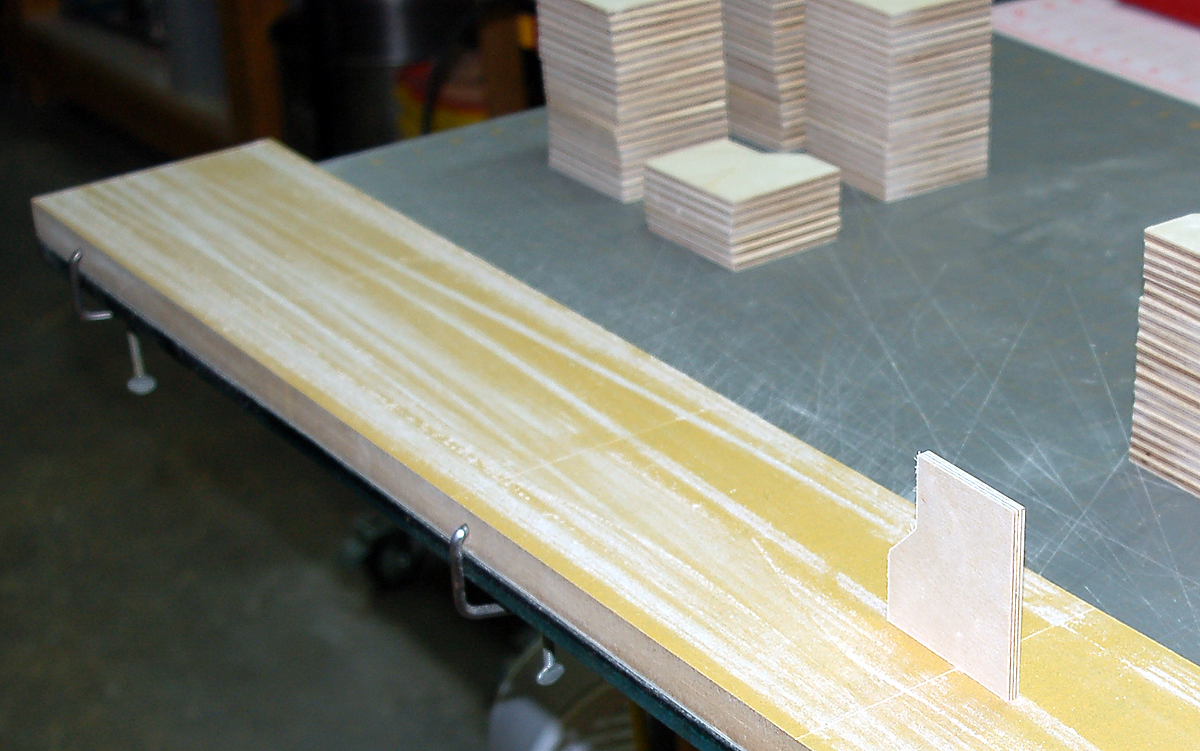
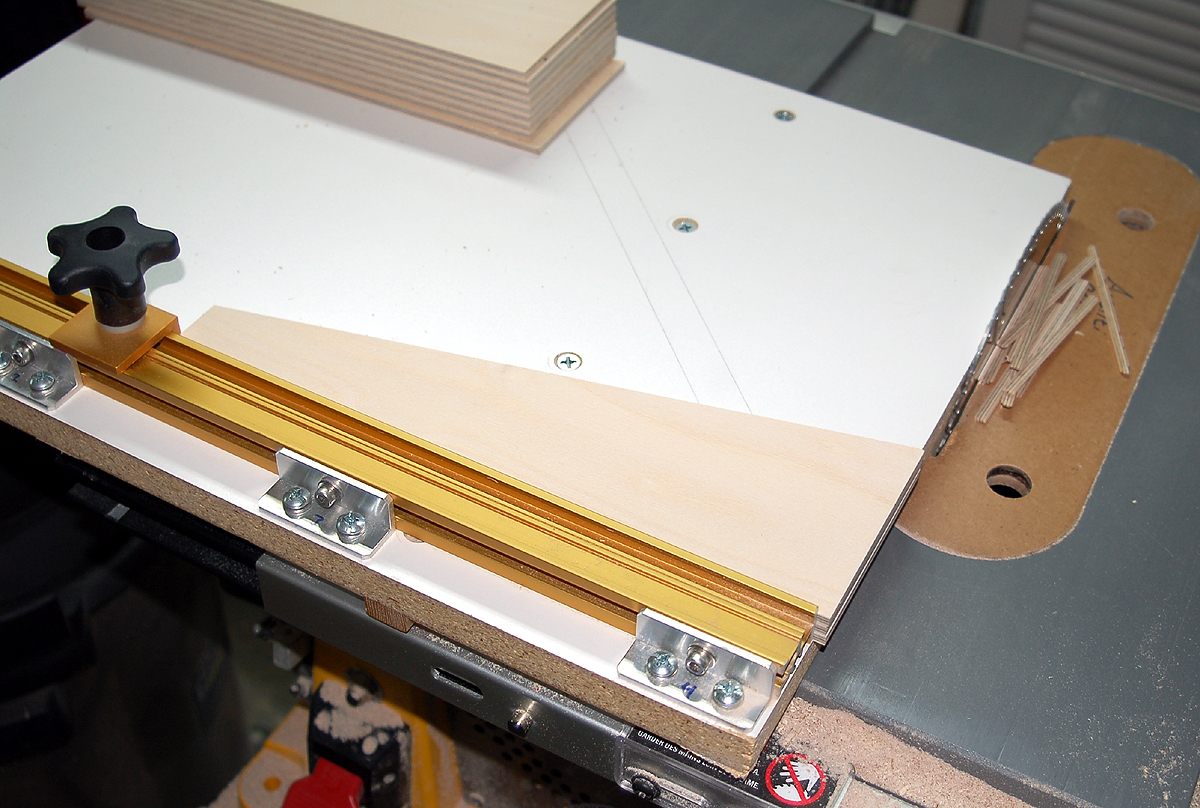
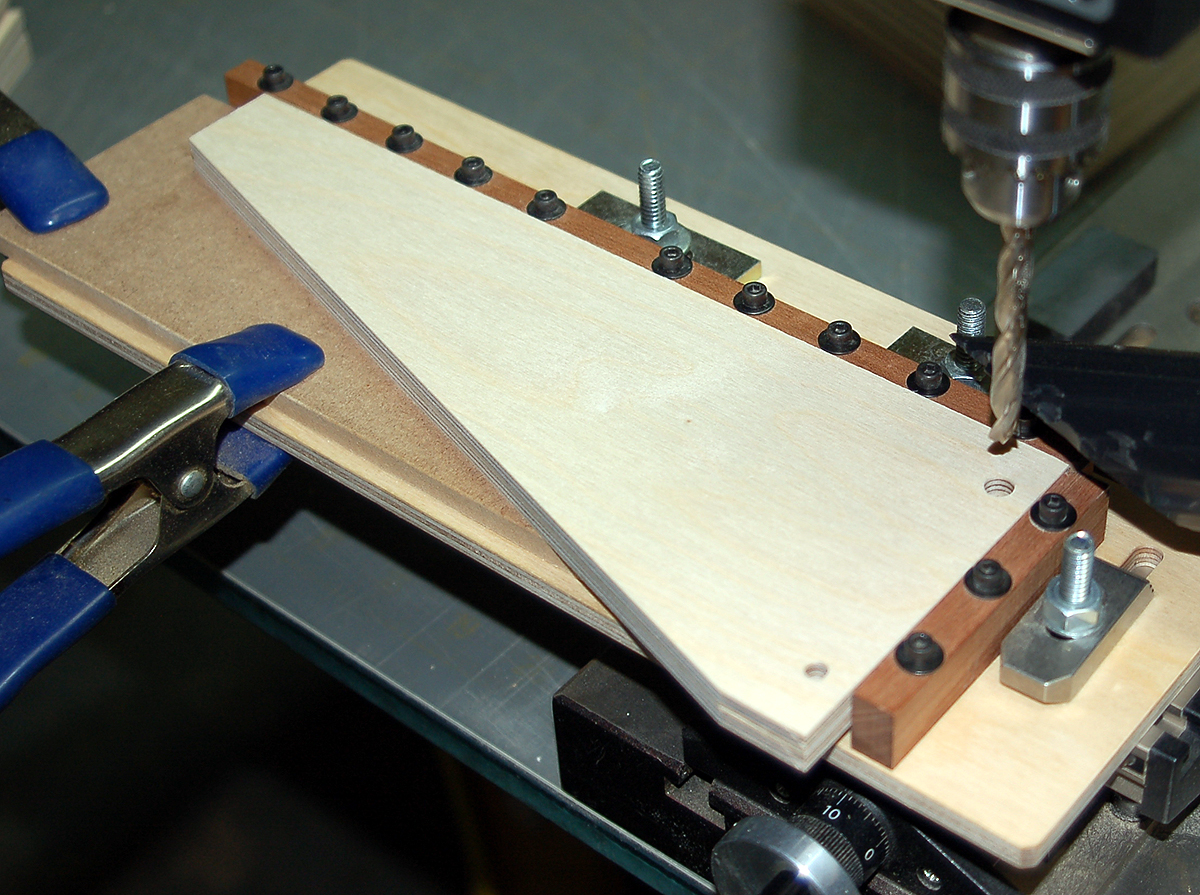
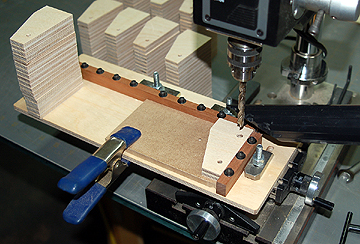
This drill jig was made by my machinist friend Joe Tabajdi.

This jig is aluminum with fifteen pairs of hardened steel drill bushings pressed into place.  There is a forward fence and two brass rod stops at the bottom of the jig.  Every fixture is placed against the fence and the stops which results in an identical hole-pattern on every fixture.  It's a beautiful thing because it allows items such as bridge presses to be mounted to fixtures which do not have to be the same size.

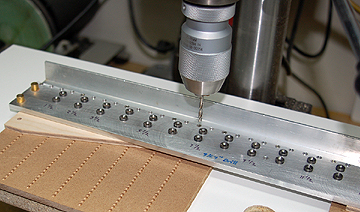
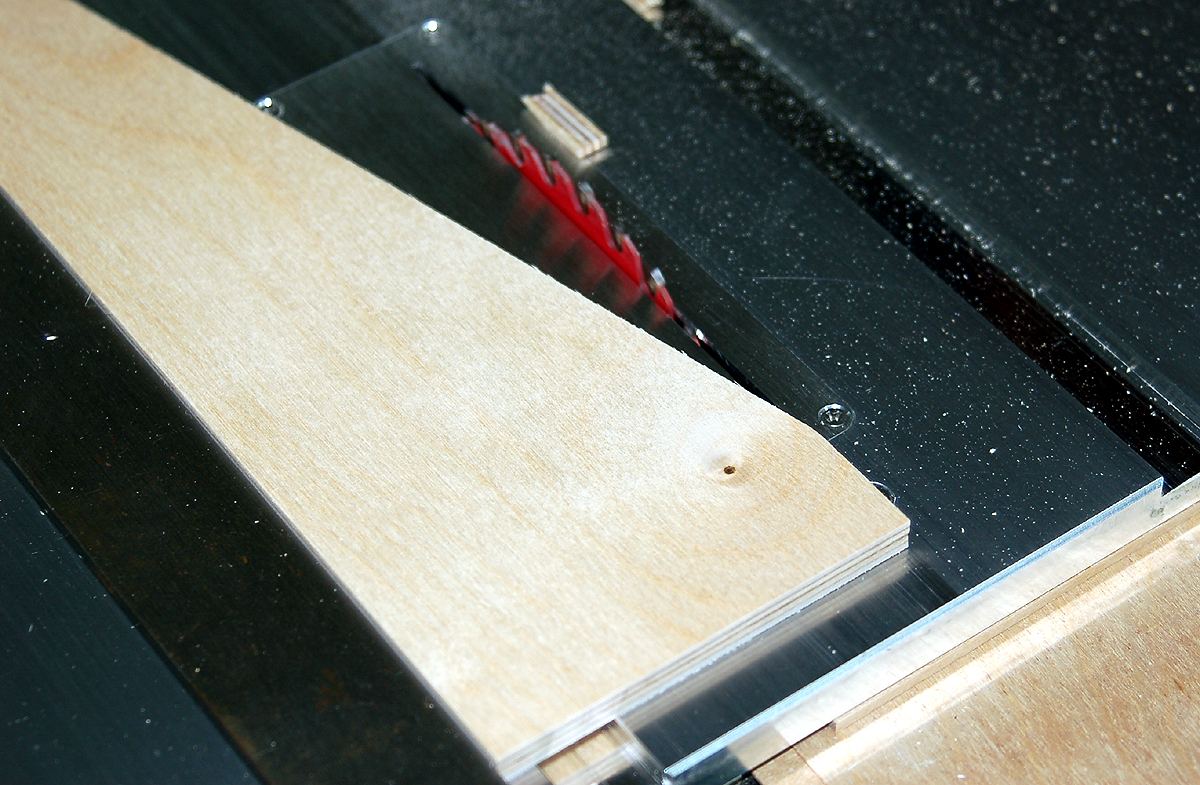
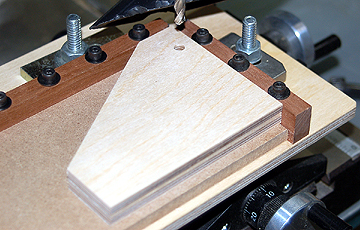
The fixture is placed on a sacrificial backer board.  The jig is placed over the fixture, properly aligned and held in place while the first hole is drilled in one end of the fixture.
A steel pin is inserted into the drilled hole to maintain alignment between the drill jig and the plywood fixture.


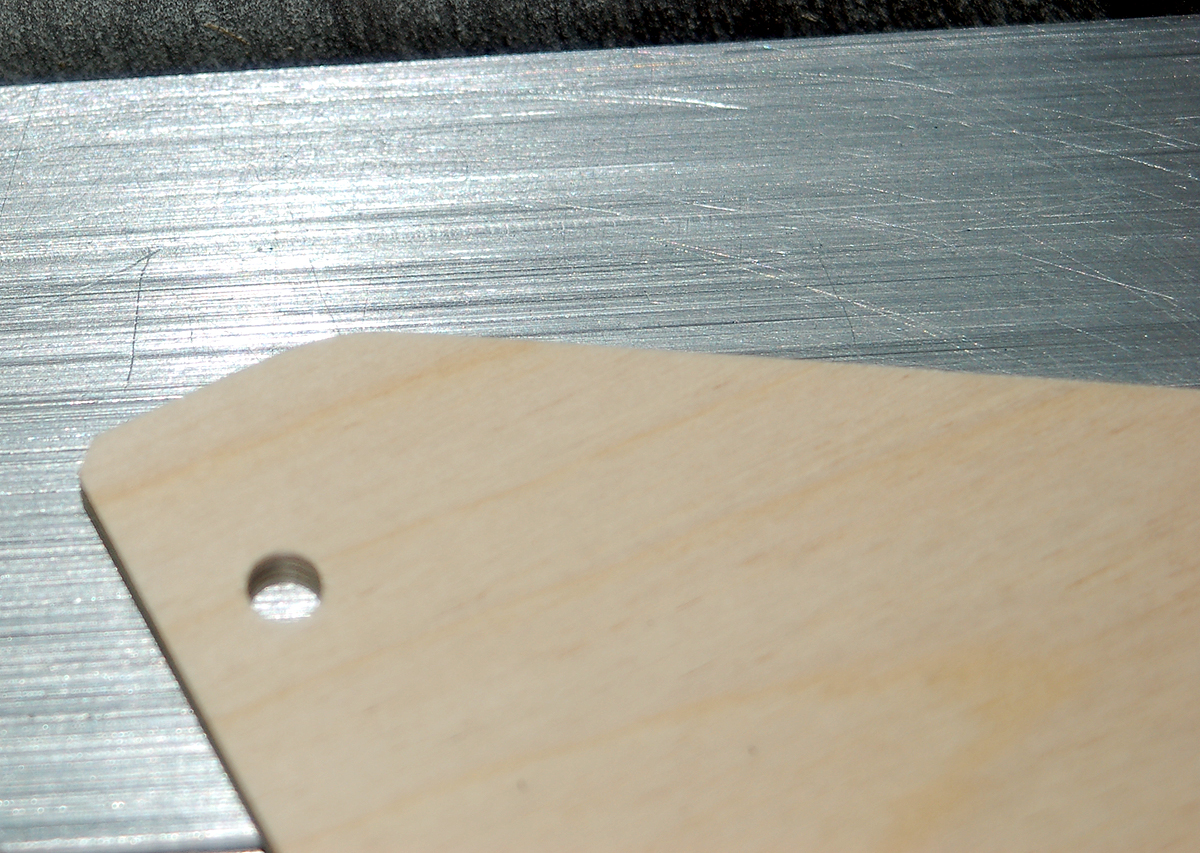
A hole at the opposite end of the fixture is drilled and also pinned.
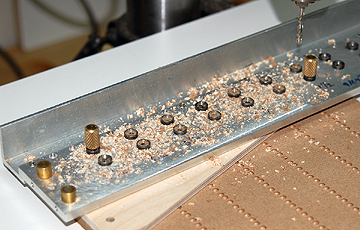
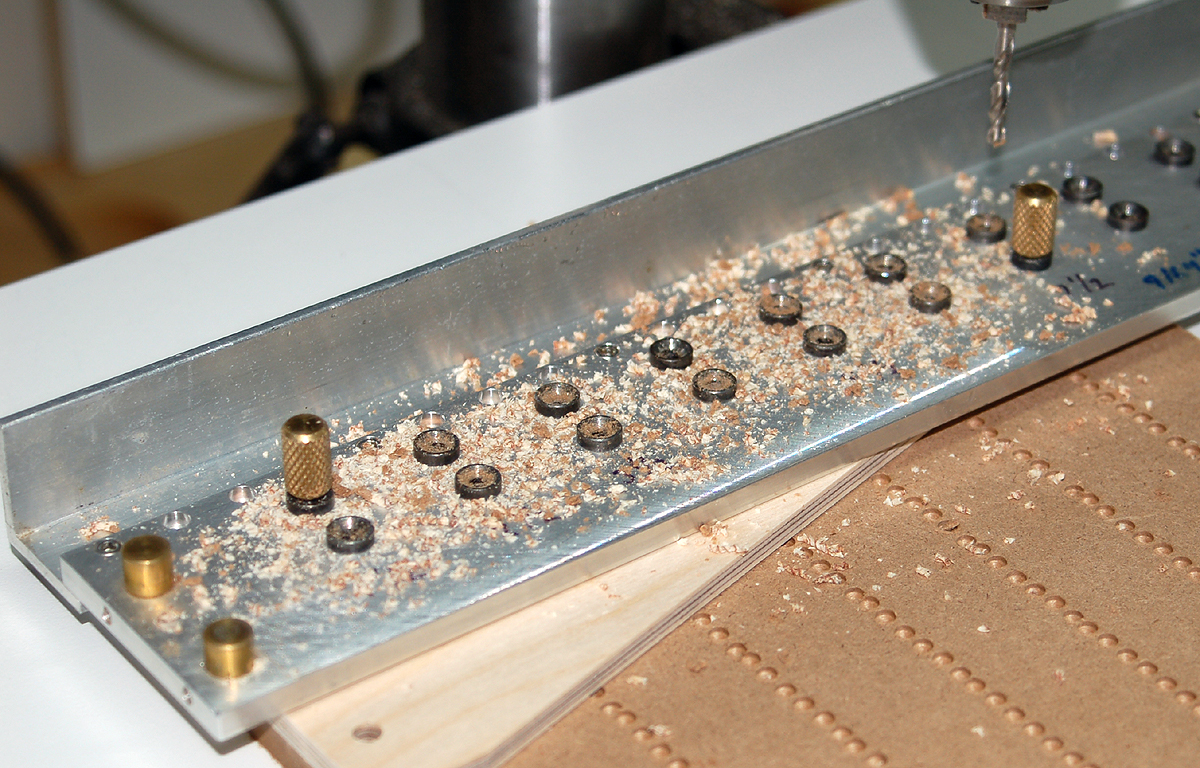
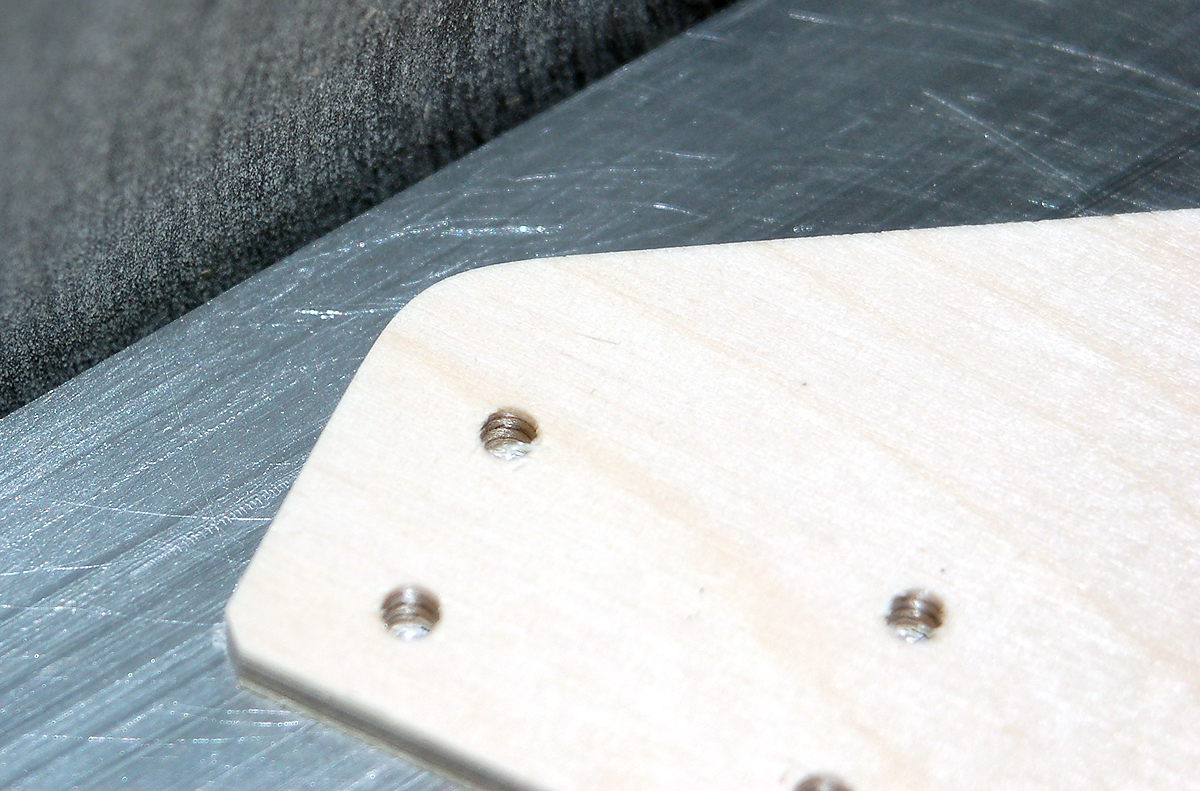
Now that the plywood fixture is secured to the drill jig the rest of the holes are drilled.

I have purchased just about every drill bit available to achieve the cleanest holes possible.  Some of those bits were very expensive such as solid carbide and cobalt bits.  Those bits chipped very easily when they struck the hardened drill guides which is something high-speed steel twist bits didn't do.  It's not easy lowering the bit dead-center into the guide hole thousands of times.

I didn't think brad point bits would work because any time the bit hit the drill guide it would quickly dull the bit.  As it turns out the brad point bits available in this size just don't work very well anyway.  I tested brand new bits on scrap plywood without using the drill jig and the brad points just didn't work.  There was significant tear-out on the underside of the wood.

Surprisingly the best quality hole is drilled by the least expensive high speed steel twist bit.  These bits only last for about 150 holes before they start tearing out the bottom of the hole at which point I discard the bit and replace it with a new one.  New bits cost less than the charge to resharpen them.  I've looked into drill bit sharpeners but these bits are on the bottom end of the range that can be sharpened and my experience is that no tool works very well when close to the extremes of the stated range.  Plus none of these tools have received reviews that made me want to purchase them.

I suppose I could spend tens of thousands of dollars buying whatever tool the drill bit manufacturer uses but at the little over a dollar I pay for a bit now I don't think I'd ever break even.

One last thing I learned in all my experimenting not all drill bits the same size are the same size.  One manufacturer's 9/64" can be quite a bit different from another's as is evident when putting the same bolt through holes drilled by different bits.

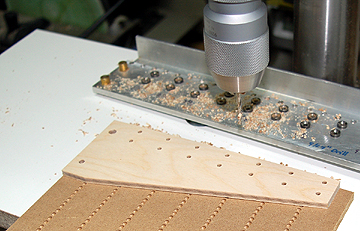
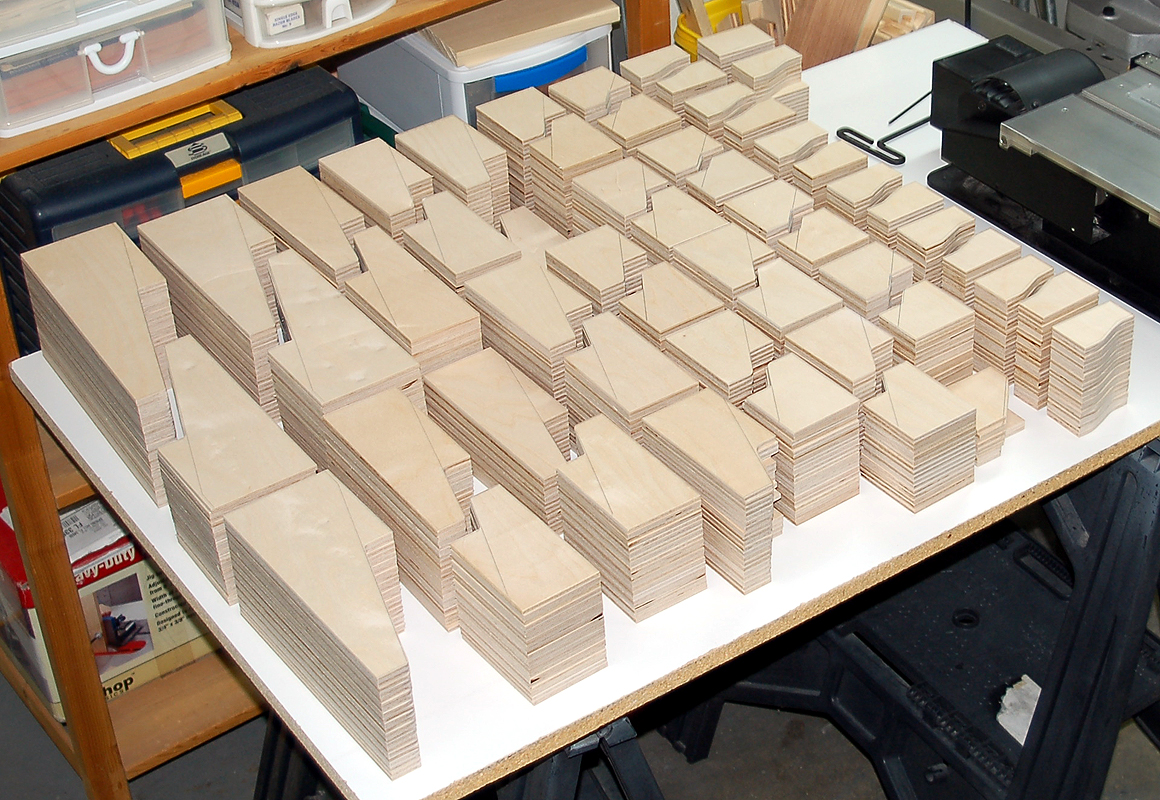
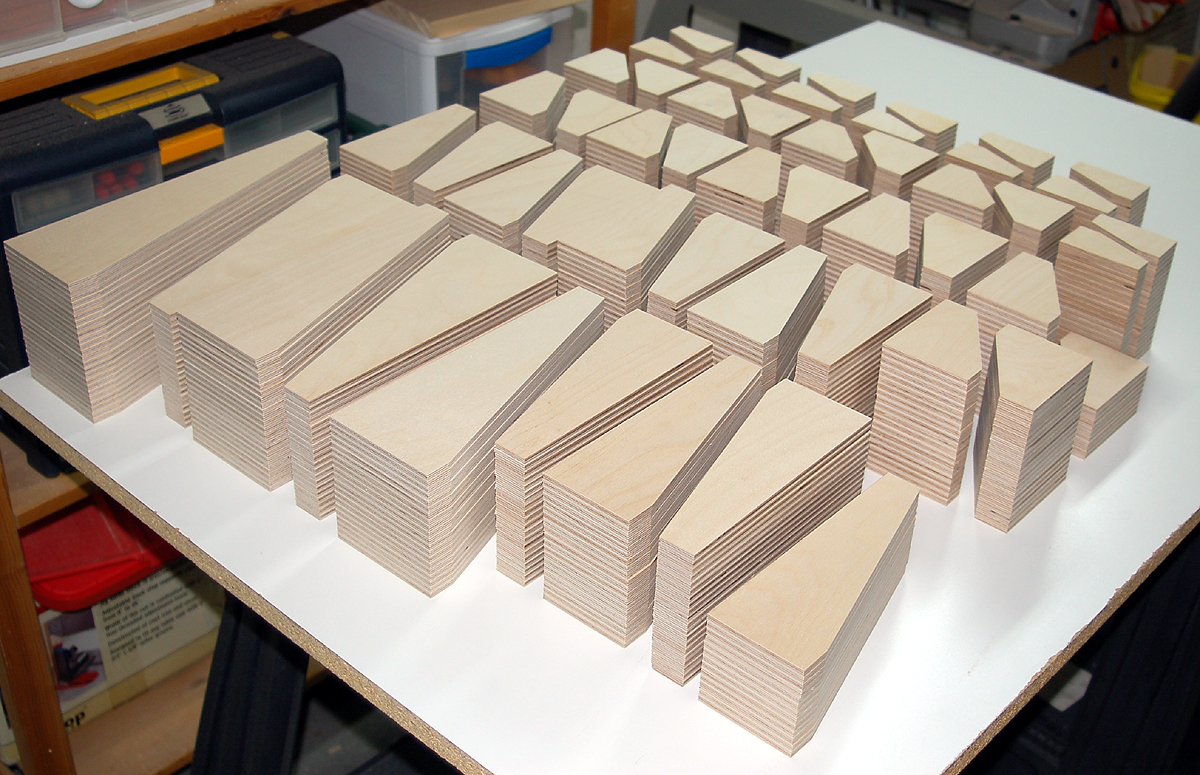
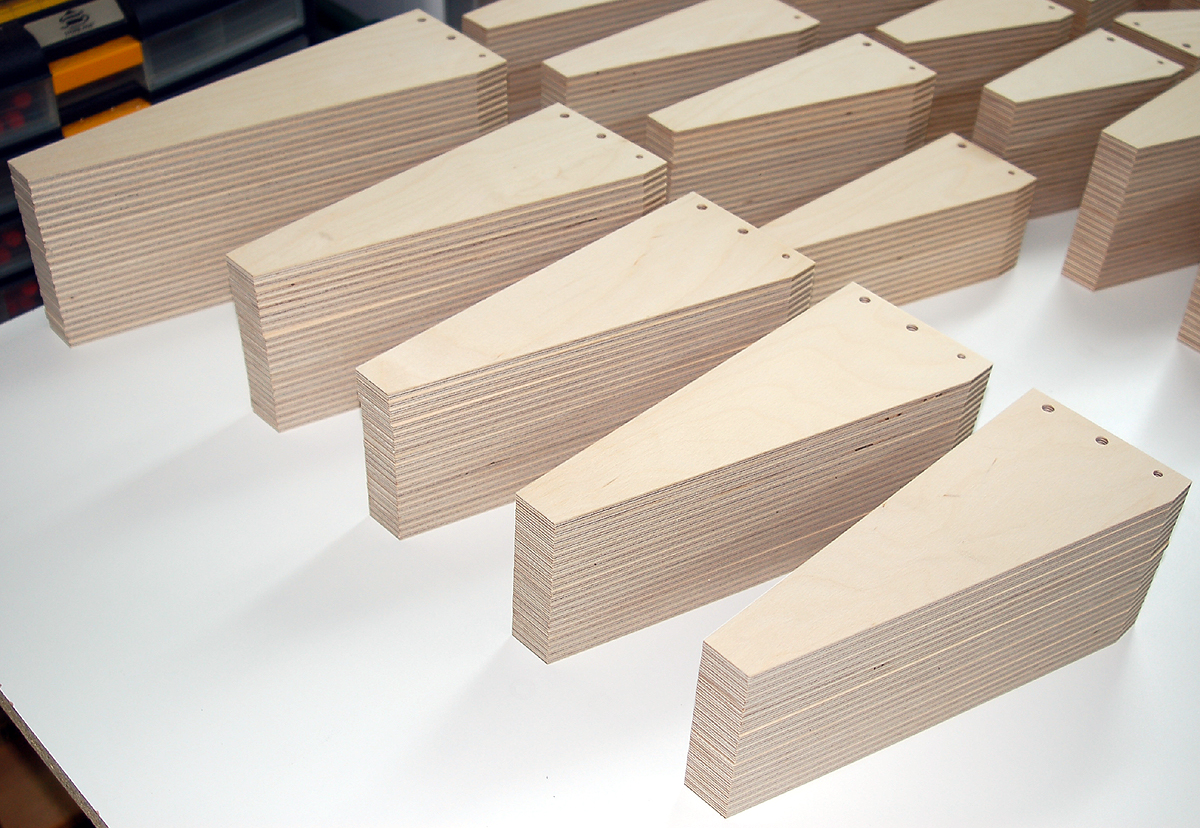
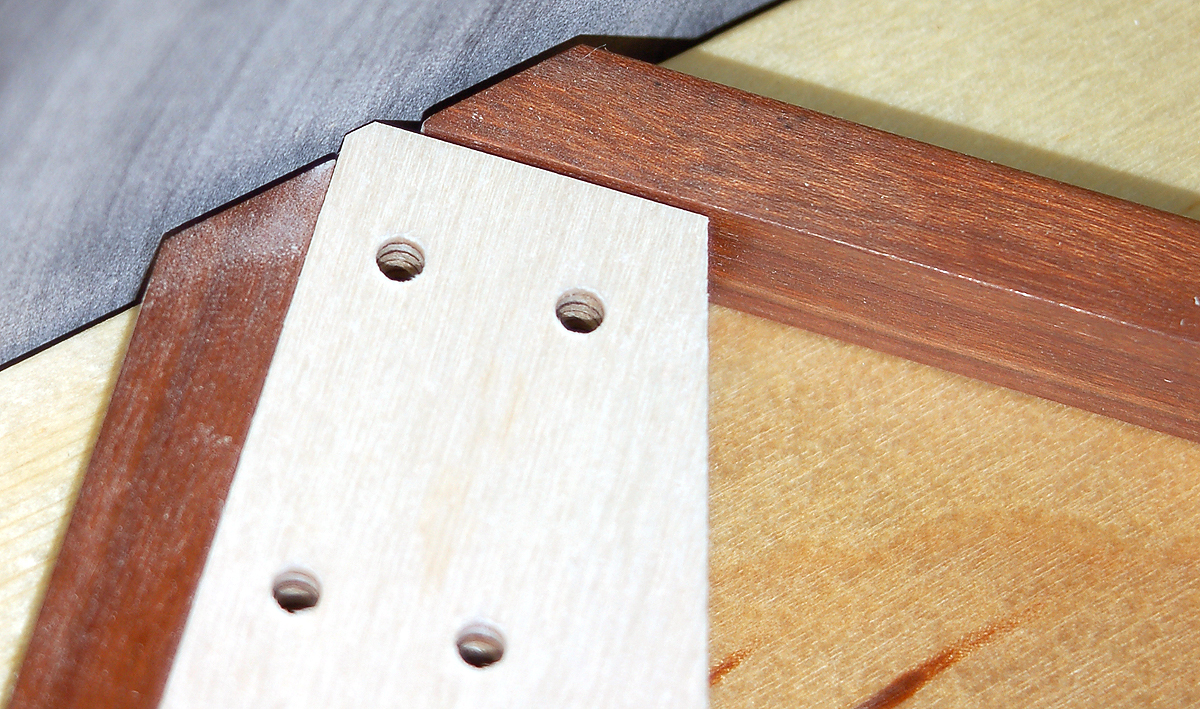
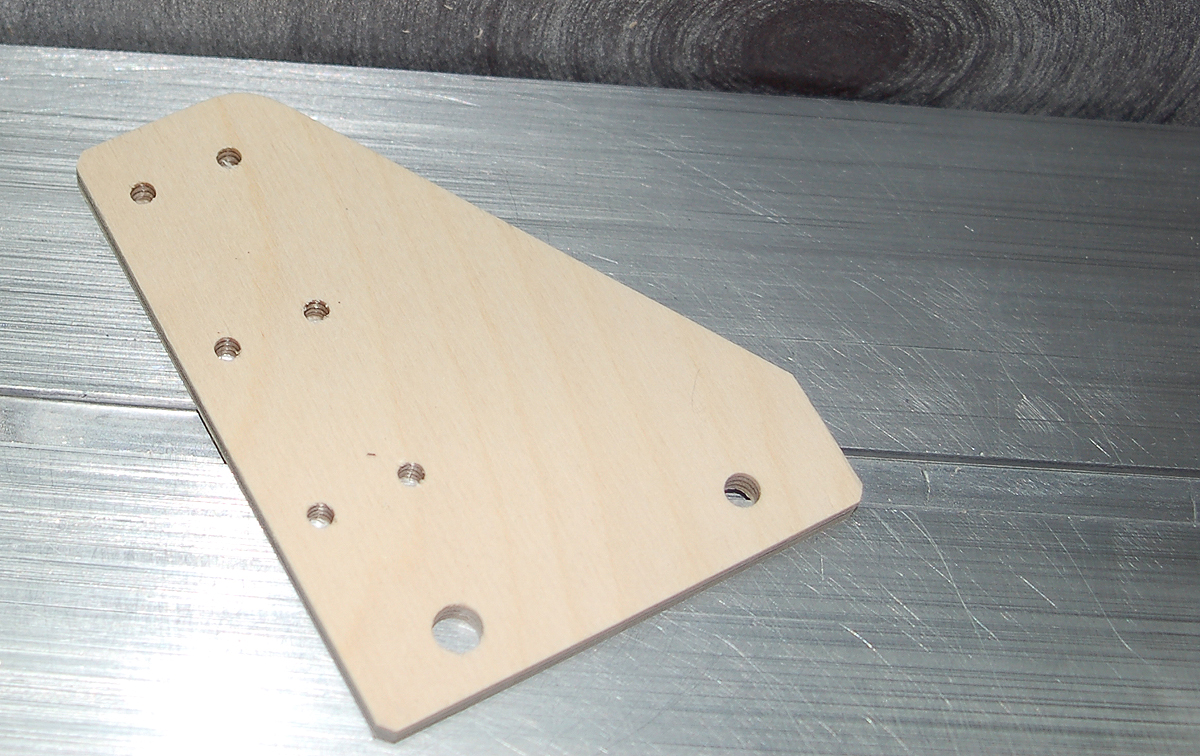
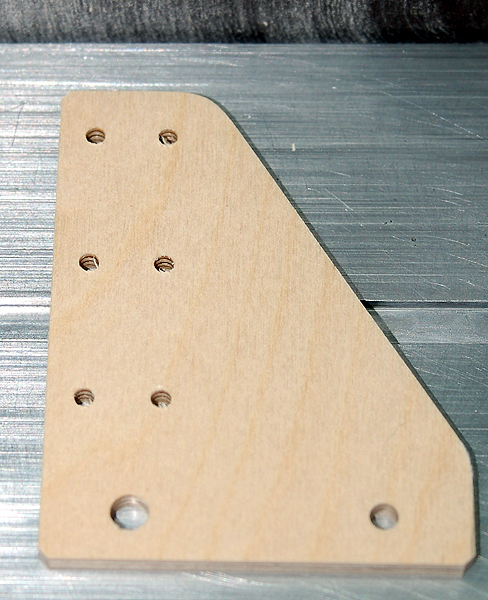
A 7-1/2" fixture having all accessory holes drilled.

All done.

Obviously this is a very time-consuming step and I'm always glad to get to the point where I'm not standing in front of the drill press for hours every day.

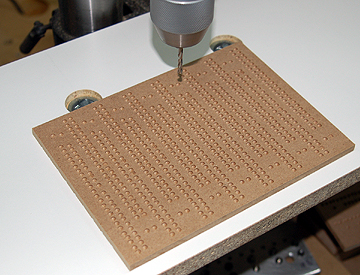
I figured out a system of placing each fixture on the backer board quickly to ensure every hole is drilled in a new spot while using as much of the board as possible.  Each backer is used on both sides.

I cut them from 1/4" MDF which is very inexpensive at about six bucks plus tax for a 2' x 4' board.  It only took a short time to cut down a board into a lot of backer boards.


Final Steps

Several weeks have passed since I began making these fixtures.  I'm seeing the light at the end of the tunnel.  There is just one more thing to do finish the corners which is two more steps.

A bevel is sanded on three corners of every fixture.  As you can see I have jigs for nearly every step to ensure accuracy and consistency.  I was going to call this jig The Princess Pretty Bevels but settled on The Bevel Master instead.

All done.

Now I round over the two remaining corners on every fixture.  This is done by eye using my disk sander.  It's actually fairly easy to be consistent by getting into a rhythm.  This step is non-critical and only for aesthetic purposes.
The top rear corner is rounded over first.

(I use a moto tool with a tapered cone sander to take off the worst of the leftover hole fuzz when present.)

The fixture is flipped over and the corner between the back and rear of the fixture is rounded.
All done.
Exactly 1,001 fixtures that are really all done.  Woo Hoo!

I have this process pretty much down to a science using the tools I have.  Even though I've made these for several years the process still evolves.  There are three more steps that are not shown in these photos.

1) I lightly sand both faces of every fixture.  That does a couple of things.  First, it gives all the fixtures a more even tone and removes any patina that's built up on the wood.  Second, it breaks down the wood fiber on any wood fuzz around the holes in preparation for 3) below.

2) I very slightly round both long corners on the front edge of the fixtures to remove tiny hairs and splinters.  The edge is not considered finished and should be softened more before applying a finish.  This step is done at the same time as sanding the front edge straight after the blanks are separated at the beginning of production.

3) I now use a cone sander in a rotary tool on both sides of every hole instead of only doing the ones that needed it most.  Basically it entails me sitting down with several chargers, several battery packs, several sanding cones and a stack of movies for a movie marathon lasting a couple days while I sand all the holes.

When that's all done the fixtures are put into stock and ready to be shipped to builders who want to build straight airplanes.


Previous —
Next —

Magnetic Fixtures System II Parts and Accessories
How I Make Vertical Presses

Comments about this article


Back to Magnetic Fixture System II
Airfield Models Home


Copyright © 2011-2021 Paul K. Johnson