|
 Before you get started you should thoroughly clean your workbench, cutting
mat, straightedges and anything else that will be anywhere near your work. Before you get started you should thoroughly clean your workbench, cutting
mat, straightedges and anything else that will be anywhere near your work.
Before you begin cleaning, remove your
shop foreman so that he isn't actively
shedding hair in areas you just cleaned.
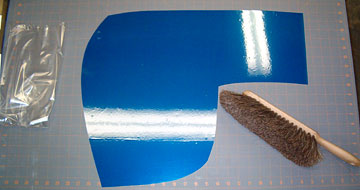
You will squeegee the film several times meaning that you'll have lots of opportunites to scratch and dull
the film. Always wet the film with window cleaner
before using the squeegee to help prevent scratching.
Ensure the edge of the squeegee is smooth. Soft plastic squeeges can be
wiped across regular copy paper to smooth the edge. Sand the edge if
necessary and finish it off by wet-sanding with fine paper. Soft plastic or
rubber squeegees can be purchased from an automotive supply store.
 When the various pieces are ironed together and ready to be applied to the
airframe, clean the adhesive side of the covering with window cleaner to remove
dust, lint and other particles. If you are using a transparent covering
then handle it only along the edges that will be trimmed off so that you do not
leave fingerprints inside the covering. When the various pieces are ironed together and ready to be applied to the
airframe, clean the adhesive side of the covering with window cleaner to remove
dust, lint and other particles. If you are using a transparent covering
then handle it only along the edges that will be trimmed off so that you do not
leave fingerprints inside the covering.
I've had no problems getting the covering to adhere to the airframe after
cleaning it with window cleaner, but if that concerns you then you can give it a
final rinse with water.
While handling the covering be sure not to crinkle it. The best way to
remove the backing is with the covering upside down on the bench. Pull the
backing straight back over itself rather than straight away from the covering.
The static in the covering will hold it down and prevent it from wrinkling.
 The
minimum that covering should overlap is 1/4" unless the part to be covered
is particularly small. For wings I normally make the overlap about
3/8" so there is no danger of it coming apart while I'm tugging the covering
around wing tips. The
minimum that covering should overlap is 1/4" unless the part to be covered
is particularly small. For wings I normally make the overlap about
3/8" so there is no danger of it coming apart while I'm tugging the covering
around wing tips.
I overlapped the covering for the
BMJR models Splash-E rudder about 1/16" which worked fine, but I don't think
that is enough for larger components.
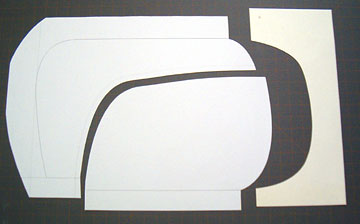 |
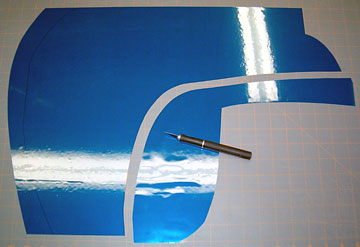
Make a good set of patterns from heavy paper stock. I
use 11" x 17" cardstock when it's large enough. Otherwise I use poster
board. If one poster board isn't large enough then you can butt
additional pieces together using tape along the seam on both sides of the
boards.
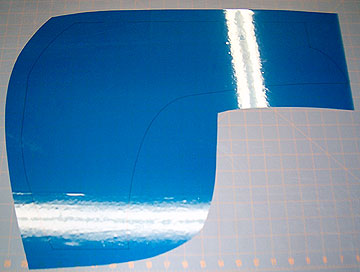
The outlines drawn on the board are the actual outlines of the wing.
Note that I accounted for excess covering around the perimeter so that I
have something to hold while applying the covering. |
 |
Throughout this process you always want the covering to
be as flat on the surface as possible. That includes when
tracing the pattern, when cutting the finished piece and especially when
sealing pieces together.
When the protective clear backing is removed from the covering there
is a strong static charge which we will use to our advantage here.
Use a bench brush to smooth the covering. |
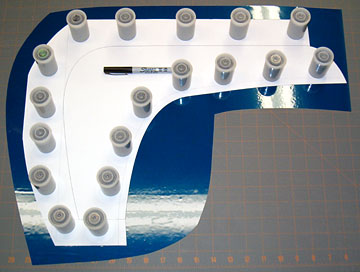 |
If the pattern is large then you may want to place
weights around the edge to prevent it from moving or lifting while you
trace it. |
 |
I always use a Sharpie marker. It cleans off easily
with alcohol. |
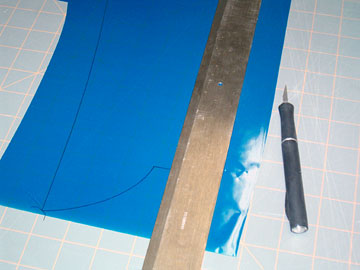 |
Use a good straightedge for straight cuts. I always
protect the piece I'm keeping with the straightedge. If I slip or
cut away from the straightedge then the mistake is on the waste side. |
 |
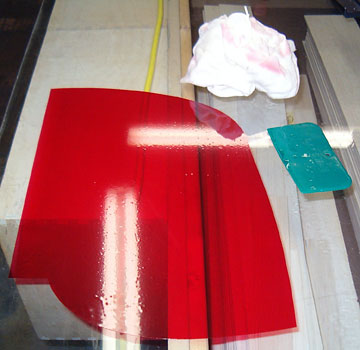
I can cut along a curve well enough that I don't bother
trying to use a template to cut around. By the way, the edge
will be smoother if you spray window cleaner on the cutting mat and then
squeegee the covering down. Wipe up excess cleaner before cutting.
Again, whenever you use a squeegee, wet the surface first to avoid
scratching the covering. |
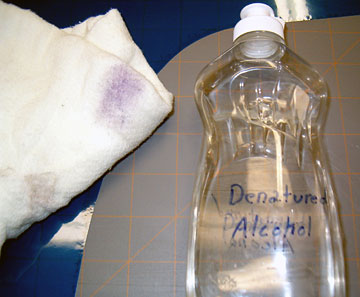 |
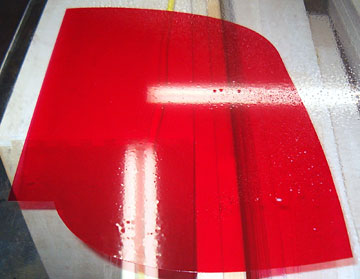
Remove the lines drawn with the marker when you have
finished cutting the film The coverings I have
used are not affected by alcohol on either side. Wipe from the
center off the edge and use alcohol sparingly to avoid it seeping under
the covering to the adhesive side. Even though alcohol doesn't
seem to affect it you still don't want to be rubbing it into the
covering adhesive. |
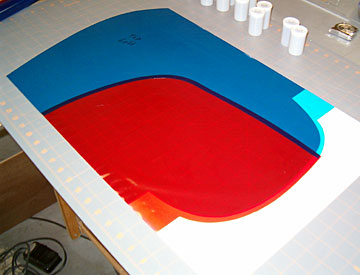 |
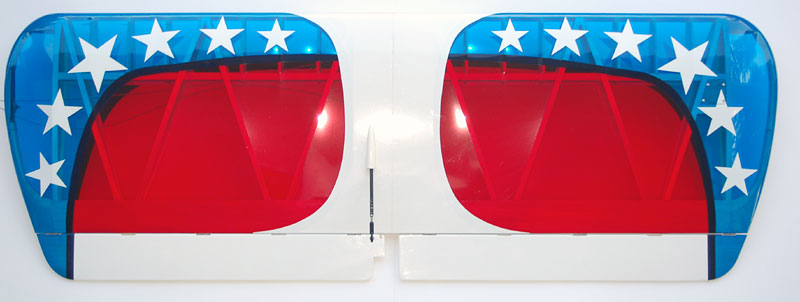
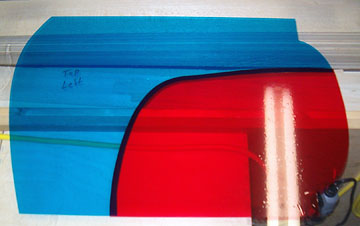
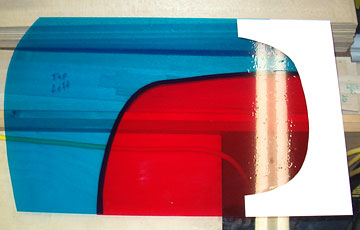
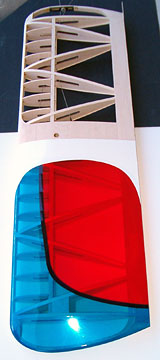
Test fit the pieces together and make any corrections
necessary. The white will be on top of the red and blue.
I've placed it underneath to check the fit because I can't see through
it. One thing I didn't mention is that whenever possible seams
should face away from the airflow. That means they should be to
the rear and out.
In this case, the red is the bottom-most piece followed by blue and
then white. |
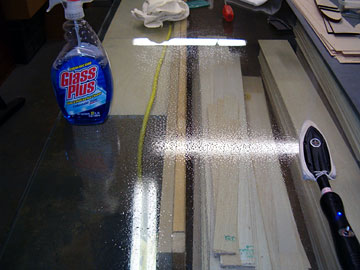 |
I have only attempted this technique on glass. It
will probably work on smooth, clean metal as well. Clean the
glass one final time and inspect it closely. You don't want to
iron crud to the covering. Use a soft, lint-free cloth to remove
the cleaner.
Spray the area for the first piece of covering. This will be
the piece on the bottom of the stack. |
 |
Wet the covering with more window cleaner and squeegee it
smooth and flat. |
 |
Spray the area for the next piece of covering. |
 |
Float the second piece into the correct position and
squeegee it. Work from the center toward the edges. If
the covering isn't aligned correctly then remove it, spray some more
cleaner and try again. It's not too difficult, but sometimes
having a helper makes it easier.
Iron this piece down.
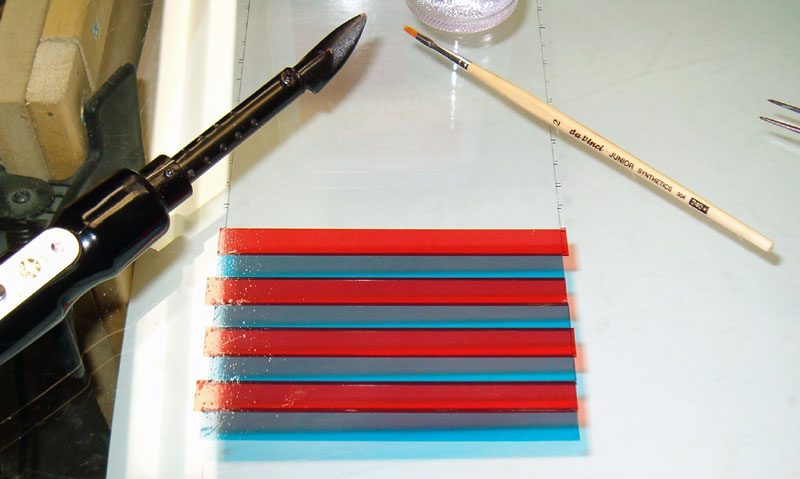
Practice on scraps first to find the proper setting on your iron. |
I found out that I've been doing this the hard way. In the past I
tried to use only the tip of the iron so that the covering would not become
distorted by heat. In this example I'm using Oracover Lite which irons
on at about 210° and shrinks at about 230°.
These temperatures will not even begin to bond the covering together when
it's on glass because the glass extracts a lot of heat. I gradually
turned up the iron until I could peel up the blue and the red came with it.
The iron was over 325° before that happened.
What I also found out was that I didn't have to use just the tip of the
iron. I could place the shoe flat on the seam which not only sealed it
better but it didn't shrink or distort the covering at all. It had
absolutely no affect yet the pieces were firmly bonded to each other.
You should always try to peel the covering apart before you actually
remove if from the glass. You need to know if it's actually stuck
together or not.
 |
Add remaining pieces using the same technique.
Again, check that it is bonded well before removing it from the glass. |
 |
All that's left to do is to iron it on the airframe as
usual. This wing is thick having tips with extreme compound
curves. They are a challenge to cover even when using a single
piece of covering.
I covered this wing by myself and applied a lot of force while using a
heat gun to get the covering to conform to the tips. In other
words, I was pulling very hard on this covering. The seams never
gave any indication that they were even thinking about coming apart. |
 |
I used a heat gun to shrink the covering after it was
adhered around the permiter of the wing. I did have to use the gun
along the seams to fully shrink the covering but I kept the gun moving
and stopped as soon as it tightened so that the seam wouldn't come
apart. |
If I have time, I will also write an article about making the actual
covering patterns using computer software instead of a drafting table.
|