Airfield Models - How To

Repairing Rustik

December 18, 2021


Home
About
What's New
History
Models Gallery
Model Building Safety
Articles
Mail & FAQ
Site Map
Site Feedback
Contact
Add to Favorites
Comments
Search Airfield Models

Back to Repairing Rustik


Airfield Models (http://www.airfieldmodels.com/)Repairing Rustik

This is the third part of an article detailing the repair of Rustik due to damage from a screen blowing out of a window and through the plane.

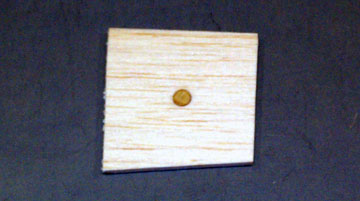
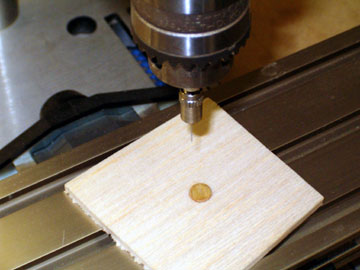
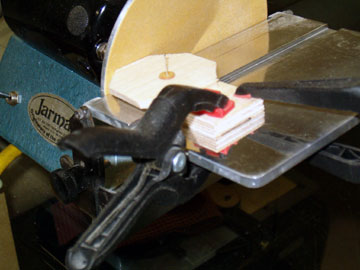
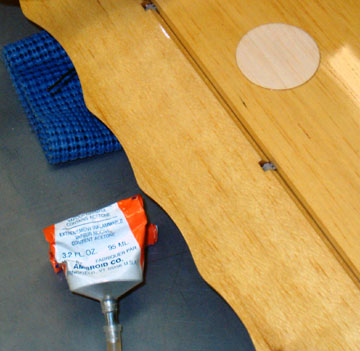
A plug must be made to fit the hole that has been routed in the stabilizer.  I want it to fit as perfectly as possible.  Even though I took great care routing the hole in the stabilizer, I knew that it wasn't a "perfect" circle.

I can make a round plug that is close to perfect, but also kept in mind that I may need to do additional work on the stabilizer to obtain a better fit.

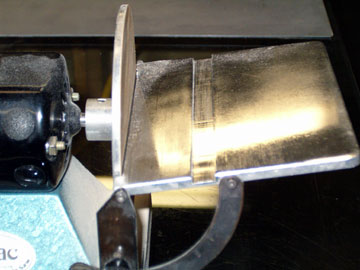
At first I planned to just make a round plug having a square edge  It occurred to me that I could make the edge of the plug tapered so that the diameter would not be as critical.

Basically I would be corking the hole.  This is probably an old wood-worker's trick.  If it's not it should be.


Making a Plug

A hole punch can punch clean circles from thin plywood. I wanted to turn the plug to make it absolutely round.  However, I did not want a huge hole in the center of it to put a bolt through so that the plug could be chucked into my drill press.

The other idea was to place the plug over a small straight pin axle and rotate it on the table of my disk sander.

Unfortunately, the soft balsa would not be able to support a small axle on its own.  The hole would wallow out and the plug would not be round.

I made a reinforcing piece by punching a circle from 1/32" plywood to back the balsa and provide support for the pin.

The plywood circle reinforces the center of the plug. The plywood circle was glued to a piece of 3/32" balsa that will be the plug.
A wire drill bit is used to drill a hole through the center of the plug. A small diameter wire drill bit is used to drill through the plywood and balsa.
A dress-maker's pin holds the plug to a plywood base and allows the plug to be rotated. A hole is also drilled into a piece of scrap plywood.  The hole is placed such that the finished plug will over-hang one edge.

The pin is tapped into the plywood base only using a small hammer.  I did this because I was concerned that the pin would bend and damage the balsa so I fit the pin to the base first.

The pin was removed from the plywood base then pushed through the plug and tapped back into the base.

A disk sander is set up to sand a taper on the edge of the round plug. My disk sander is set up to put a slight taper on the edge of the plug.
The base and plug are clamped to the disk sander.  The plug is rotated to shape it to a perfect circle. The assembly is clamped to the sander table.  The balsa plug is turned somewhat over-size at first.

The disk sander is set up to make the plug upside down.  In other words, the "up" side of the plug has a smaller diameter.  This made it easy to fit the plug to the stabilizer without disassembling it from the base.

A couple of adjustments were necessary before the plug was the correct size.

The plug is a nearly perfect fit. The plug is a good fit.  The reason the plug is made from wood thicker than the skin is so that the plug will be proud and can be sanded flush.

Note that the pin hole in the center isn't wallowed out as it would be had the reinforcement not been used.

I removed the plug and used denatured alcohol to remove the remnants of the circle drawn with the Sharpie marker.

Once the plug is glued in place, the line will probably be a permanent, ugly addition to the repair.

The plug is glued in place and allowed to dry. Ambroid cement was applied to the edge of the plug, the inside of the hole and on the ribs.

The plug is pushed into place with the grain aligned and allowed to dry over night.

After the glue dried I put a drop of water in the center of the plug and applied heat with an iron.  That made the pin hole swell shut and disappear.


Previous —
Next —

Making a Hole
Refinishing

Comments about this article


Back to Repairing Rustik
Airfield Models Home


Copyright © 2004 Paul K. Johnson