Airfield Models - How To

Make Monokote Film Hinges for Flying Model Aircraft

December 19, 2021


Home
About
What's New
History
Models Gallery
Model Building Safety
Articles
Mail & FAQ
Site Map
Site Feedback
Contact
Add to Favorites
Comments
Search Airfield Models

Back to How-To Articles


Airfield Models (http://www.airfieldmodels.com/)Make Film Hinges for a Flying Model Aircraft

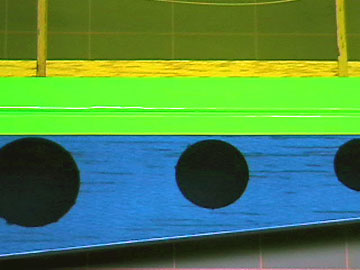
Often called Monokote hinges, film hinges are easy to make and very appropriate for certain type aircraft.  They can be made from any iron-on film such as Top Flite Monokote, Oracover, SolarFilm or Carl Goldberg UltraCote or iron-on fabric such as Coverite or SolarTex.

Film hinges are light and flexible.  In addition to their simplicity, they have the advantage of automatically sealing the hinge gap which makes them very efficient as well.

Another advantage to using film hinges is on your design prototypes. If you think you might want to test different control surfaces, these hinges can be replaced more easily than other types without surgery or damage to the model.

An issue that concerns people regarding these hinges is longevity.  One would think that the constant flexing back and forth will eventually cause the hinges to crack and fail.  I would say that is a definite possibility.  I suspect that before the hinge failed, you would have plenty of warning.

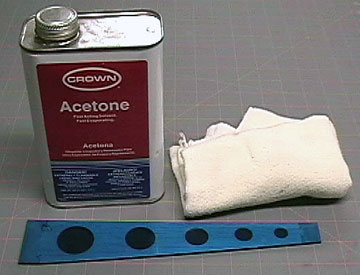
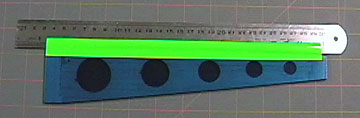
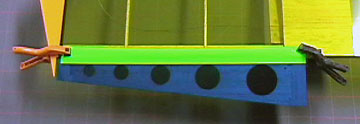
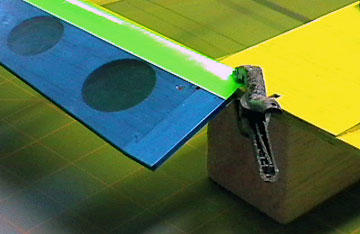
Film hinges are very easy to replace.  Simply peel them off, clean the area with lacquer thinner to remove any residual adhesive and then iron down new hinges.

I generally replace the hinges after 2 to 3 seasons because they start to peel up due to fuel getting under the seams.  But I have never had a set fail or tear.

As far as what aircraft film hinges will be appropriate on, that is tough for me to answer.  Personally I use them only on models that are slow, small and light or have lightly loaded control surfaces.  I would not use these type hinges on any aircraft that requires very precise control surface movement such as a precision aerobat.

I would also not use film hinges on a painted finish.  As far as I am concerned they can be used 
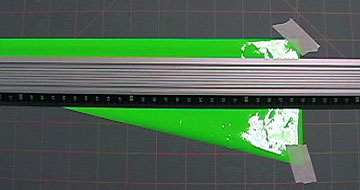
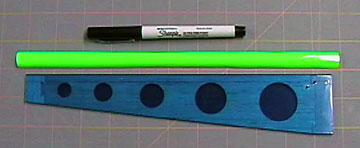
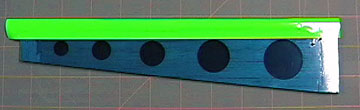
only on an iron-on covering.

This article details the hinge installation for the elevons on my JGRC Aggressor.

Great Gonzo's ailerons use film hinges.  Film hinges would have been a good choice for Gonzo and my Herr Pitts Special as well.

Also see


Making the Hinges

Before you start, there are two heat settings you need to find on your covering iron.

The first setting is the lowest setting that will adhere the hinge to the covering.  The second setting is the highest setting that will adhere the hinge to the film without melting the hinge or the underlying covering.

Start by ironing a piece of the covering to a piece of scrap wood at the same heat setting as you used to apply covering to the model.  Turn down the iron to its lowest setting and leave it for several minutes so it can cool to the new temperature.

Attempt to iron a piece of the hinge material over the covering on the scrap wood.  Turn up the heat until the hinge sticks, but does not shrink.  That is the low setting.

Now find the high setting by turning up the iron and going over the hinge again.  Let the hinge cool and then peel it off.  The heat is too low if the hinge comes off too easily.  Adjust the iron temperature and repeat until the film adheres well.  Of course you should give the iron time to reach any new setting before attempting to use it.

You will find that film hinges can be peeled off regardless of the temperature setting.  It should require some effort to peel the hinges off when the correct temperature is used .

The hinge does not need to be the same material as the covering as long as it sticks.

Cut the hinges to the proper width. The first thing you should do is cut all the hinges that you plan to use.  You will need one strip for both sides of each control surface.

The hinge should be wide enough to securely adhere to the control surface and the surface it attaches to plus approximately the thickness of the control surface.

In this example, the control surface is 1/8" thick and I want 1/4" of material on the elevon and the wing.  Therefore, I cut the strips 5/8" wide.

The larger the plane, the wider the hinge should be.

Use a solvent to clean all surfaces that the hinges will adhere to.

Ensure the covering is ironed down securely before you apply the hinges.  Loose covering will create slop in the control setup.

Clean the surfaces thoroughly using a solvent such as acetone, alcohol or lacquer thinner.

It is a good idea to wash your hands to avoid getting oils on the surfaces.  Try not to touch the areas where the hinge will be if possible.

Mark the surface to aid in aligning the hinges. After the surfaces are clean, use a Sharpie fine-point marker to indicate where the hinge should go.  The marker cleans off with alcohol when you are finished.

All bets are off for fabrics though.  I am not sure if the marker will come off or not, but with film it is not a problem.

Iron the hinge to the control surface.

Set your sealing iron at the low temperature that you tested for earlier.

When the iron is at the proper temperature, align the hinge and iron it down.

Trim the ends of the hinge. Trim the ends of the hinge.
Iron a hinge on the opposite side of the surface. Flip the control surface over to put the other half of the hinge on.

Put a separator between the two hinges so that they do not get ironed together.  I use a steel ruler.

Allow the hinge to cool completely before removing the separator.

Align the control surface on the mating surface. Having a helper makes the job easier, but if you are on your own, then a couple of spring clamps work well too.

It does not matter which side you iron down first.  For matching surfaces, do the same side first.  For example, if you are hinging ailerons, hinge the top and then the bottom of each surface.

More often than not these hinges will pull the control surface slightly off-center in one direction.  For example, if you hinge the top first, the control surface may move off-center toward the top of the wing.

If you hinge the same side of matching controls and are consistent then the controls will be symmetrical even if they aren't perfectly centered.

Of course if the controls are unacceptably off-center then you should remove the hinge and start over.

Deflect the control surface to allow for control movement. Deflect the surface away from the side you are working on to allow the surface to flex.  Be sure to allow for more movement than you think you will need.

Hold the surface to prevent it from moving.  With the iron still on the low setting, start at the middle and push the iron toward the leading edge of the wing - not back and forth sideways which will warp the hinge.

Flip the wing, deflect the surface in the opposite direction and repeat.

When hinges are completely adhered to both sides of the surface, adjust the iron to the high temperature you tested for.  Thoroughly seal the hinges.

Run the tip of the iron down the hinge line. Finally, run the tip of the hot iron slowly down the hinge line on both the top and the bottom.  Do not push too hard or the point of the iron can tear the hinge.  It is best if you can get the top and bottom hinges to adhere to each other.

Be sure to seal any excess material at the ends of the control surface.

Now flex the surface back and forth and ensure the hinge is not too stiff or has excessive play.

There are times when the hinge does not come out quite right and it has to be peeled off and redone.  Once you get the hang of it, you will see that these type of hinges are very simple and fast to install.


Previous —
Next —

How To Install Robart Hinge Points
How to Mount a Scale Pilot Bust

Comments about this article


Back to How-To's
Airfield Models Home


Copyright © 2004 Paul K. Johnson