Airfield Models - How To

How to Make a Set of Ribs for a Tapered Wing

December 18, 2021


Home
About
What's New
History
Models Gallery
Model Building Safety
Articles
Mail & FAQ
Site Map
Site Feedback
Contact
Add to Favorites
Comments
Search Airfield Models

Back to How-To Articles


Airfield Models (http://www.airfieldmodels.com/)How to Make a Set of Ribs for a Tapered Wing

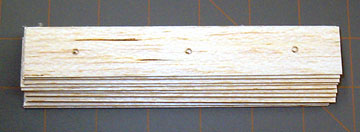
There are several ways to fabricate a rib sets for tapered wings.  The method shown here is the fastest and one of the most accurate.  The only drawback is that the ribs must be evenly spaced assuming all the ribs are the same thickness.

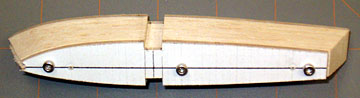
If ribs are needed that do not space equally then you will have to interpolate those ribs from the surrounding ribs or glue an over-sized blank in place and then sand it to shape with the wing panel.

Another way to make ribs for a tapered wing is manually plot or use rib-plotting software to draw each rib pattern individually.  The ribs are then cut in pairs.  This is my least favorite way as it is the most time-consuming, tedious and presents more opportunities to make mistakes.

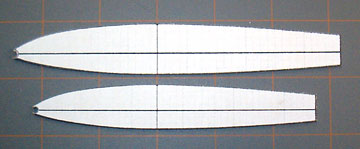
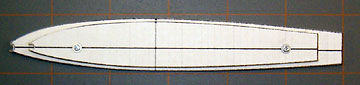
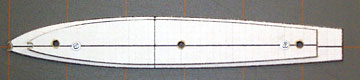
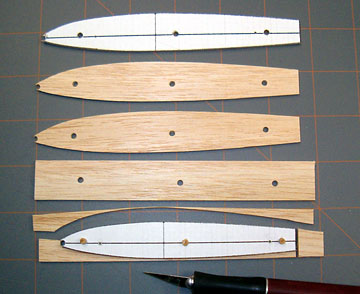
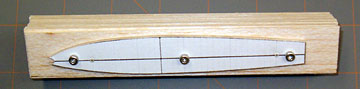
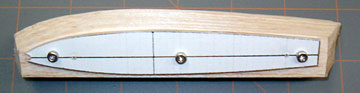
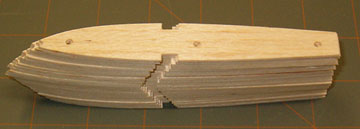
The method being presented requires two airfoil patterns for an entire wing panel instead of one for each rib.  The idea is to shape all the ribs between the two patterns.

The number of blanks can be determined one of two ways:

Method 1: Determine the wing span.  Determine the rib spacing.  Divide the span by the rib spacing and add two.

For example, if you are building a 56" wing having ribs spaced 2" apart then you would need 30 ribs (15 per panel).

  • Number of ribs = (wing span ÷ rib spacing) +2

Method 2: Cut a random number of blanks and then space them equally to make a wing of the desired span.

Also see


Preparing the templates

Make copies of your drawings and spray glue them to a hard template material.  Aircraft plywood, Formica or aluminum are good choices.

In this case, I used 1/8" aircraft plywood.

Take your time shaping the templates to make them as accurate as possible.

Depending on how you do things, it may or may not be important that the centerlines of the ribs are aligned to one another as they will be in the finished wing.

For example, if you cut spar notches after the ribs are sanded to shape and separated from the blanks then the templates do not have to be perfectly aligned now.

I will be cutting the spar notches while the ribs are clamped between the blanks and am incorporating a slight degree of washout in the wing, so I aligned the tip rib over the root rib accordingly.

This wing will also be swept, but the templates do not need to be aligned to reflect that.  I aligned the ribs so that the 33% lines are aligned.

With the templates screwed or double-taped together, drill holes for clamping bolts.

Always save your templates. People who throw their templates away, crash their planes and need to make new ribs.


Making the Ribs

If you want to save wood you can estimate the size of each blank.  I find that to be too much trouble and simply cut each blank to the maximum size.

The blanks were drilled in batches using the template as a guide.

Remove four blanks from the stack.

Cut around the templates to make two root and two tip ribs.  These will be the actual root and tip ribs.

I usually make them from a harder balsa and they become built-in sanding templates when sanding the wing using a long block.

Put these ribs aside.  They do not get clamped between the templates with the rest of the blanks.

Separate the remaining blanks into two stacks.  Bolt one stack together between the plywood templates.

There are twelve 1/16" blanks in this stack.

When you make the matching set, turn the templates to be mirror images and bolt them together so they taper the opposite way.

This helps ensure that any material removed from the templates when sanding the first set doesn't affect the second set.

Begin by planing and carving to rough shape.  All I've done to this point is use a razor plane.
Use a good sanding block to finish the set.  Avoid sanding the templates.

I blocked up the trailing edge to level the centerline and then ran the set through my table saw to cut the spar notches.

In the past I used a razor saw to cut the sides of the notches and a hobby chisel to chip out the waste.

The ribs have a taper around the edge that must be removed.

There are two ways that I might do it.

  • Pull matching ribs from both sets and sand them together.
  • Sand the taper off after the wing panel is built which is probably more accurate.  Any spars on the building board will have to be blocked up to clear the tapered area.  Otherwise the spar will stand proud when the taper is sanded off and will have to sanded down.  Sanding down spars is no fun.  Make them flush or even too low but never too high.


Previous —
Next —

Make Constant Chord Model Airplane Wing Ribs
How To Edge-Join Balsa Sheeting to Make a Skin

Comments about this article


Back to How-To's
Airfield Models Home


Copyright © 2006 Paul K. Johnson