![]()
|
|
|
|
|
|
|
|
|
|
|
|
|
|
|
|
|
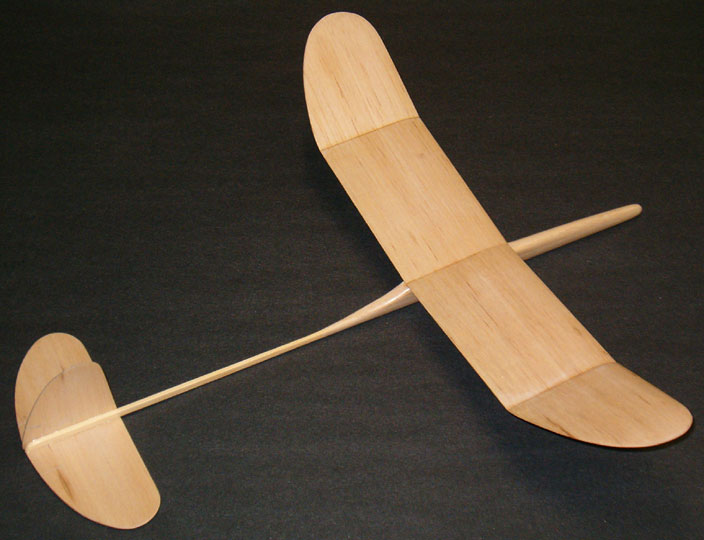
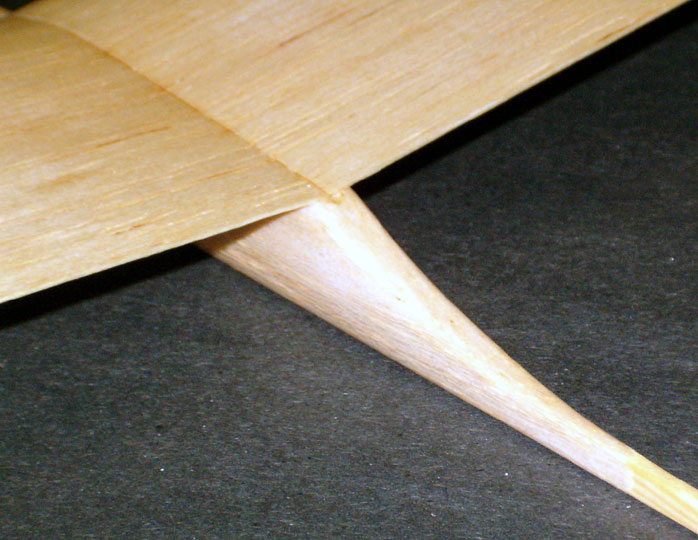
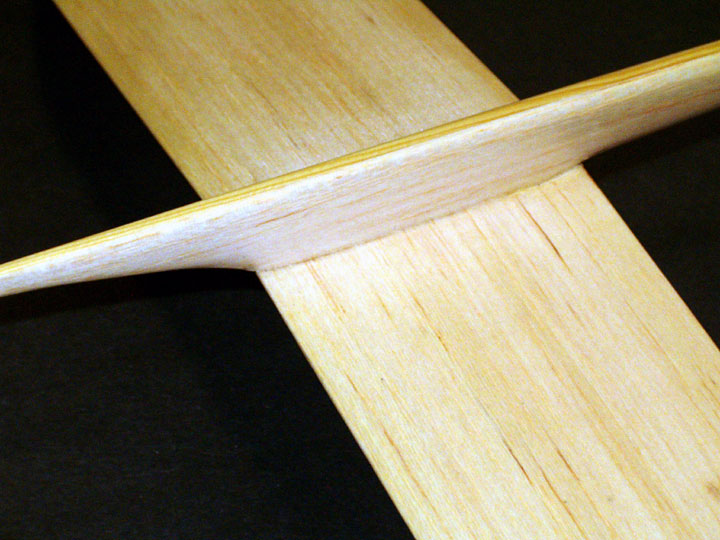
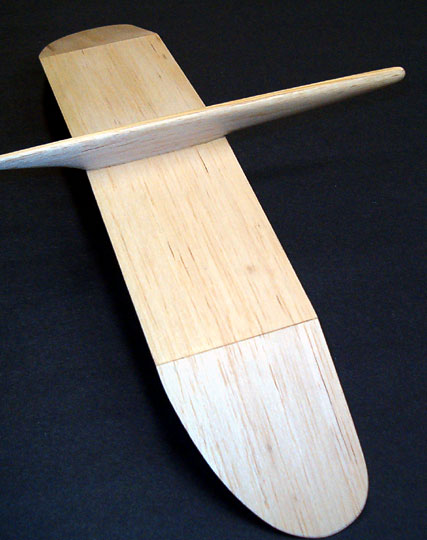
About the Graupner MiniI purchased the Graupner Mini from a hobby shop while I was stationed in Germany along with a couple other free flight gliders. It's been many years since I built something like this but simple sheet balsa models have always appealed to me when they are nicely built and finished. This is a nice kit that is very complete. It comes with a very robust piece of balsa to be used as a sanding block as well as sandpaper and glue. The included wood is on the heavy side which is what I normally expect from these types of kits. The model could be significantly lighter if built using contest balsa. Because my experience with free flight models is very limited I simply followed the directions and didn't try to improve the model. At this point I wouldn't know how. The instructions are printed on the plan and as is typical of European kits, they are in several languages including mine. WingThe wing is machined from a single sheet of balsa having pre-cut polyhedral angles. The upper surface is airfoil shaped while the lower surface is flat. The polyhedral angles are not cut all the way through the wing. One could simply crack the joints, block up the panels using the included templates and glue the joints. I chose to finish the cut with a sharp hobby knife to separate the pieces so I could sand each section more easily. I also sanded the beveled ends. The finish was a little rough but it didn't take much time to smooth it with sanding blocks. I felt the tips needed to be shaped better so I spent some time on them as well. I used 30 minute epoxy for these joints as there are no reinforcements. The kit comes with a small tube of UHU glue which is a model airplane cement like Ambroid. I used the included glue with other projects a long time ago. Templates are included for blocking the polyhedral joints at the correct angle. It's pretty much fool-proof. There's a reinforcing piece intended to be glued under the wing at the root so that one's finger doesn't crush the trailing edge on hard launches. I left this piece off keeping in mind that I can always add it later if necessary. It goes under the right wing if you're right handed or under the left wing if you're left handed. Another template is included for gluing the wing to the fuselage to ensure that it is aligned correctly. Fuselage and EmpennageThe forward fuselage is pre-cut and has a groove in the bottom for gluing in the spruce stick tail boom. I sanded the spruce stick and knocked off the sharp edges prior to gluing it into the fuselage with carpenter's glue. The stabilizer has printed lines for alignment which I sanded off because I don't like visible lines on my planes and they would have been next to impossible to remove later. I sanded the stabilizer thinner because the kit comes with a lot of lead to balance the model. I also rounded the leading edge and tips of both the fin and the stabilizer.
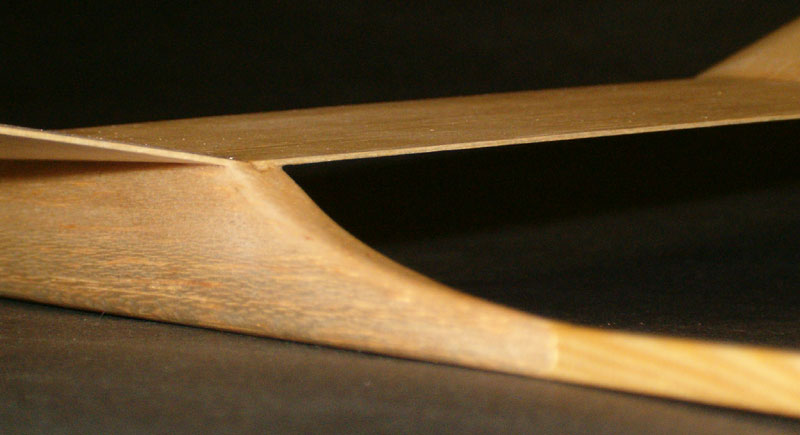
The rods are to be glued only at the ends but the epoxy ran down the rod a little bit on my model. That hasn't caused any problems. Trim adjustments are very slight. The stabilizer was glued underneath the tail boom using carpenter's glue. The fin is glued on top of the stabilizer and to the side of the stick. Prior to gluing the wing on I spent about an hour shaping the forward fuselage. I also cut an angle in the top to receive the wing. The instructions don't include this and I'm not sure how you would achieve a good glue joint without it. FinishingOnce the model was fully assembled I brushed on a coat of Sig Lite Coat butyrate dope. The first coat was almost completely sanded off and a second coat was brushed on. That coat was sanded until smooth. I brushed one more coat on the fuselage figuring that the model would need a little thicker finish from landings here in Florida where there's no such thing as soil - only sand. The kit box shows the model painted white and the trimmed with the included decals. I think it looks nicer in a natural finish. I'm considering painting a canopy though. Flying
I trimmed the wire until the model glided across the yard properly. I then used a small drop of epoxy to glue the wire in place. On stronger launches the model was porpoising which indicated it was still tail heavy. I really don't get this. If a manufacturer includes as much lead as what came with this kit, why not make the nose longer to help achieve balance instead of adding lead? Again, this kind of airplane isn't my specialty so there may be a very good reason. For example, if it's too light then it might not come down. The wing span seemed kind of short to me from the beginning so I figured this would be a fairly fast glider which it is. As of this writing the model still isn't trimmed well enough for me to throw it hard up into the sky but if the wind calms down for a while I'll be back out making adjustments until it is. At this point it glides very straight and goes a longer distance than I would expect with just a slight push. To be honest I'm not real concerned how well this model flies. But I do hope to get the model trimmed well enough so that I can post a video. I'm sure it will fly very well but it will also look nice just being displayed in my home.
|
|
|
|
|
|
|
|
|
|
|
|
Copyright © 2006 Paul K. Johnson
|
|


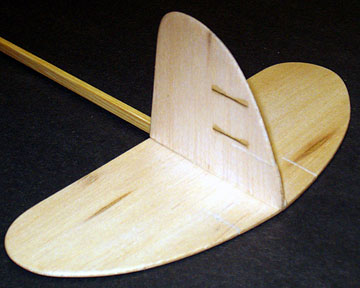 There are two die-cut slots in the stabilizer and one in the fin. Short
pieces of brass rod are glued in place and along with the pre-cut slots they
allow trim adjustments to be made which should hold their settings relatively
well.
There are two die-cut slots in the stabilizer and one in the fin. Short
pieces of brass rod are glued in place and along with the pre-cut slots they
allow trim adjustments to be made which should hold their settings relatively
well. The model came out very tail heavy. Although the plan indicates there
is a cut-out in the fuselage to receive weight, that wasn't present on my model.
Instead of using the included lead I drilled a 1/8" hole in the nose to receive
a piece of music wire.
The model came out very tail heavy. Although the plan indicates there
is a cut-out in the fuselage to receive weight, that wasn't present on my model.
Instead of using the included lead I drilled a 1/8" hole in the nose to receive
a piece of music wire.