I have seen these type
clamps included with various
tools. I have one
that came with a tool but I don't know where I can get more. I'm not
even sure what their proper name is.
All I do know is I've wanted more of them for some time and it was kind of
obvious how to make them. It just took me a while to get around to it.
Most modelers will have all the tools necessary to make these. The
only things you might have to buy are the actual parts for the clamps which
should cost less than $10.00 for enough to make a half-dozen or more of
them.
Obviously you can scale these clamps larger or smaller as your needs
dictate. My
wire bender can handle 1/4" wire and that's about it.
I can't imagine any application I would have that would require a
heavier-duty clamp than that.
Why Make Board Clamps?
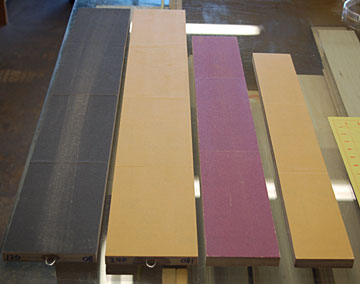
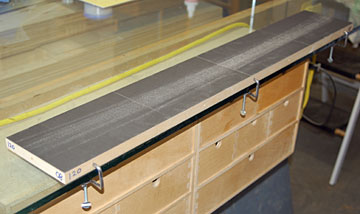
I have a variety of double-faced sanding boards.
These are particularly useful for sanding straight edges on items such as
firewalls and other medium length pieces.
In practice I would
always rather hold the work with both hands and move it against a sander
rather than hold the work in one hand and a sander in the other. It
can't always be done but my sanding boards get more use than any of my
sanding blocks.
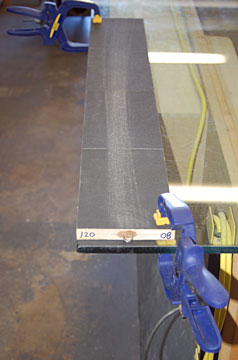
There are three problems with clamping boards to a
bench
like this:
The clamps don't really hold the board that securely
and it can shift which is very annoying.
They are in the way and I've gouged more than one piece of light
balsa when I whacked it against a clamp.
Only the middle of the board is available and the
sandpaper wears out
while leaving fresh paper along the other edges that can't be used or is
difficult to use.
These clamps are also great for small tools bolted to small boards.
You can store the tool easily yet secure it to your bench for use without
having it semi-permanently mounted to your bench. For example, I could
cut a board for my Microlux table saw and use these clamps to hold the saw
to the bench.
Making the Clamps
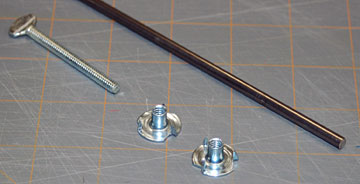
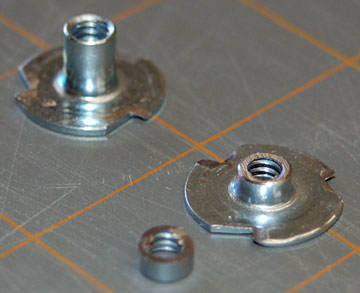
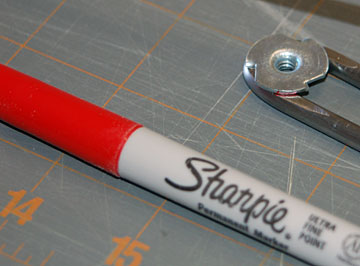
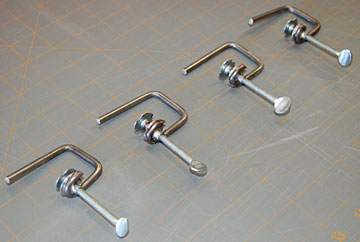
These are the only pieces you need to make a single
clamp. I used 3/16"
music wire, a 10-24 x 2" thumb screw (shorter
would have been better) and two 10-24
blind nuts.
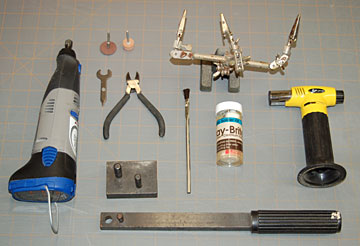
Ok, so not many parts are needed but a lot of tools are.
A
Dremel is used to cut the music wire and dress the ends.
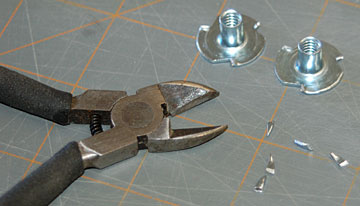
Nippers are used to remove the prongs from the blind nuts.
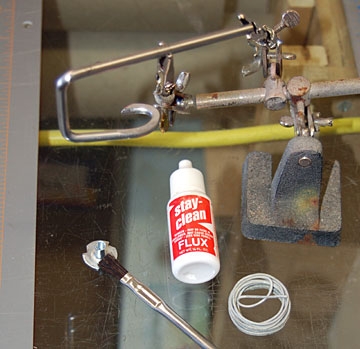
A wire bender is used to bend the clamp to shape.
Solder, a torch (or good iron) and flux brush for soldering the
assembly together.
Extra hands are used to hold items while they're being soldered.
Most of these tools can burn or maim you somehow. Wear good
work gloves and eye protection.
Cut a piece of music wire to the appropriate length.
You'll need to read through this entire article to figure out what the
proper length is as it depends on your bench-top thickness.
Add a little extra length so you don't have to get every
bend perfectly located without ruining the piece.
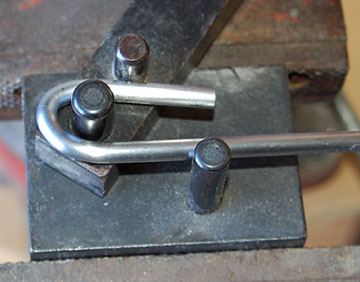
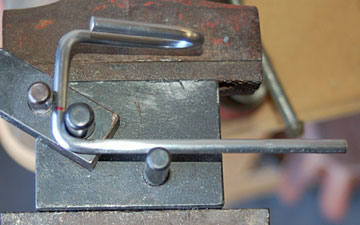
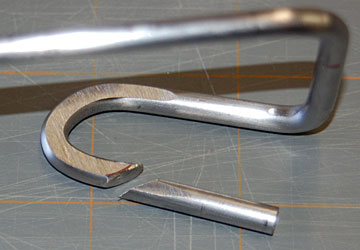
Make the first bend a half-loop. It doesn't have to
be pretty.
Rotate the piece 90° for the
second bend.
Make the second bend 90°.
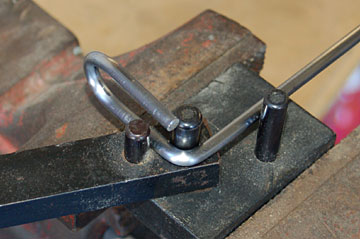
Sand or file a flat on the inside of the bend. The
entire bend doesn't need to be flat — just
the area where a blind nut will be soldered.
Note that the bend is rotated slightly such that the
center of the loop will more or less center on the wire.
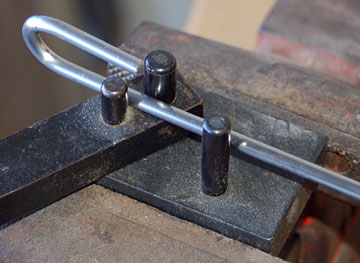
Make a second 90° bend.
The distance between the two bends is dependent on how thick the boards
are and how thick your bench top is.
Clip all the prongs from both blind nuts.
Grind off the excess left over from the prongs.
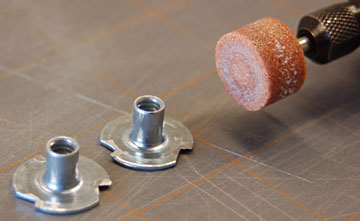
Cut about half the shank from only one blind nut. I
threaded the blind nut and a locking nut on a piece of 10-24 threaded
rod and sanded the end flat using my bench sander.
A Dremel and emery wheel were used
to remove the burr around the edge.
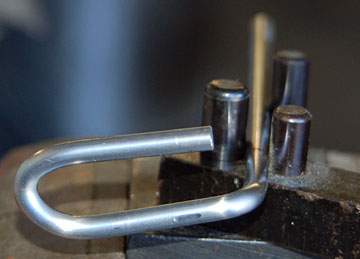
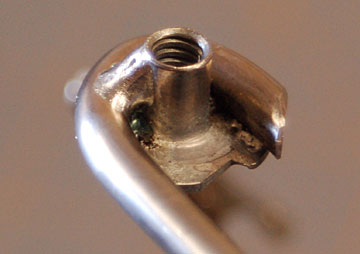
Place the short blind nut inside the bend and mark where
to remove the excess wire.
Note that the short nut is used for
convenience — it is not the nut that gets
soldered to the clamp.
Use a Dremel with an emery wheel to cut off the excess
wire.
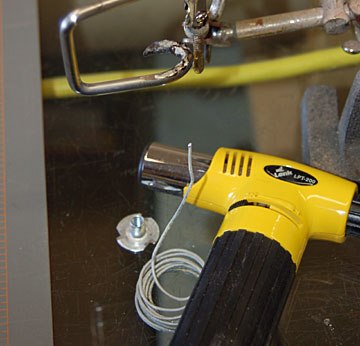
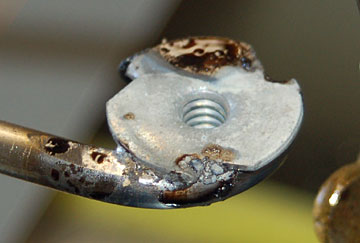
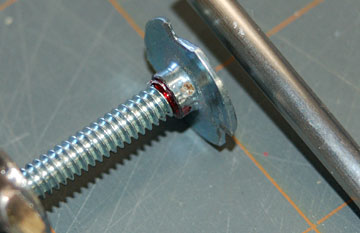
The long blind nut is soldered to the clamp. Apply
flux to the flat part of the clamp and to the inside of the blind nut
flange.
Apply solder to the music wire.
While the solder is still molten drop the blind nut in
place. Use a wood dowel to push it down. You may need to
apply heat to melt the solder again.
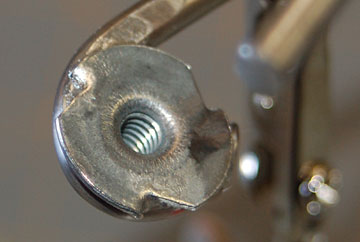
Be sure to thoroughly clean the clamp to prevent the flux
from corroding it — particularly if you use soldering acid like I did.
I used a wire brush and warm soapy water to clean the clamp. I
dried it and then oiled it.
This is probably way more solder than necessary as the
clamp pulls the blind nut to it rather than pushing it away.
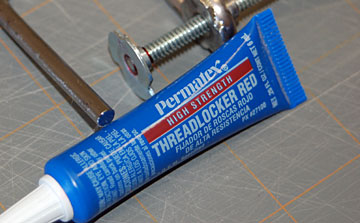
I used permanent
thread locker to attach the short blind
nut to the thumb screw after it was threaded into the clamp. Don't
let the thumbscrew protrude past the end of the nut.
Finally I put the assembly in my bench vise to crimp the
blind nut slightly so I could use it right away instead of waiting for
the thread locker to cure.
Less than two hours work for all these.
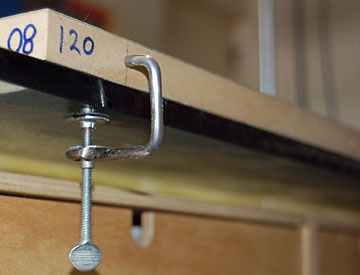
I drilled 3/16" holes in both edges and one end of all my
boards. The holes were a little too tight so I opened them up
using a 13/64" bit.
My thumb screws could have been much shorter. I can
cut off the ends and put on new blind nuts.
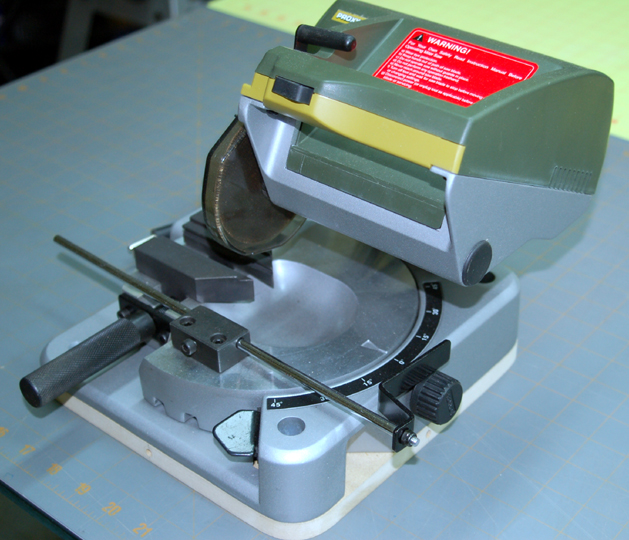
This is my Proxxon Shop and Miter Saw. I mostly use
it for cutting metal (music wire, large threaded rod, etc.).
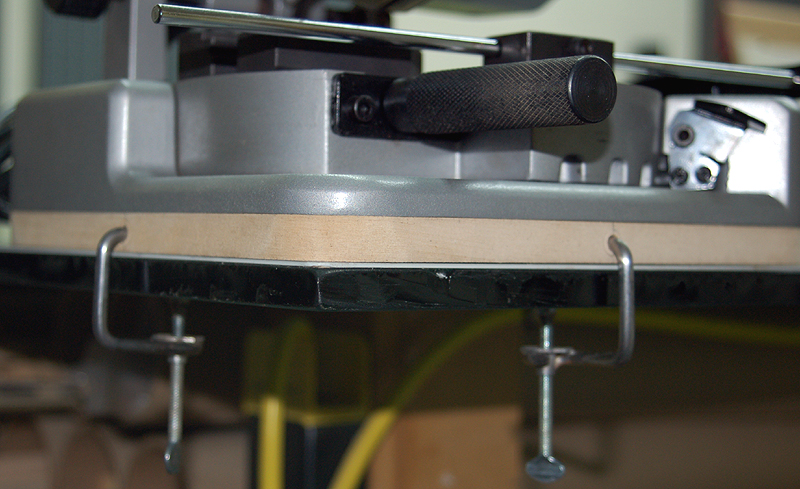
It
moves around when running so I made a base from 1/2" Medium Density
Fiberboard (MDF).
I used a Robart Hinge Point Drill Guide for their large
hinges to drill 3/16" holes centered on the edge of the board. The
holes were opened up using a 13/64" bit to make the clamps a slip fit.
The board is drilled on all four edges so I can set up the saw however
works best for the task at hand.