Airfield Models - How To

Insall a Solder Clevis for Flying Model Aircraft

December 20, 2023


Home
About
What's New
History
Models Gallery
Model Building Safety
Articles
Mail & FAQ
Site Map
Site Feedback
Contact
Add to Favorites
Comments
Search Airfield Models

Back to How-To Articles


Airfield Models (http://www.airfieldmodels.com/)How 
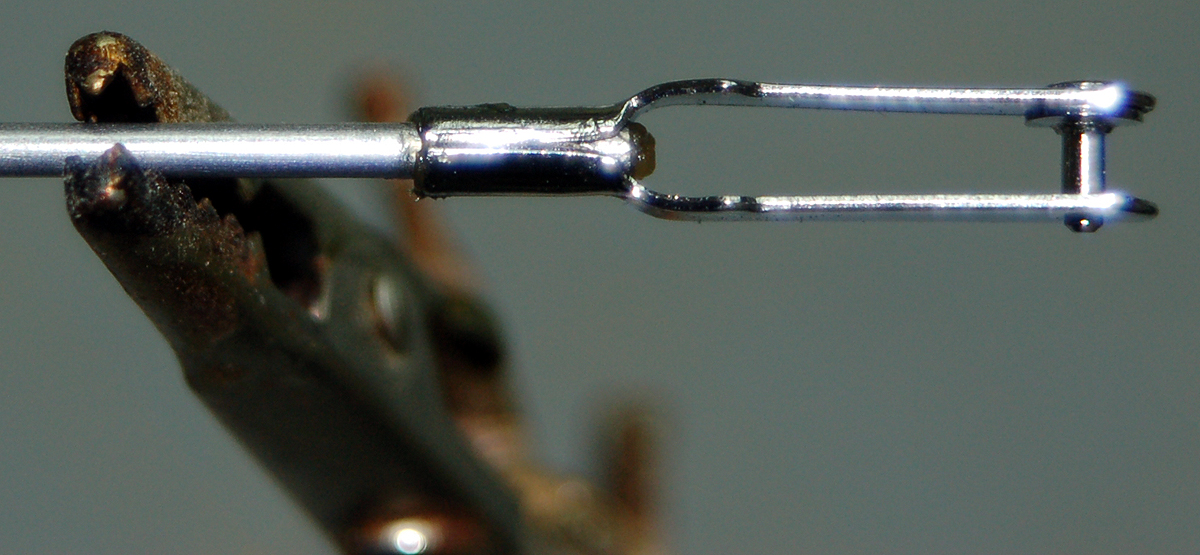
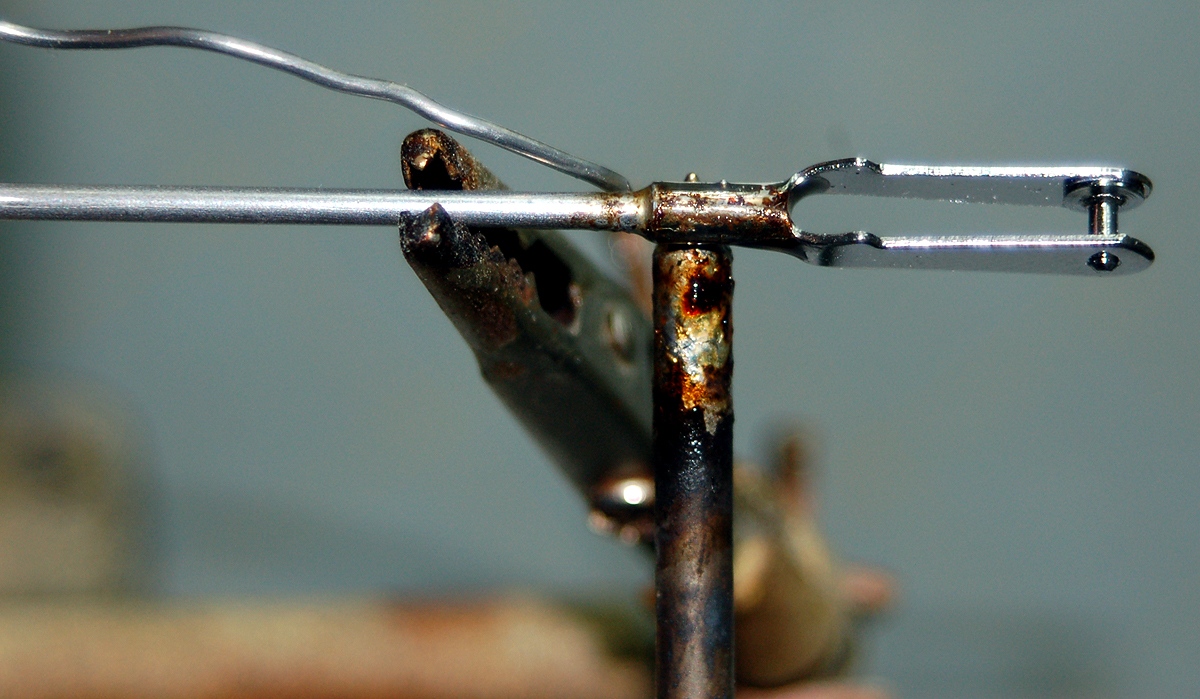
to Install a Solder Clevis

This is a question I've received several times over the years as it appears some guys have the same problems I had when attempting to solder something because I didn't know the fundamental principles of soldering.  There are really only five things you need to know:

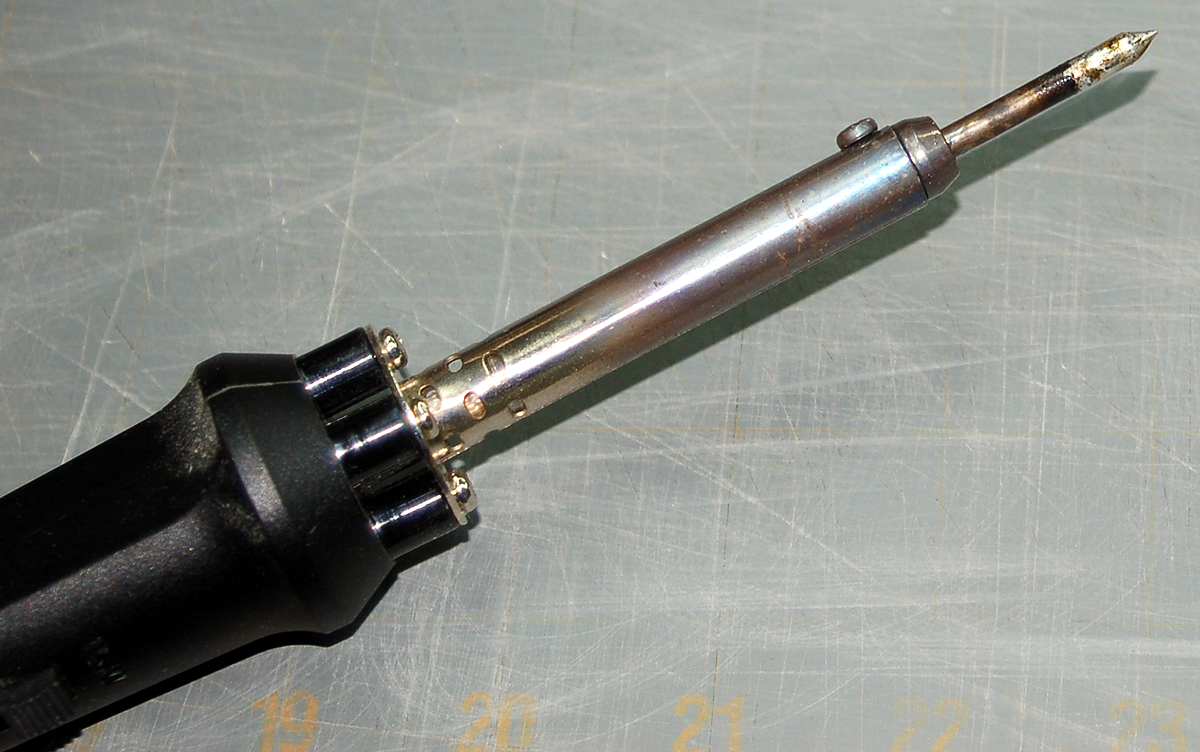
  1. Keep your soldering iron tip clean and tinned.
  2. Clean whatever it is you are soldering.
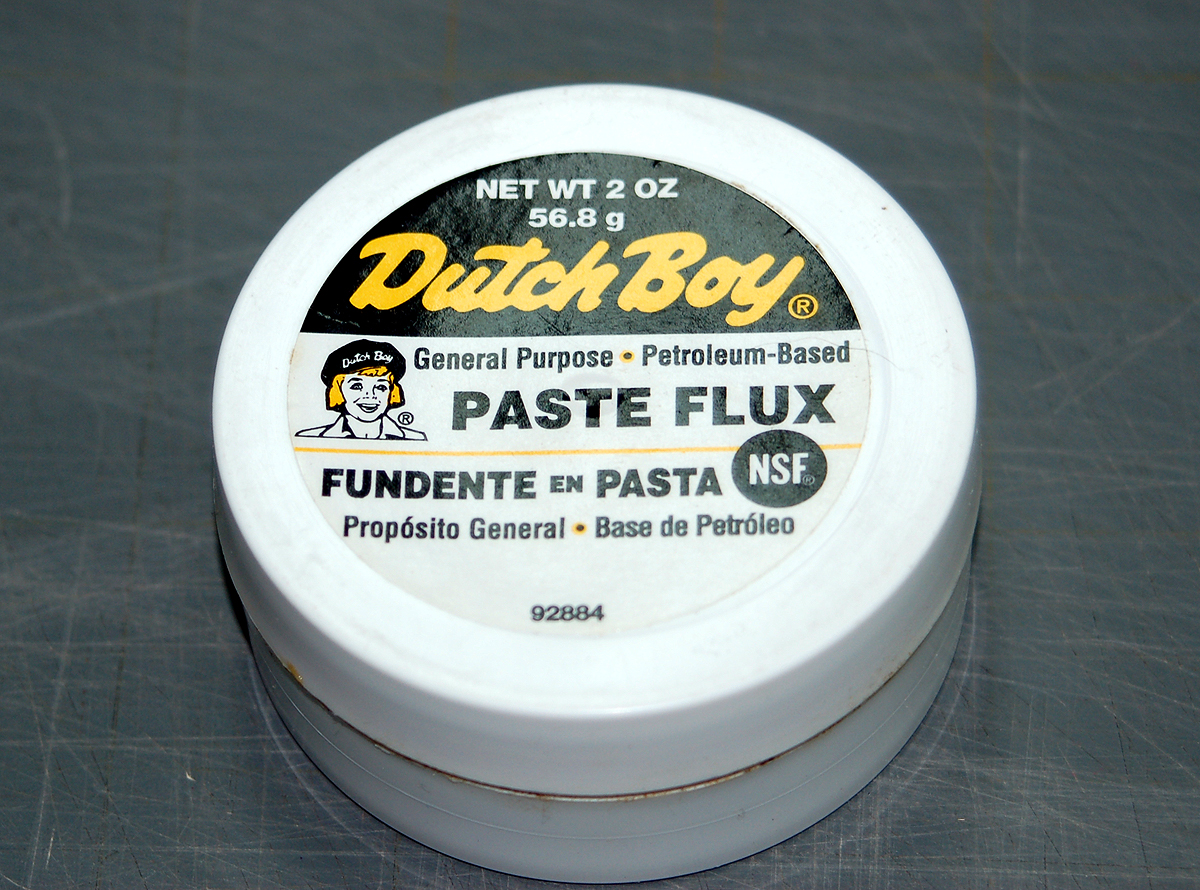
  3. Don't use acid flux or acid-core solder unless you absolutely have to.
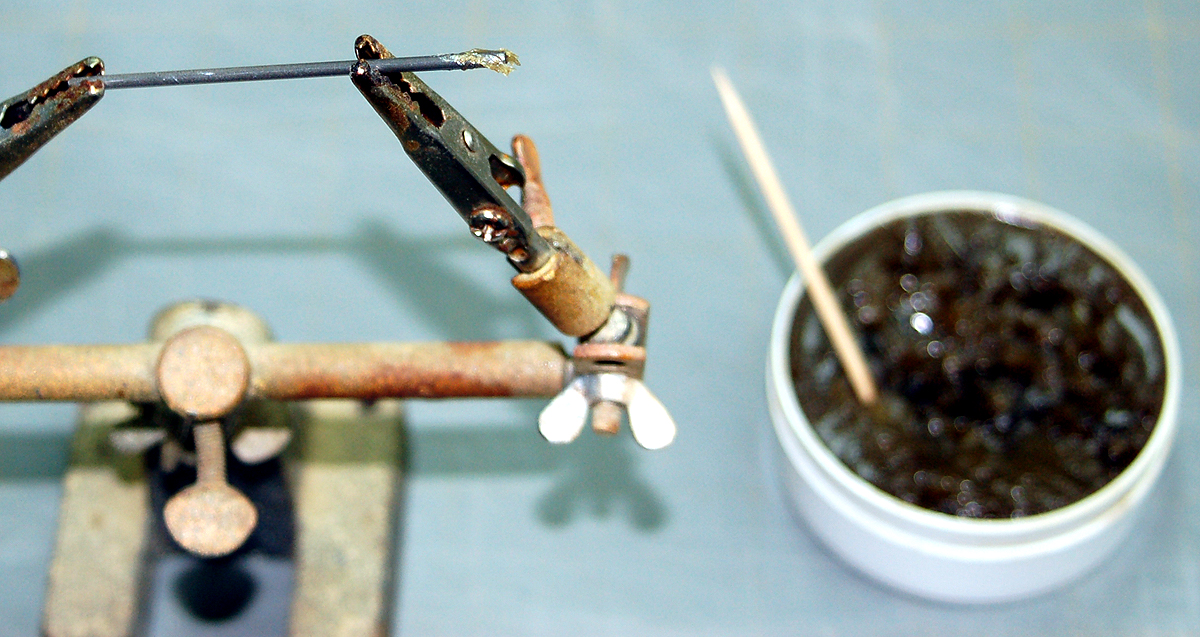
  4. Heat the joint with the soldering iron underneath it because heat goes up.  Do not put solder in the joint and apply the iron to the solder.
  5. Allow the joint to cool naturally.  Never do anything to rapidly cool the joint just as dipping it in water or liquid hydrogen.

Number one is where I was going wrong.  I was trying to solder and the solder wouldn't melt or flow because the tip was cruddy.  So the iron stayed plugged in way too long which made the tip even cruddier.  Plus it burnt up the iron.  Eventually I would pull out my butane lighter and get the job done with a resulting joint that was permanently burned black.  I can answer Neil Young's question, "What is the color when black is burned?"

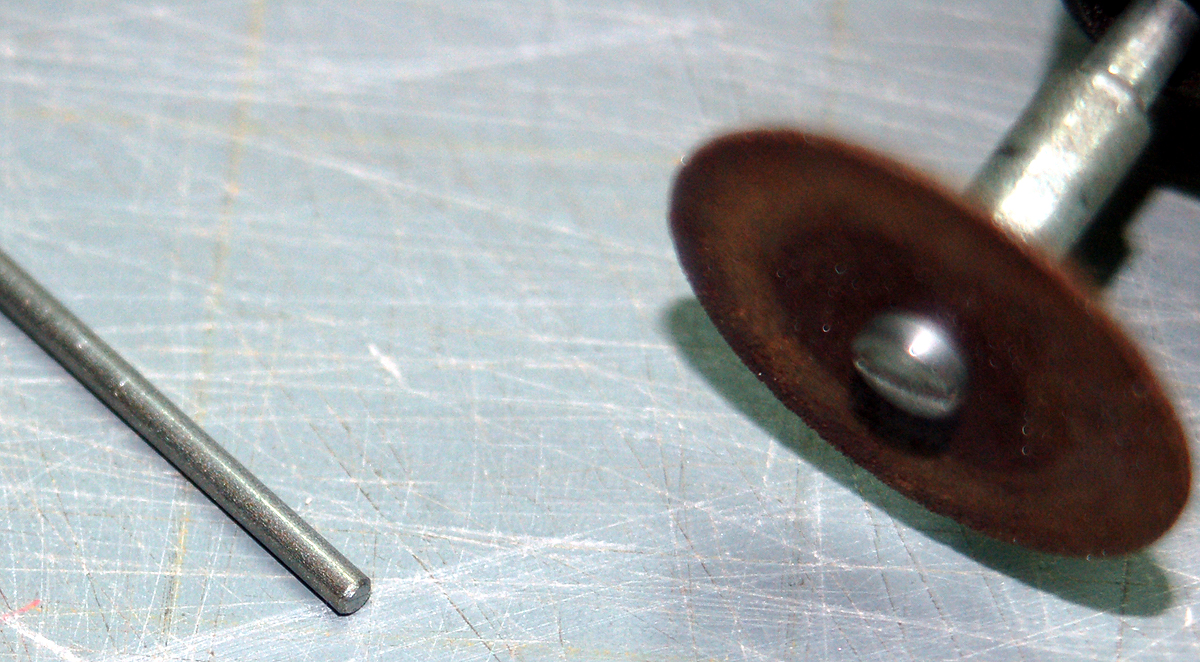
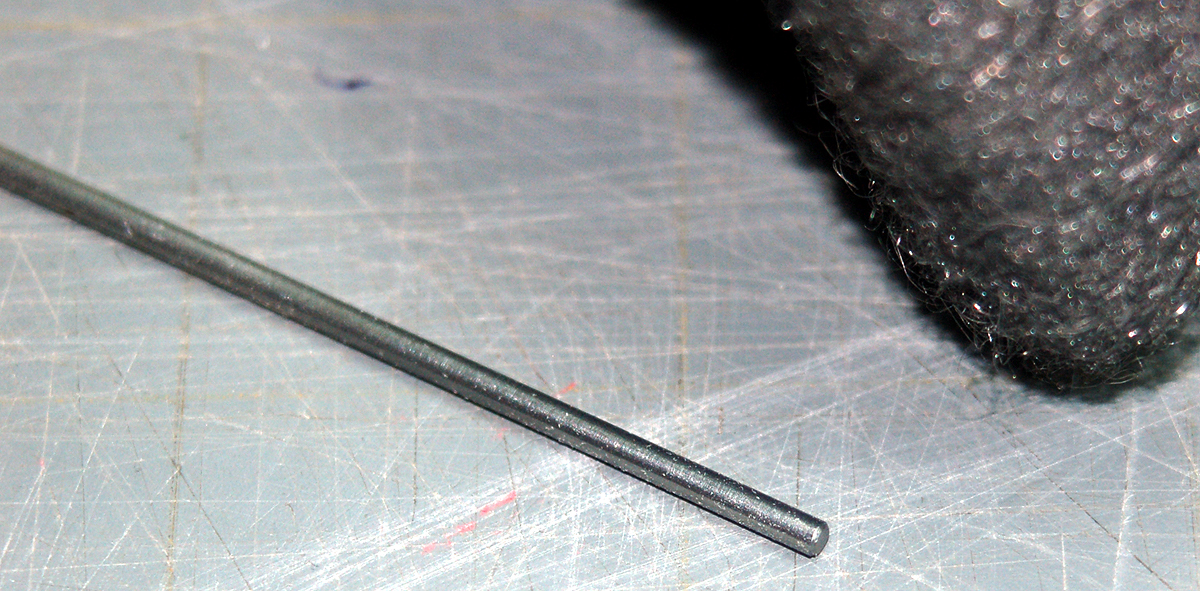
Number two usually means using some type of mild abrasive.  I use #0000 steel wool whenever possible but have also used very fine sandpaper, 800 or 1000 grit.  A wire brush can work too.  The idea is to clean corrosion and tarnish off the surface you plan to solder.  Any type of abrasive scratches the surface which usually invites rust.  So you don't want to use anything coarser than necessary.

Finally you need to clean the solder joint very well to remove left over flux.  At this point I use one of several plastic brushes such as an old toothbrush.  The toothbrush is used 99% of the time but sometimes I need a different brush to reach where a toothbrush won't.

After the part is clean I usually use a light oil and watch it for a couple of days.  If I missed a spot cleaning it will probably start to rust.  If I catch it soon enough I can clean it up again and oil it and it's good from there on out.


Soldering a Clevis

Gather up all the tools and materials

  • Pushrod material.
  • The solder clevis.
  • A Moto-Tool with an emery cut-off wheel mounted.
  • Very fine (#0000) steel wool, very fine sandpaper or a wire brush.
  • Extra Hands.
  • Rosin-core solder.
  • Solder flux if you can't get cored solder to work.
  • A toothpick to apply flux.

Note that most solder clevises are sized to fit the unthreaded portion of soft steel 2-56 threaded rod.

Square up the end of the pushrod and remove the burr.  An emery cut-off wheel in a Dremel works for both purposes.
I use #0000 steel wool to clean the pushrod.  You can see that it leaves fine scratches which give the solder some tooth.

Avoid using coarse abrasives which leave deep scratches and invite rust.

I use paste flux whenever soldering anything that isn't stranded electrical wire.  For whatever reason I can't get the core in cored solder to work properly.  Paste flux is inexpensive and for model-builders a can like this will last for many years.
Apply the flux to the area to be soldered as well as inside the shank of the solder clevis.
As the iron cools down from its last soldering session the tip loses its tinning.  Have a wet sponge ready when you plug the iron in and as soon as it's hot wipe it on the sponge to clean it.  Immediately tin it.

It is very important that your soldering tip be cleaned and tinned.  The tip won't stay tinned so you have to tin it as frequently as necessary.  For example, if you tin your soldering iron tip it will begin to lose it's soldering shiny goodness while you grab your camera, frame the shot, take it, turn the camera back off and set it down.

The point is that you should tin the tip frequently.

Slide the solder clevis onto the pushrod with the pushrod completely filling the clevis shank.

Note the slot on the clevis.  Normally I rotate the clevis so the slot is up.

Solder clevises come pre-tinned.  That's what you see filling the slot.  This clevis is brand new and has never been soldered.

Do not apply the iron to the solder.  Instead, heat the outside of the clevis from underneath.  Remember, heat goes up.

After heating for a few seconds the flux will be bubbling.  Apply the solder to the intersection of the shank end and the pushrod.  If everything is right the solder will begin to melt immediately and flow into the joint.  Watch the slot.  If you see it filling with solder you know you're doing it right.

With the iron still under the clevis I sometimes apply a little solder to the inside of the clevis where the shank meets the pushrod.  Normally that's not necessary.

There is no reason to have a lot of solder covering the outside of the shank or pushrod.  It doesn't add any strength but does add weight and ugliness.

Always allow solder joints to cool naturally.  They cool very quickly and can usually be handled in a minute or so.  Forcing a joint to cool faster by putting it in water, for example, will result in a cold solder joint which is easily recognized by its dull appearance.  Cold solder joints are extremely weak and usually have cracks which may or may not be visible.

After the joint has cooled naturally use an old soft toothbrush and warm soapy water to clean the excess flux and whatever else away from the assembly.  Take your time and try to get everything really clean.

Dry the pushrod immediately and apply a light coat of oil.  You will need to clean the pushrod again if it is being glued into another component such as a balsa, fiberglass or carbon fiber pushrod.

That's really all there is to it.  It's not a black art and doesn't require any kind of special skill.  Just make sure your soldering tip and the parts to be soldered are clean, use the right kind of solder, heat the joint, not the solder and allow the soldered joint to cool naturally.  Clean everything up and then apply an oil or wax to prevent rust.


Previous —
Next —

How To Install Robart Hinge Points
How to Mount a Scale Pilot Bust

Comments about this article


Back to How-To's
Airfield Models Home


Copyright © 2011 Paul K. Johnson